
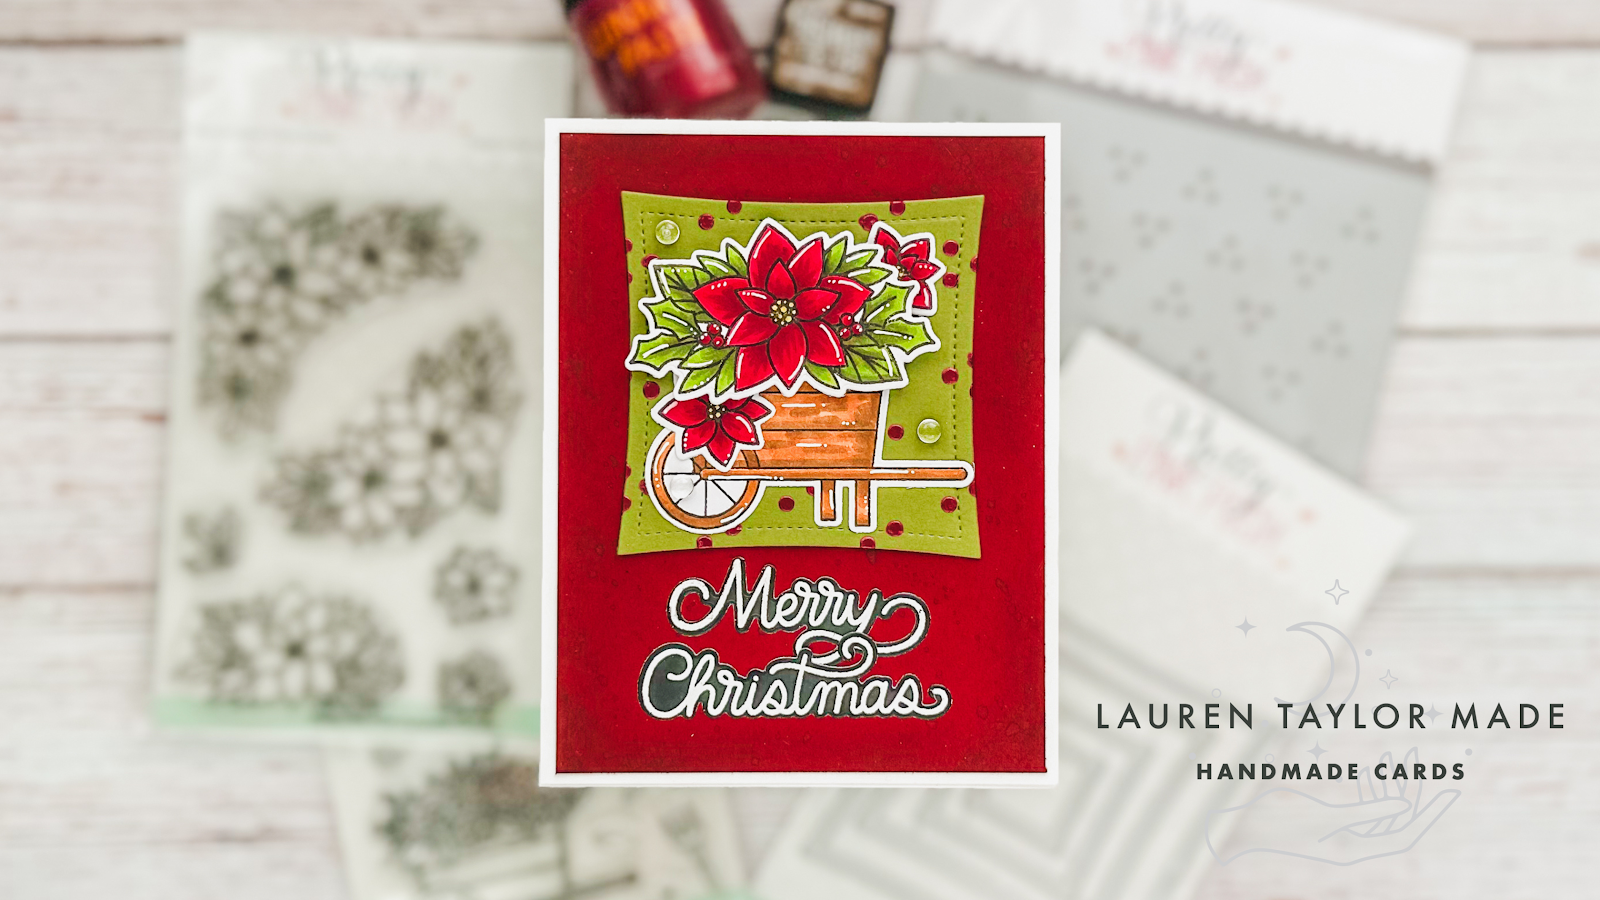
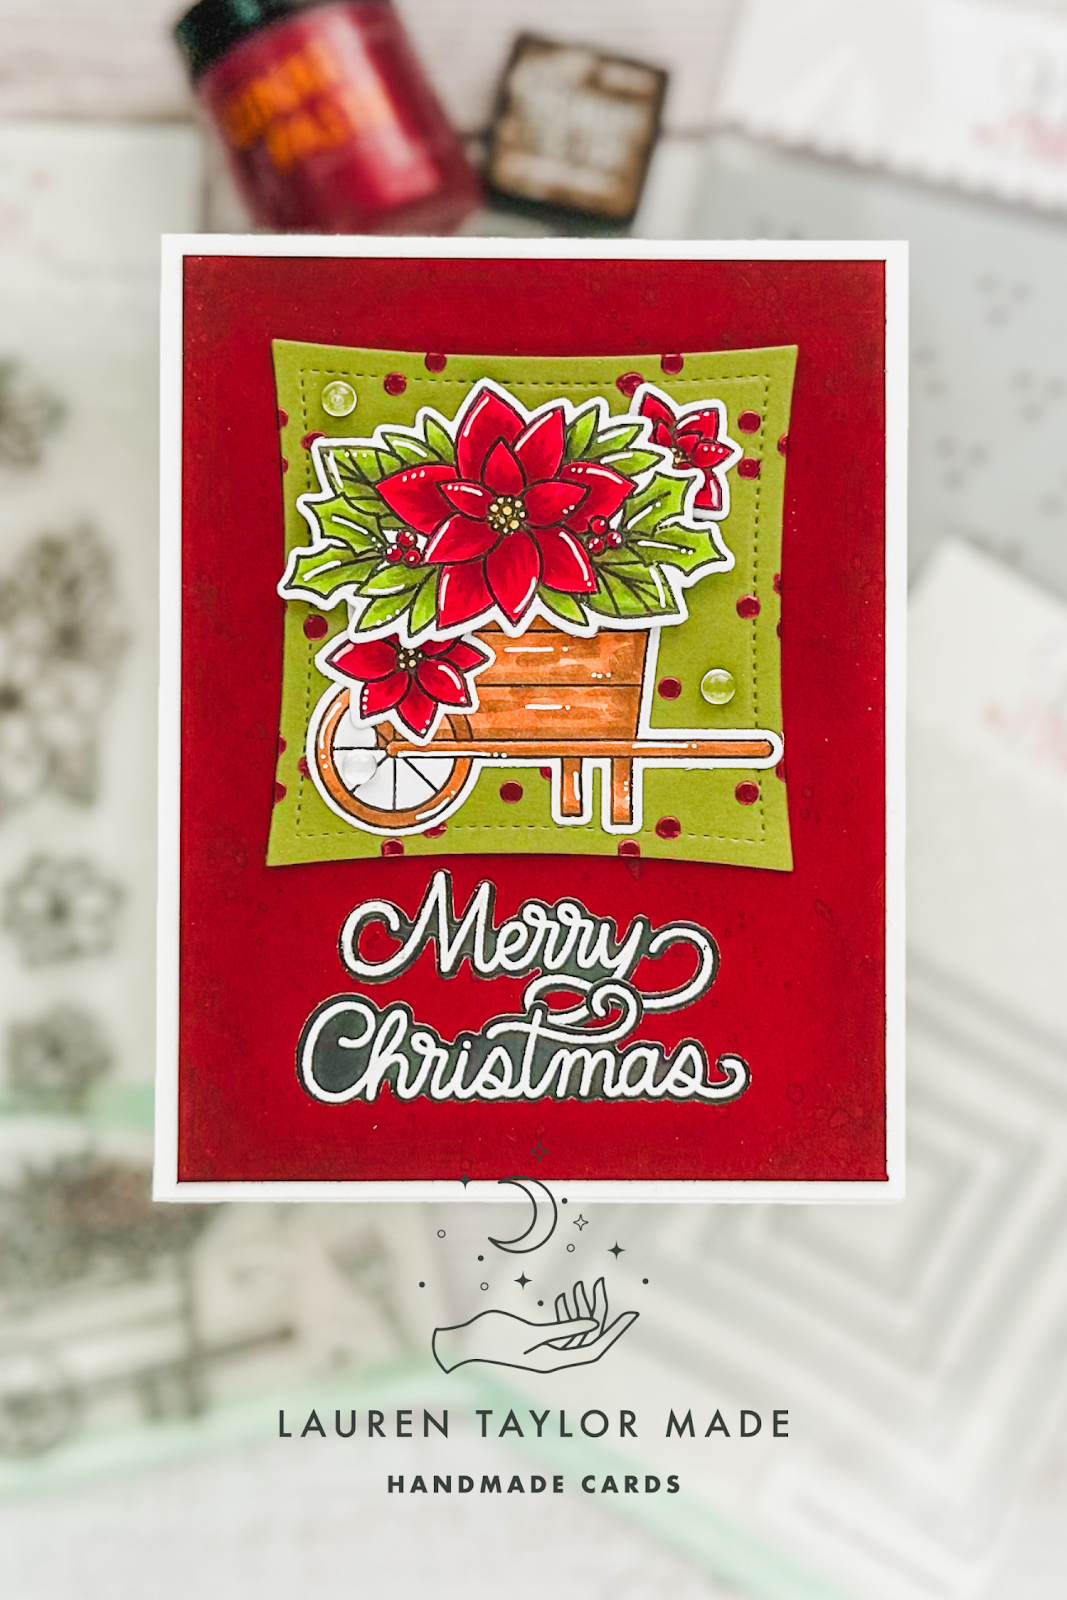
I am continuing Christmas in July with Pretty Pink Posh and wanted to show how you can mix and match floral stamp sets to put in the wagon image from the Flower Garden Stamp Set! For this card, I am using the Poinsettia Corners Stamp Set so we can make a Christmas card. To make sure it has enough time to dry, we’re going to start with the stenciled background. I cut a piece of olive green cardstock with the second largest square from the Wonky Stitched Squares Dies. Using the Swiss Dots Stencil, I added in Game Over Lunar Paste which is a cranberry red stencil paste.I stamped my images next with alcohol marker friendly black ink and white cardstock so I could color them in with my Ohuhu Art Honolulu Markers. If you would like to know which colors, I have the marker caps showing in the video and read the colors as well.
After coloring in the wagon from the Flower Garden Stamp Set and poinsettias from the Poinsettia Corners Stamp Set, I used the Flower Garden Coordinating Dies and Poinsettia Corners Coordinating Dies to cut them out. When coloring the wagon, I did not color any of the floral images and trimmed the image down so there was just a small area for me to use foam adhesive to add my poinsettias. I also layered in the smaller poinsettias around the wagon with liquid adhesive and attached the images to my stenciled wonky square.
 |
 |
For the background of the card, I cut a piece of cranberry red cardstock to 4x5-1/4" and added Walnut Stain Distress Ink around the edges as well as splattering to create some interest on the background cardstock and would not look too plain. While it was drying, I embossed my sentiment from the Holiday Scripts Stamp Set in white on black cardstock and used the Holiday Scripts Coordinating Dies to cut them out.
To assemble the card, I glued the red cardstock to the center of an A2 card base and then the stenciled background with images to the top of the card so there is an even border around the top and sides of the wonky square. I glued my Merry Christmas sentiment beneath the square and added a few 4mm Clear Droplets for some added shine but keeping my color scheme. I hope you have some fun “altering” your wagon garden with different floral sets from Pretty Pink Posh!
Post a Comment