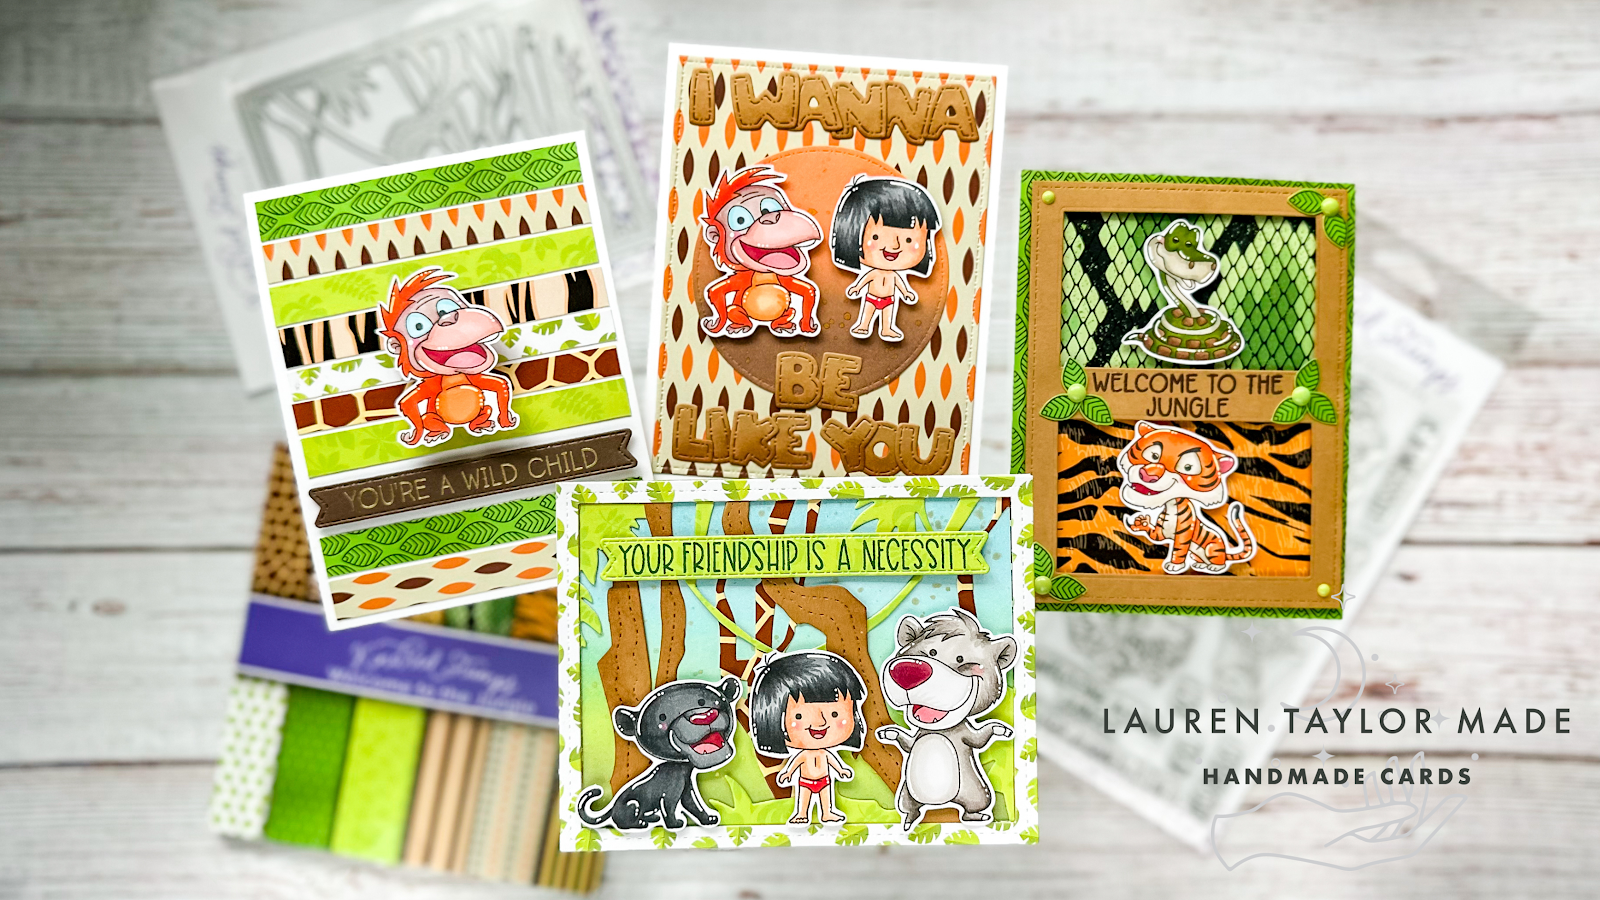
It's a new release from Kindred Stamps! We're getting wild today with the new Wild Child Stamp Set, Jungle Die and Jungle Paper Pack. There are other stamps and paper released today, so make sure you see the full new release and get shopping. I have created three cards to give you some inspiration with the three products I have for the new release.
I first started with stamping out all of the images and did two of the little boy because I had a rough idea of what I wanted to make and which characters would be together on a card. I colored all of my images in with Ohuhu Art Markers (except the bear's fur is with Copic Warm Grays) after stamping with alcohol marker friendly cardstock and black ink.
My first card is using the Jungle Die with different Jungle Patterned Paper and kraft cardstock. I did some layering to have different papers for different parts of the Jungle Die, I wanted to give the background a lot dimension with having different types of paper for the trees, leaves and vines. I added some Vintage Photo Distress Ink to the kraft cardstock for added dimension.
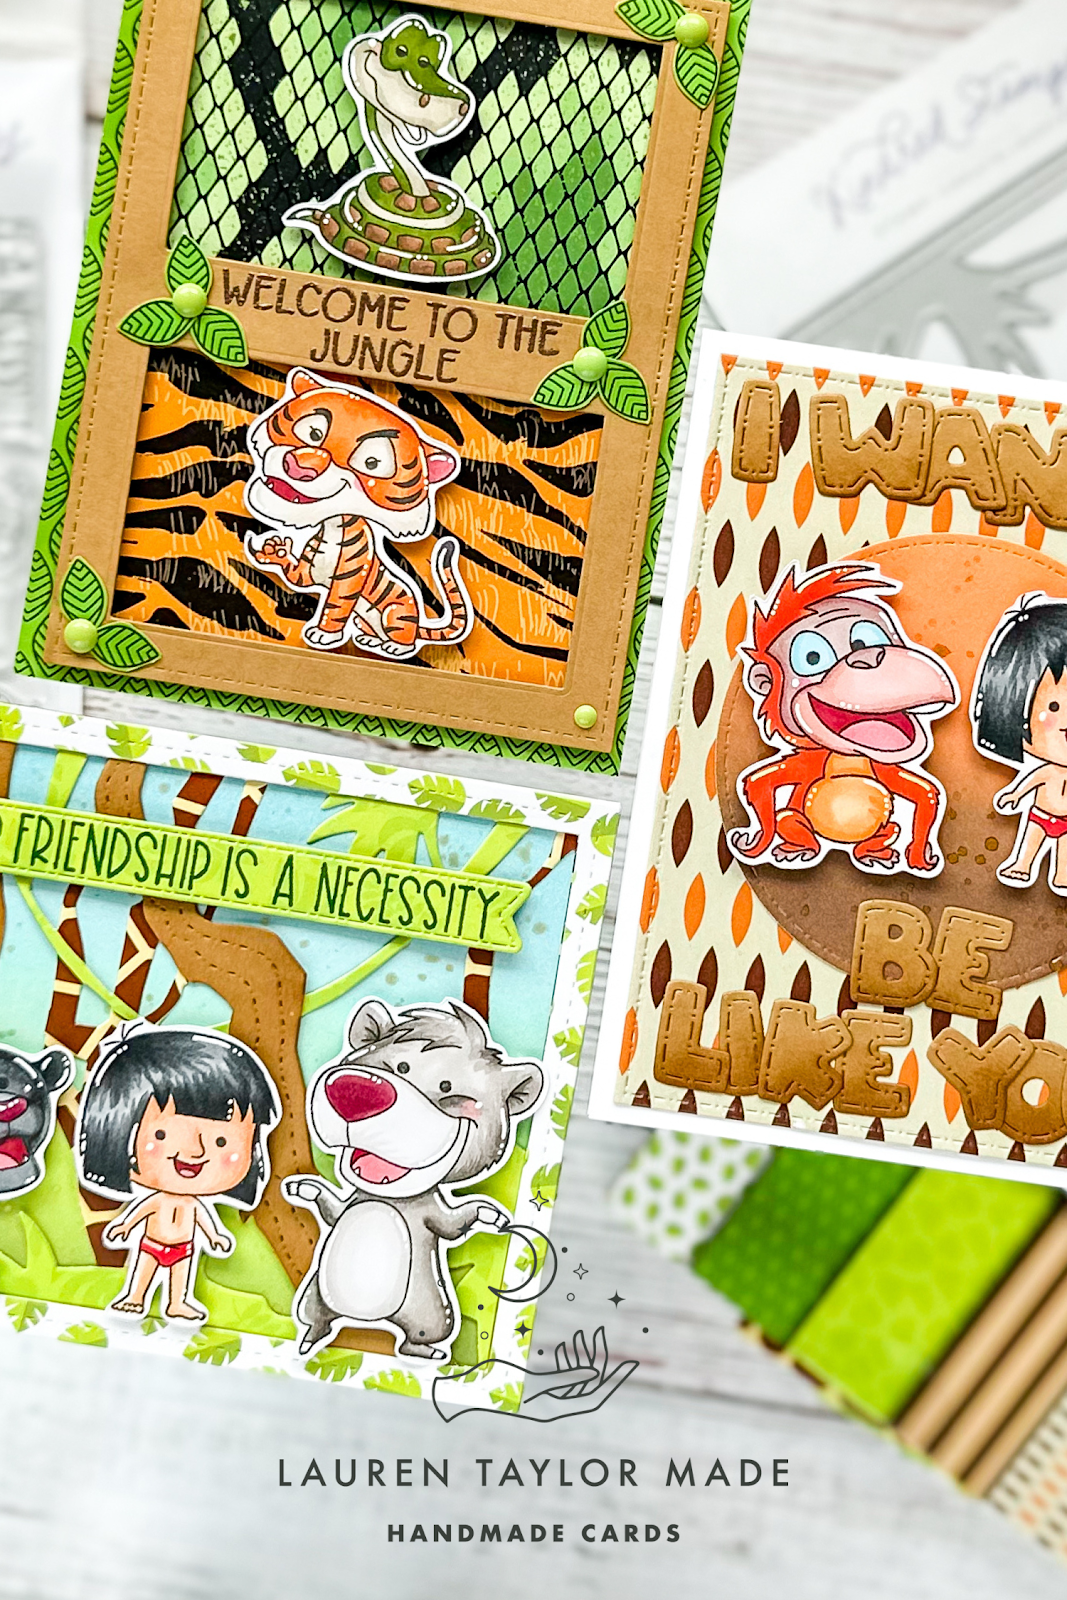
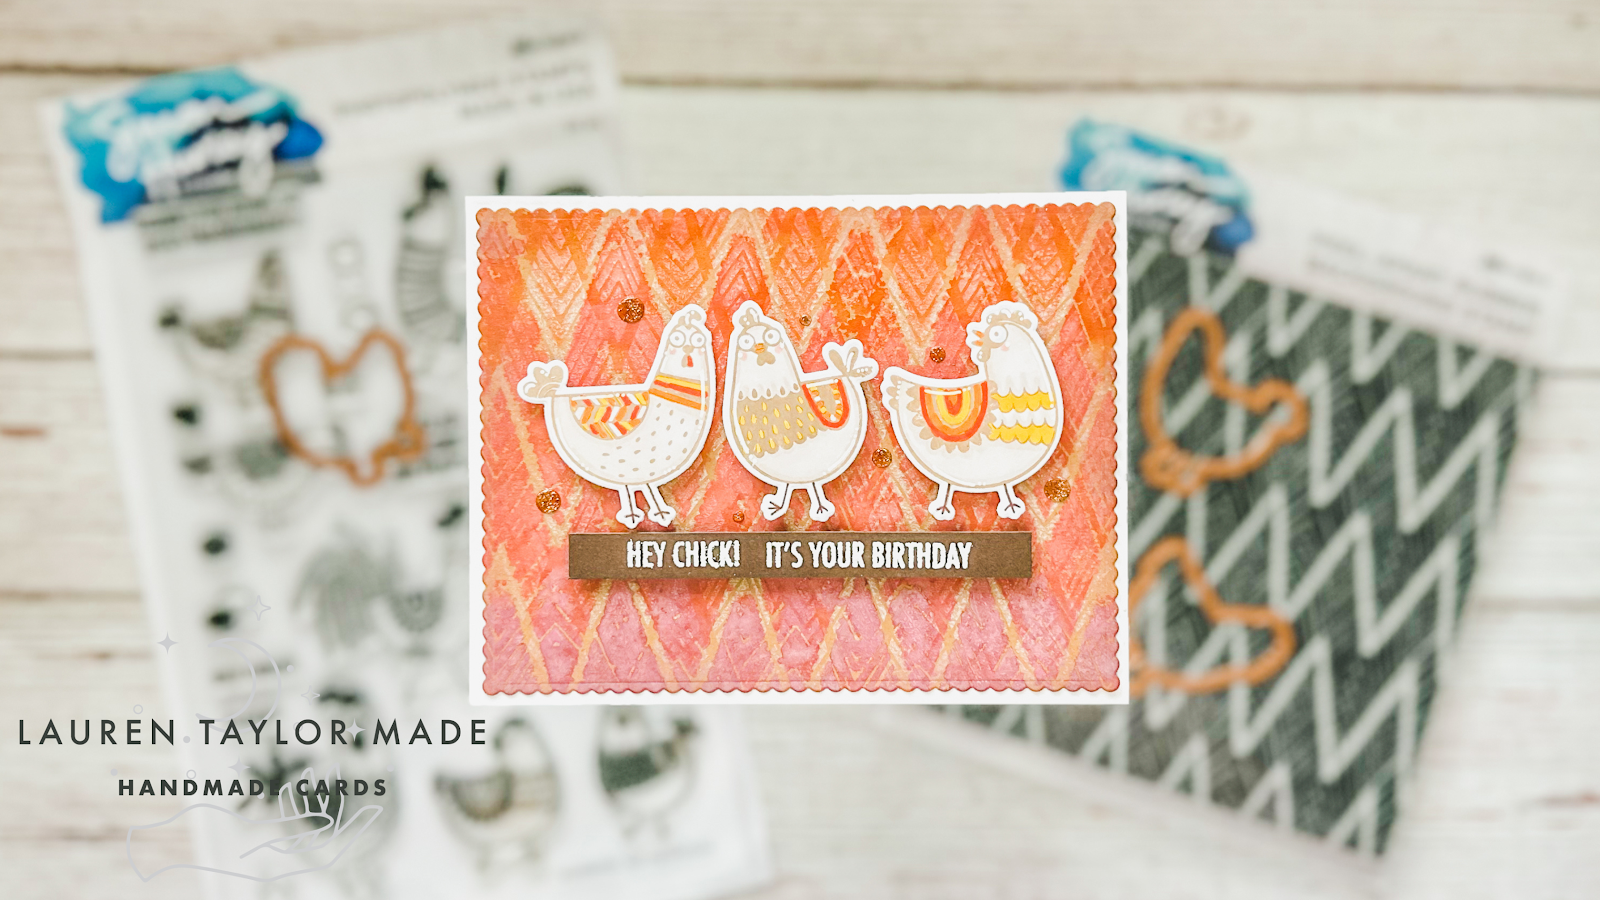
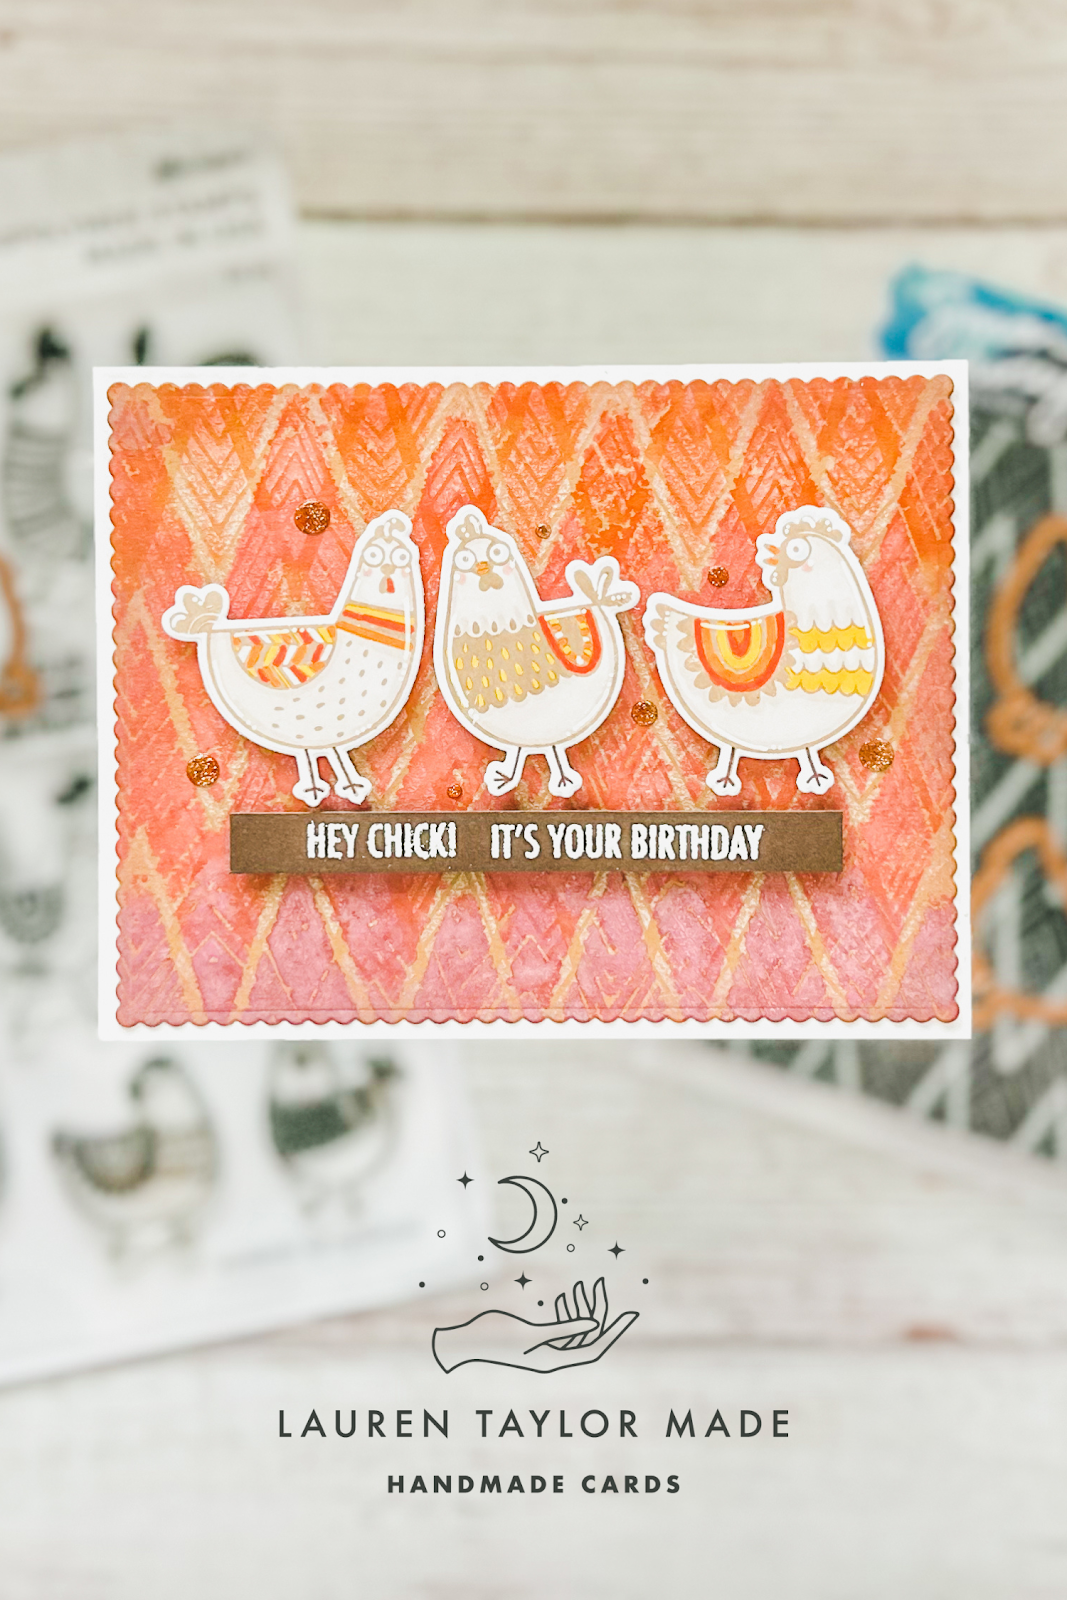
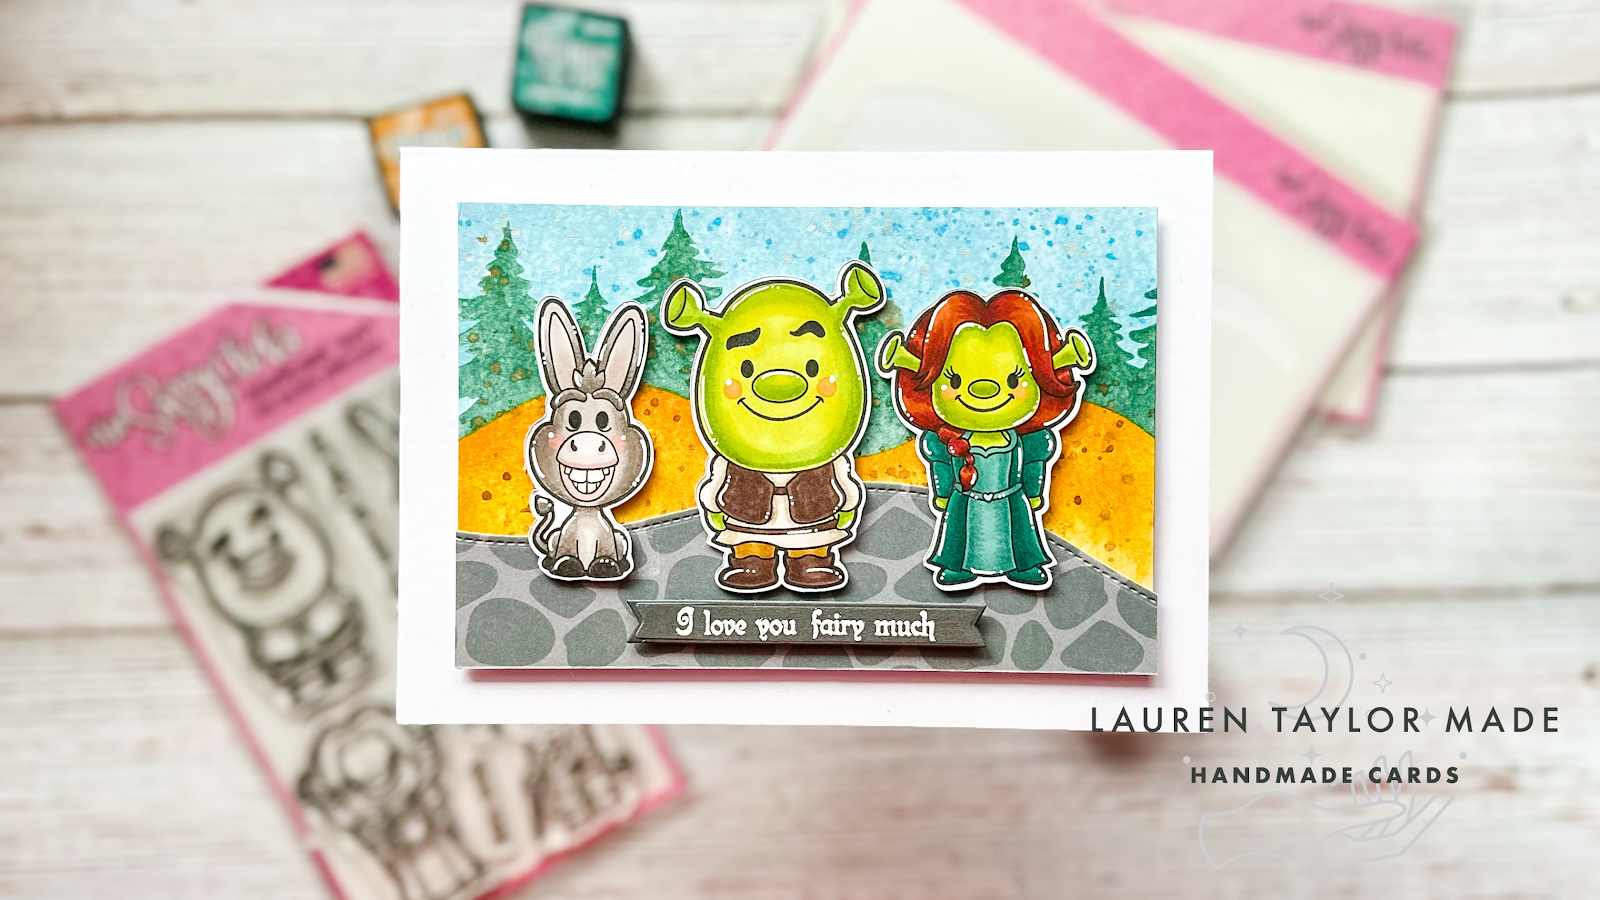
The background is a blend of Distress Oxides (Tumbled Glass, Salvaged Patina, Twisted Citron and Peeled Paint) with some metallic watercolor splatter. I stamped the sentiment with green ink and used the largest Sentiment Strip die; it is popped up onto the card as well as my three fandom characters.
For my "bad guy" card, I die cut two rectangle panels from a piece of kraft cardstock that was die cut with the Card Basics Dies. I layered a piece of snake skin and tiger stripe patterned paper on top of the green leaves paper onto my card base. My sentiment was embossed with Dino Dust Embossing Powder to the center of my kraft panel and then I popped it up with foam adhesive.
My two animals were popped up inside of their matching panels and then I fussy cut some of the green leaves and glued them around the panel. I also used some green enamel dots add more to the leaf and panel design.
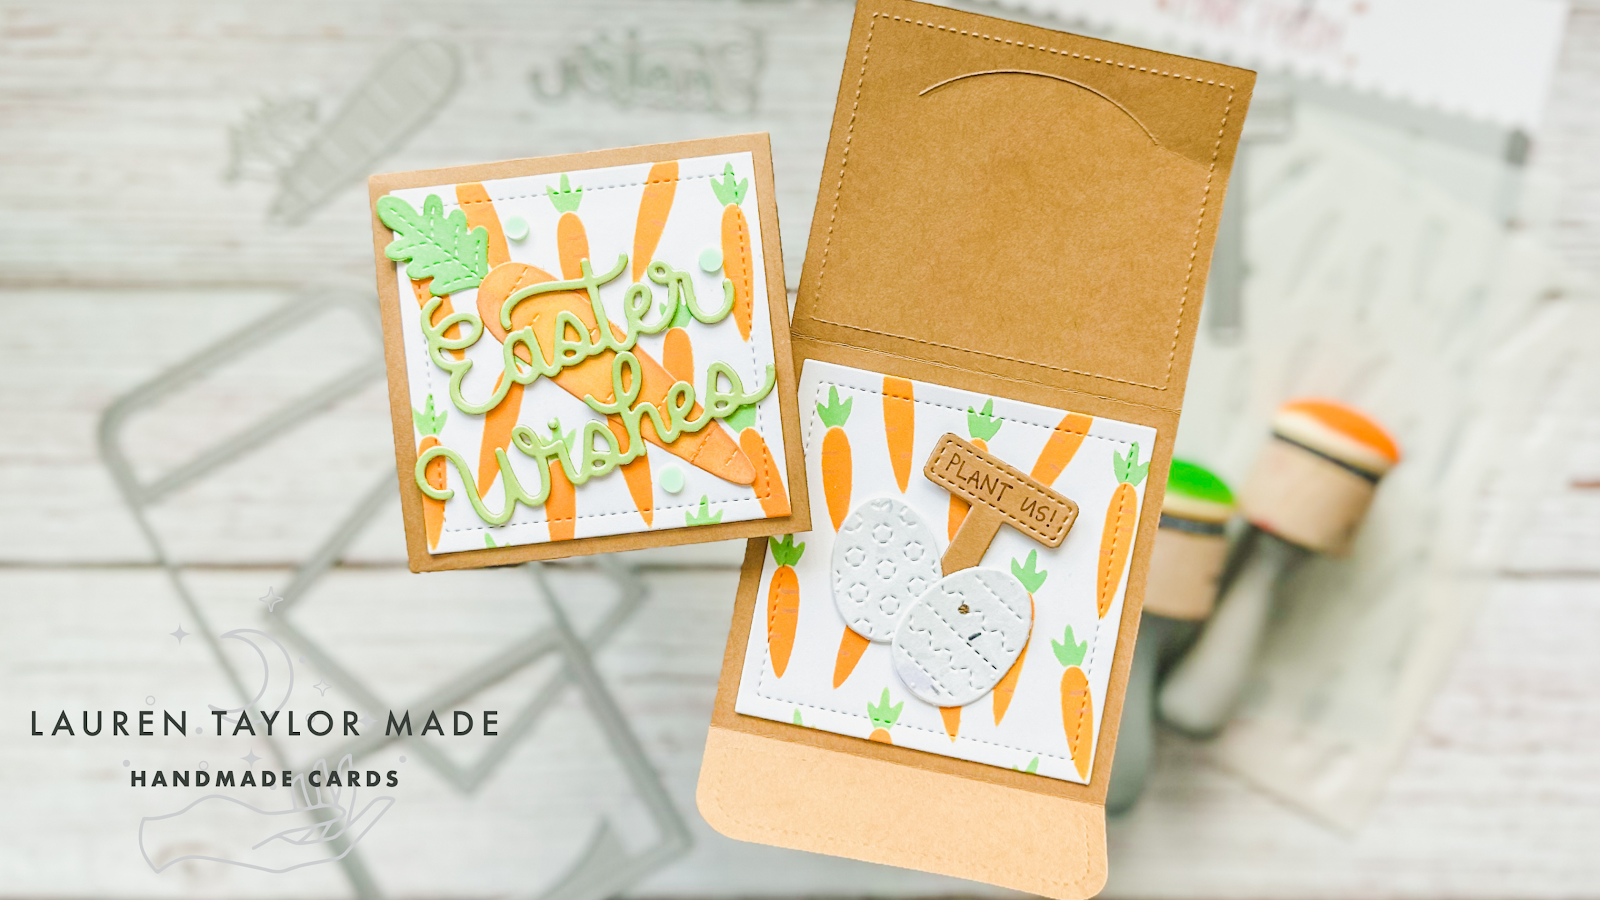
Cutting up the patterned papers for these cards left with lots of scraps so I thought I'd make a card with them! I trimmed them down and glued them onto a card base, leaving room for my sentiment that is embossed on a Sentiment Strip that is popped up on the card base. I colored in my orangutan character and added him to the card with a wobbler so it's interactive and look like he's dancing!
My final card is inspired by the coloring of my two characters! I liked the patterned paper with the yellow-grey, orange and brown colors; I used the large rectangle from the Card Basics Dies to cut it out and added it to my card base. I used Distress Oxides in Spiced Marmalade and Vintage Photo to create a circle background for my stamped images. After I glued down the circle, I added my die cut sentiment using the Stitched Alpha Die Set, kraft cardstock and Vintage Photo Distress Ink.
Finally, my characters are popped up with foam adhesive and now I have the song that inspired my sentiment stuck in my head! I hope you're as excited as I am about this new release and that you check out all of the new products from Kindred Stamps today! Let me know in the comments if you have any questions about my cards.
PIN THIS
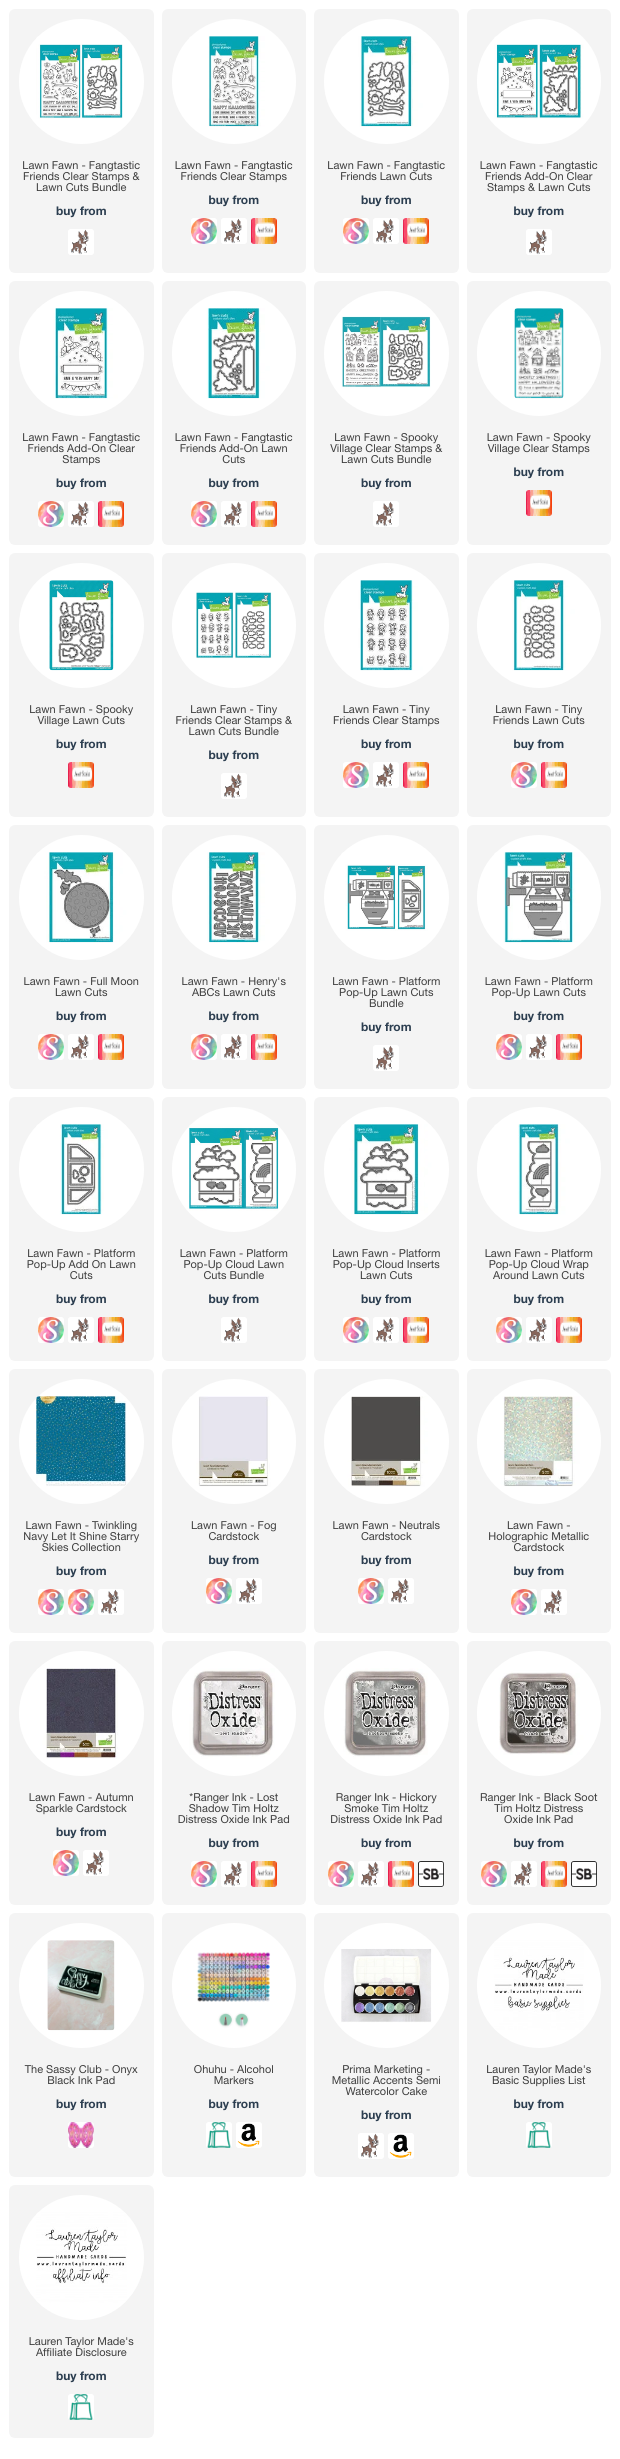
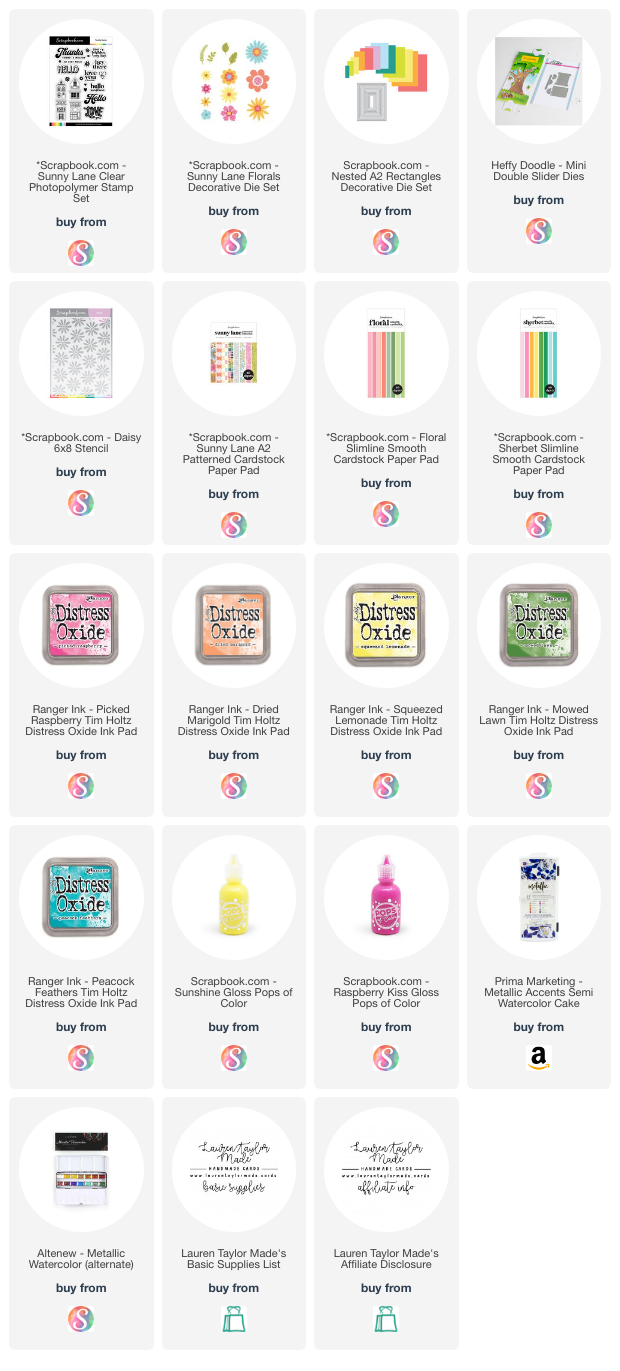
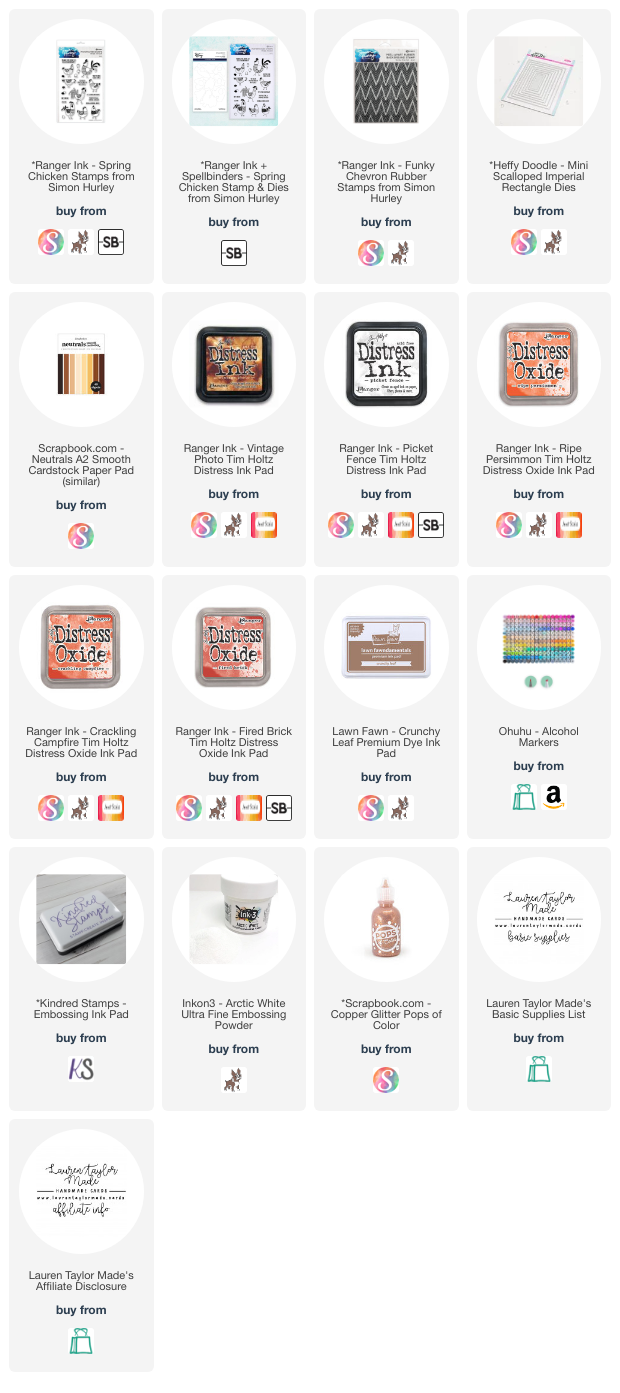
SUPPLY LIST
Read More