Kid Valentines with Pretty Pink Posh

Monday, January 30, 2023

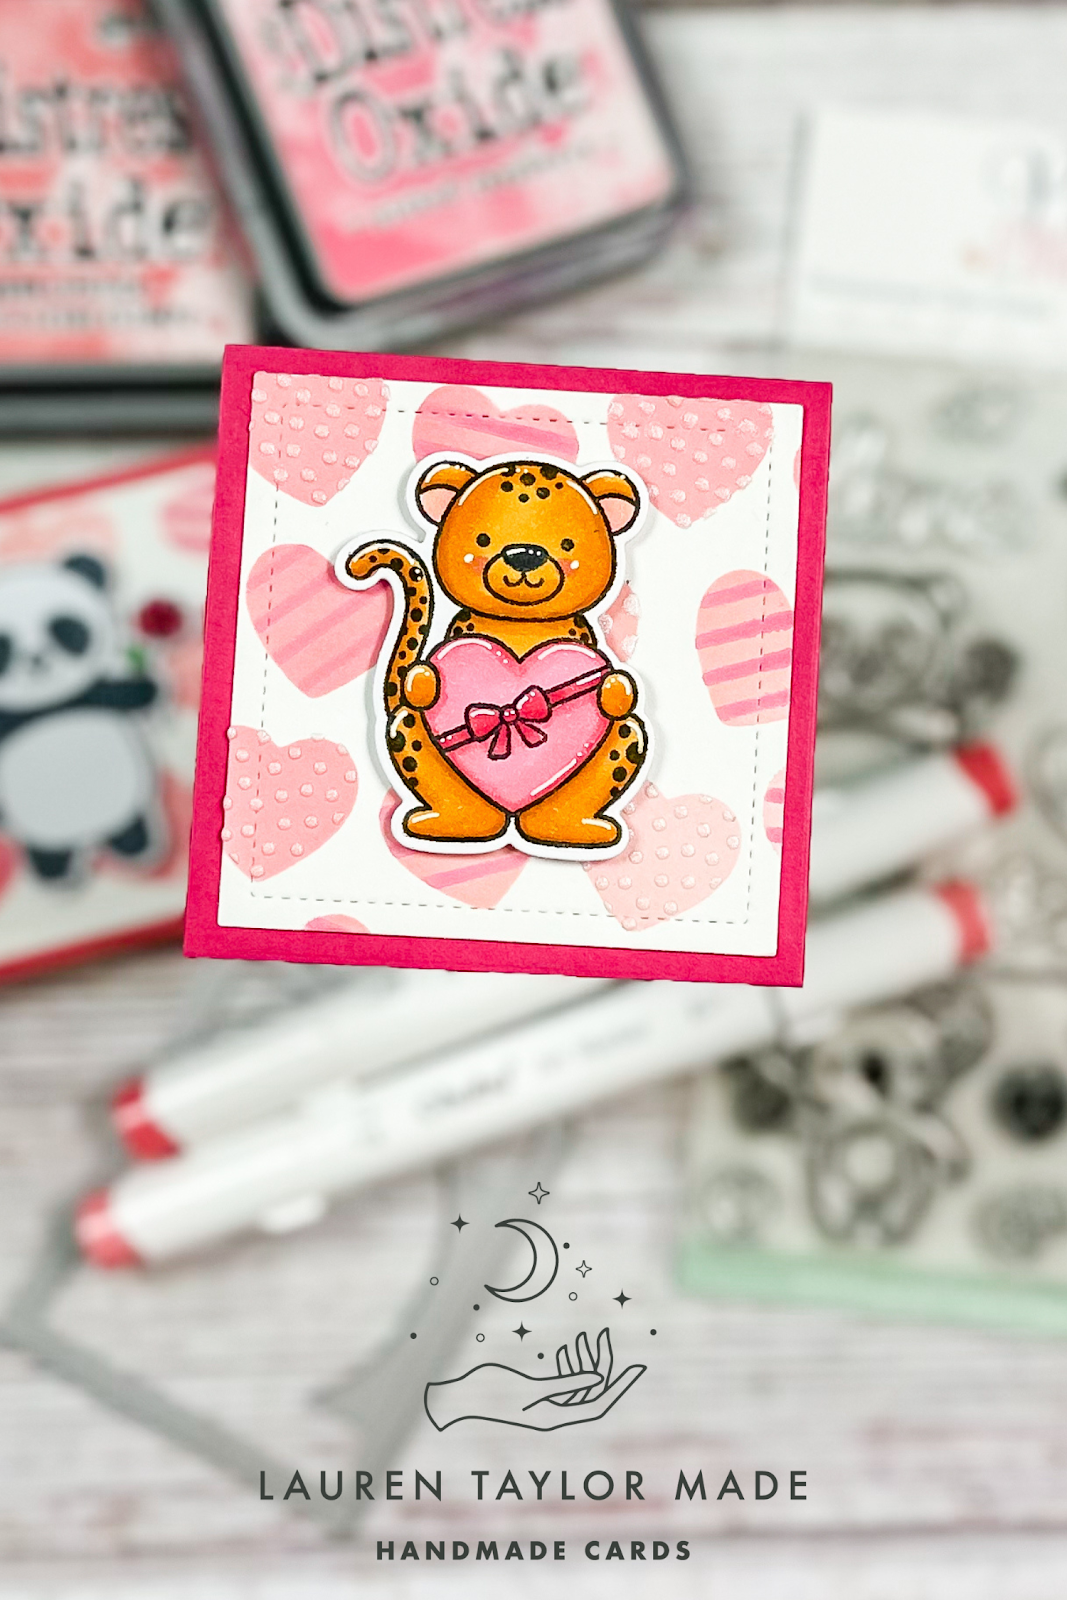
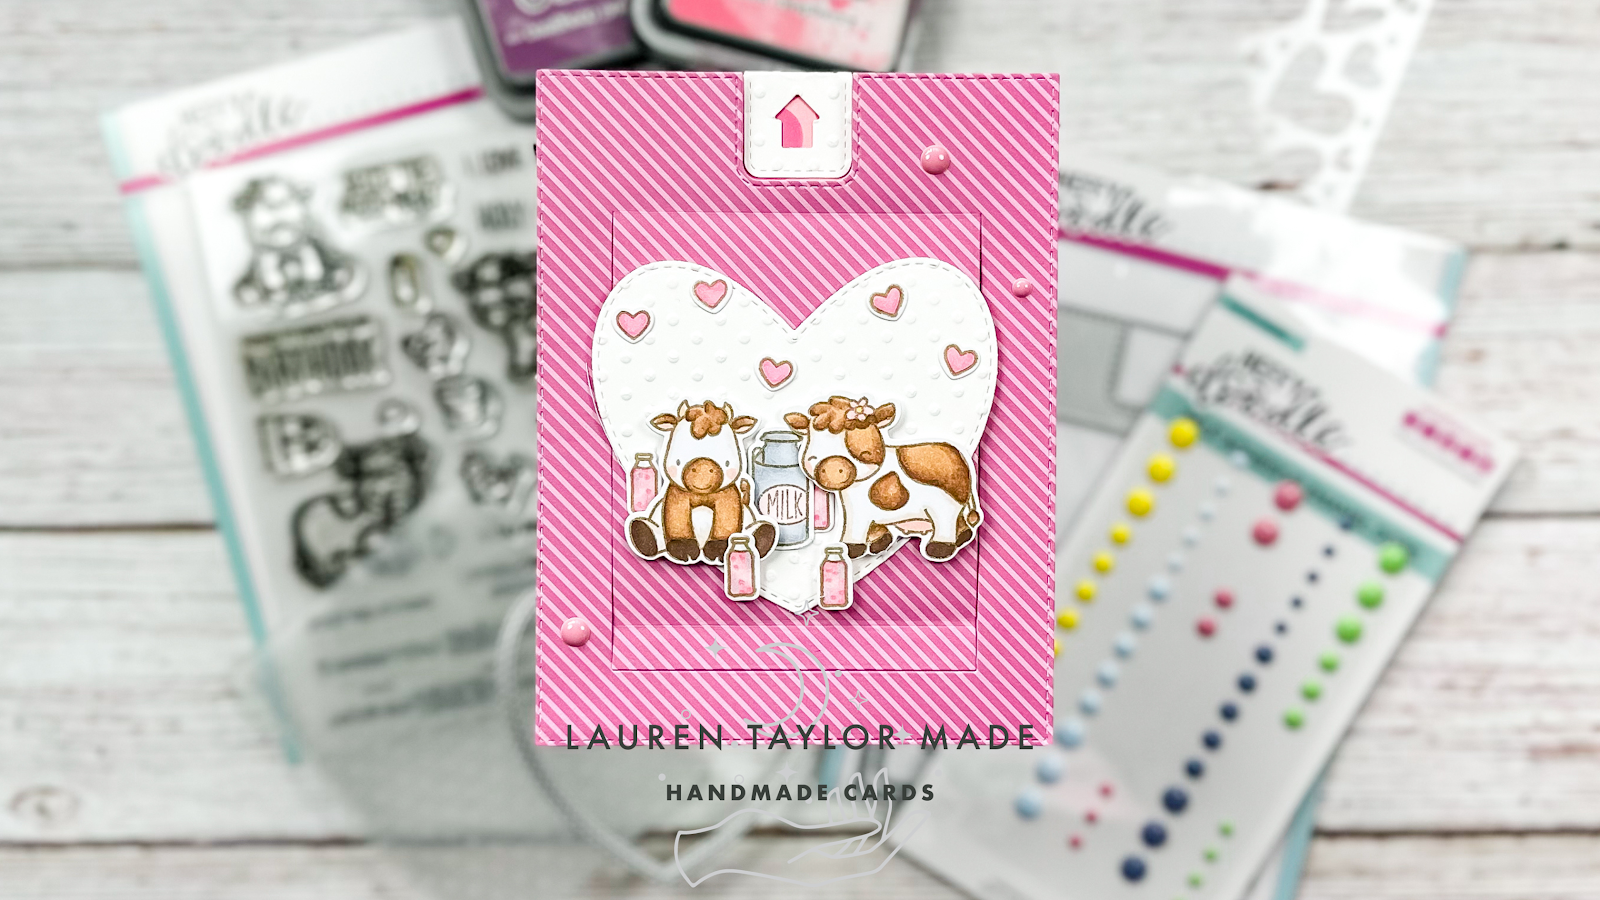
I am so excited to share my first Pretty Pink Posh video (reposted on my channel) today! For my project, I wanted to show how I created some Valentines that Abigail can use for her class for the upcoming holiday. In my video, I showed how I stenciled the heart background with Distress Oxides and Stencil Butter that created four backgrounds at a time!

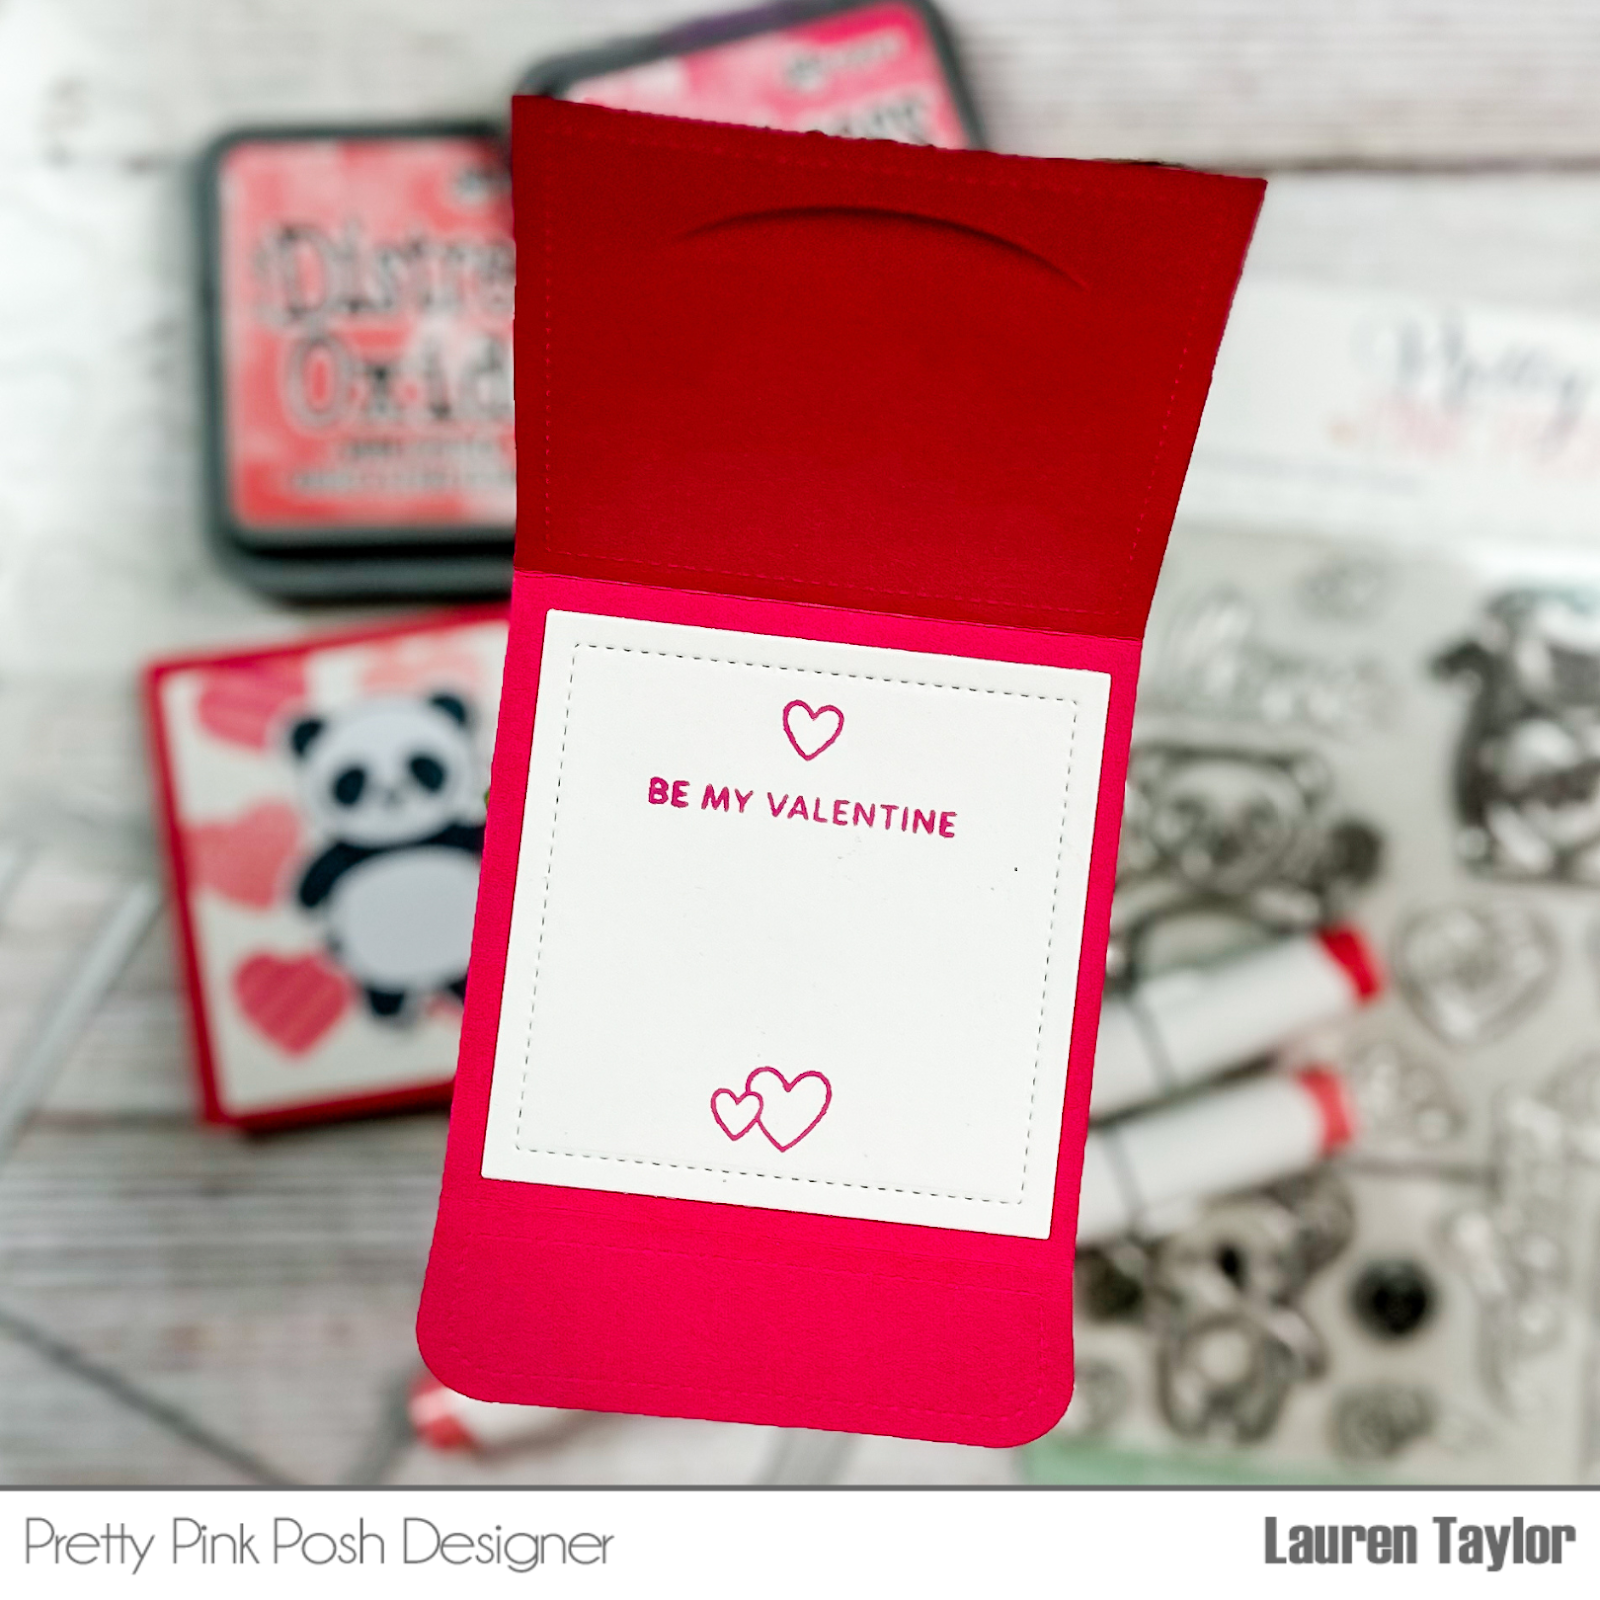
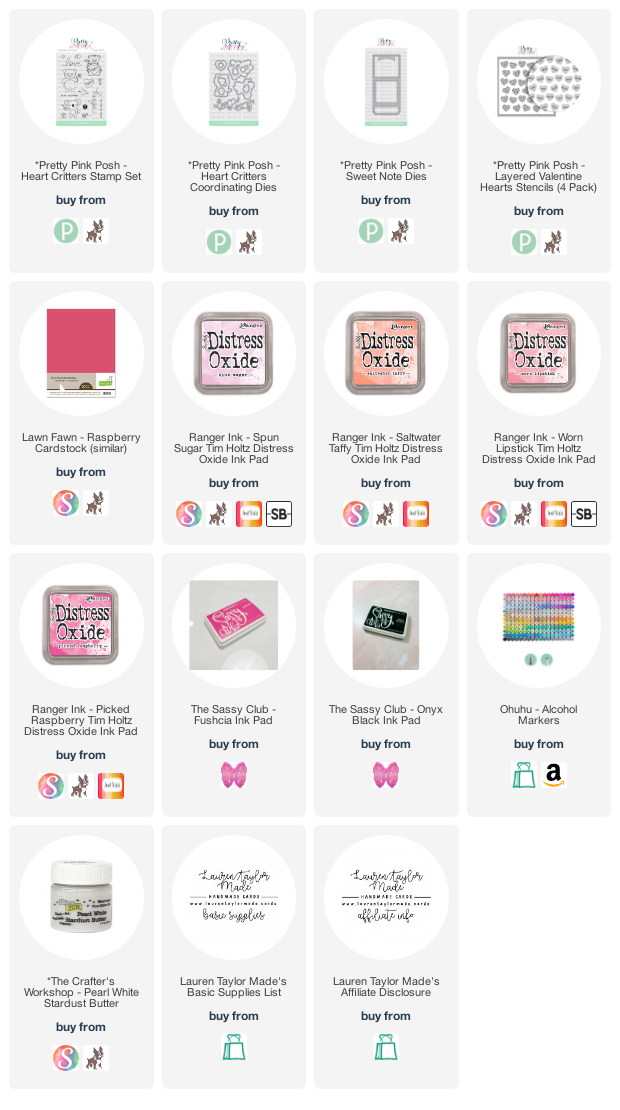
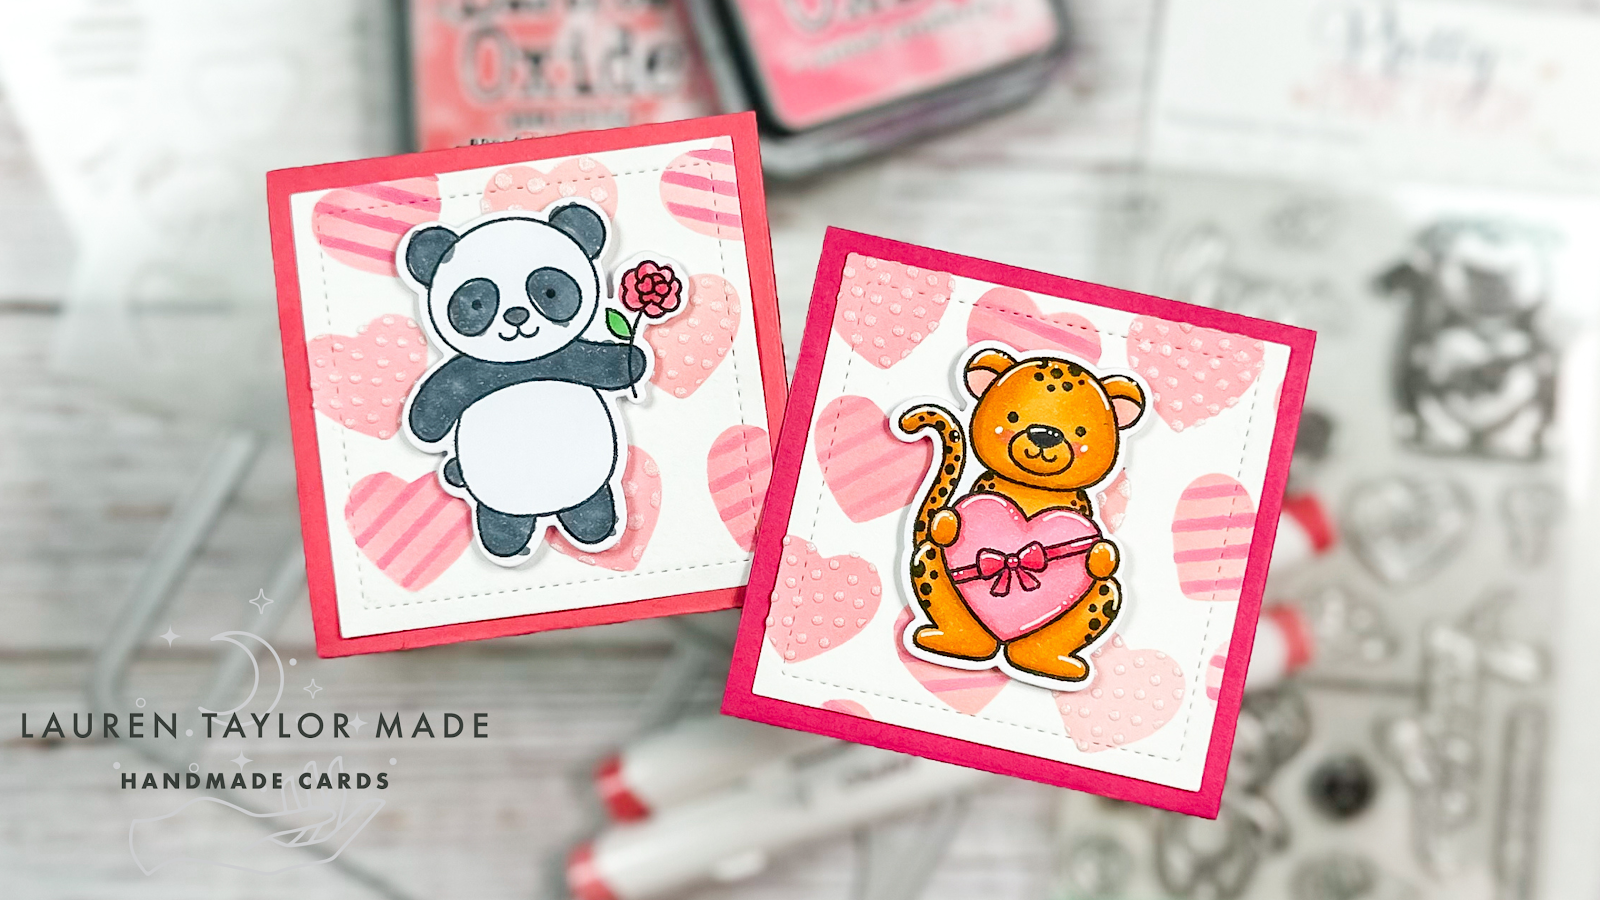
Next I colored the cheetah from Heart Critters and have the coloring guide down below in case you would like to see the Ohuhu Marker colors to color in a cheetah yourself. The Sweet Note was die cut from pink cardstock and I also die cut another square for the sentiment on the inside.

When Abigail made hers, she chose the Panda with the flower to color in and we popped it up on another Sweet Note. Now she has more to color to make the other two! I hope you enjoy this video and make sure to subscribe to Pretty Pink Posh's YouTube channel to see my videos earlier than on my channel!

VIDEO TUTORIAL


PIN THIS
SUPPLY LIST

Read More

Ugh, As If! Purse with Ink Road Stamps

Sunday, January 29, 2023

Well, it finally happened. The wheel at Craft Roulette finally landed on the dreaded purse card parameter. I searched through my stamps, and I could not find anything I wanted to use with a purse! I did see my Whatever stamp set from Ink Road Stamps and I thought it would be cute to make a purse that looks like something Cher from Clueless would carry!

The parameters this week were a purse card project, 3 pops of gold for colors, an element that starts with an "e" and a frame. I made a purse using a cut file from Brother on my Scan N Cut and chose plaid paper as the plaid makes lots of frames! I have three pops of gold along the bottom of the purse and there is an exclamation point for my element with an "e".

You can see how it came together in my Reels down below, and I did glue it shut because it's now sitting on my desk for me to admire. How do you think I did with this week's parameters?

VIDEO TUTORIAL


PIN THIS
SUPPLY LIST

Read More

New Tim Holtz Distress Color - Lost Shadow!

Saturday, January 28, 2023

It's new Distress color day! I am so excited to share with you the new Ranger Ink Tim Holtz Distress color... LOST SHADOW! It's a beautiful new shade of grey - it fits nicely as an icy grey in between Pumice Stone (warm grey) and Hickory Smoke (cool grey). I swatched out all of the different mediums that I was gifted from Scprabook.com: Distress Paint, Embossing Glaze, Spray Stain, Oxide Spray, Ink and Oxide.

In my video below I share how I made this cloudy sky card using Distress Oxide with a cloud stencil, I also mixed some Distress Spray Stain with Cloud Whip to add a second layer of clouds. Before I added my rainbow, I also sprayed my cloudy background with Distress Oxide Spray. The grey banner is from the Lost Shadow Embossing Glaze on white cardstock and the sentiment is die cut out of the Distress Paint also on white cardstock. 

Are you excited for this new color as I am?! I think it's a perfect addition and I plan to do make all the clouds in this new Lost Shadow. Make sure to get your new color from Scrapbook.com and let me know what's the first thing you're going to do with the new color and which medium!

VIDEO TUTORIAL


PIN THIS
SUPPLY LIST

Read More

Love and a Dog Slimline Card with Heffy Doodle

Friday, January 27, 2023

Anyone else buy supplies that you swear you're going to use and instead you're just intimated by them and never use them? Haha, probably all of us. I bought a set of the Tim Holtz Distress Watercolor Pencils and I have no idea how to use them. I am finally getting a hold of alcohol marker coloring, why did I think I could handle another new thing?

When I saw that the first month's theme for the Card Hoppin' Facebook Group was colored or watercolor pencils... I knew I had to join in on the YouTube video hop! In my video today, I'm finally using these pencils to create a soft, watercolor rainbow for the background of my cutie Heffy Doodle pups. Check out how this slimline card came together by watching my video below. In the description of my video, you can read about how to hop along with other crafters to help inspire you, too!

VIDEO TUTORIAL


PIN THIS
SUPPLY LIST

Read More

Theme Parks Album - Title Page & EPCOT Trip

Thursday, January 26, 2023

If you remember last October, I started my "October Daily" album, but another idea that I had was to create an album with pictures and ephemera from our different theme park adventures! I created my title page using different papers from Scrapbook.com, Echo Park and Simple Stories. I have been adding Disney and Harry Potter inspired products just for this album idea.

I am a very simple memory keeper and love pocket pages so I can print and slip my photos into sleeves and have just a bit of decorating on smaller size pages (like 4x6" and 3x4"). As I am a card maker, I like the smaller sizes rather than large pages (like 6x8" or even 12x12"). I love that Scrapbook.com has Disney inspired pocket cards that help make my journaling so easy!

I also used some of my new Social Paper Plan stamps and dies on my last page to finish off our EPCOT adventure when we went during my time off in Florida. A crafty friend pointed me in the direction of Social Paper Plan and I wanted all the things. I used the When You Wish Upon a Star set to add in little Disney inspired images and the Magic Ears Hat to die cut that cutie hat!

We just recently went to Universal Studios Hollywood again so that will be my next entry into this memory book, but I am ready to jump back to cards again.

PIN THIS
SUPPLY LIST

Read More

Magical Christmas Season Cards with Kindred Stamps

Wednesday, January 25, 2023

I must be on a busy but super cute card kick, because these Christmas cards are wild! I just love all of the details from the Kindred Stamps Magical Season Kit. Unfortunately this kit is now sold out as all KS Boxes and Kits are limited edition, but you can definitely still use similar products and the most important part is the Castle Die and that is still in stock!

In my video below, I share how I created the Christmas castle from stenciling to assembling all of the parts. Next I make the backgrounds which have Distress Oxides to blend into colors I thought best represented each of the characters and how I colored them in. To create the shiny mouse heads, I used Deco Foil Duo and some shiny, silver foil! Finally, I add in some colorful light cords to match the theme of the card.

Once my backgrounds were all dry, I assembled each card with all their amazing and colorful layers! All layers are adhered down with adhesive while my stamped and colored characters are popped up with foam adhesive. I also picked sentiments from the kit stamp sets that I thought matched the characters the best and added them on the inside of the cards.

My video today is a bit on the longer side, but there are so many different parts to creating these cards! I did stamp and color my characters off camera - they are stamped with my Sassy Club ink and colored without Ohuhu Art Markers. Please let me know if you'd like more info on how to colors these characters for a future video!

VIDEO TUTORIAL


PIN THIS
SUPPLY LIST

Read More

You Are My Heart with Scrapbook.com

Tuesday, January 24, 2023

Getting my holiday stash built up for the upcoming Valentine's Day and I created this shaped card using Scrapbook.com Exclusives! My card base is A2, but I die cut it with the largest Nested A2 Arch so that there is fold along the top of the card (just shift the die up a bit on your top folding A2 card base). I also used the largest arch to die cut out some watercolor cardstock.

I added Kitsch Flamingo Distress Oxide all over the cardstock and layered the solid hearts from the Heart Patterns Stencils with Cloud Whip. As that dries, I die cut another arch out of vellum cardstock, stamped some Wildflower Branches with Chianti VersaFine Ink and embossed it with clear powder.

Then I cut the Heartfelt Wishes die as well the Love and You from Love Block Words die set from pink yardsticks from the Roses A2 paper pad. The banner was cut from Solar White Neenah cardstock and I stamped one of the sentiments from Heartfelt Wishes with the same Chianti ink. I layered the banner, heart and sentiment die cuts so they would fit inside of the vellum arch.

I adhered the die cuts onto the embossed vellum with wet glue, then added the vellum to the Cloud Whip heart background with foam adhesive - I only added foam adhesive behind the die cut pieces so you couldn't see it peek through the vellum. Finally, I added a few glitter Pops of Color with Princess Pink. I just love how it turned out - the monochrome look is just so perfect!

PIN THIS
SUPPLY LIST

Read More

Strawberry Milk Cows Slider Pop Up Card with Heffy Doodle

Monday, January 23, 2023

Can you imagine if cows could make milk in different flavors? It's been the joke that brown cows make chocolate milk, but what if cows made strawberry milk for Valentine's Day? That fantasy is what inspired my Slider Pop Up card for Heffy Doodle this month! I have lots of pink and hearts on this card from using the Love is Everywhere Stencil, Wildflowers Paper Pad and Enamel Dots, and Bubblegum Blush Cardstock.

In my video today, I share the die cutting of the interactive dies as well as how I stenciled the hearts with two colors to match the dark pink stripes on my patterned paper. I also share tips to make sure you don't accidentally glue over the score line to create a pop up scene and how to line up the pull tab arrow perfectly in the notch.

I am also really working on getting good color combinations with my Ohuhu Markers so you'll see them featured in my next color and chat video, but I do share some of my coloring in the video today so you can write down the colors if you have Ohuhu Markers, too. I hope you enjoy today's video of my Heffy Doodle Design Team project and the idea of strawberry milk cows, too!

VIDEO TUTORIAL


PIN THIS
SUPPLY LIST

Read More