Showing posts with label farm. Show all posts

No Place Like Home BetterPress Card with Spellbinders

Thursday, February 13, 2025

Hi friends! I'm so excited to share a fun and creative project with you today as we hop along with my fellow crafters in the Creator Collective. We're celebrating the launch of Justine's Farm Collection from Spellbinders, a beautifully whimsical farm-inspired set designed by our own talented creator, Stationary by Justine.

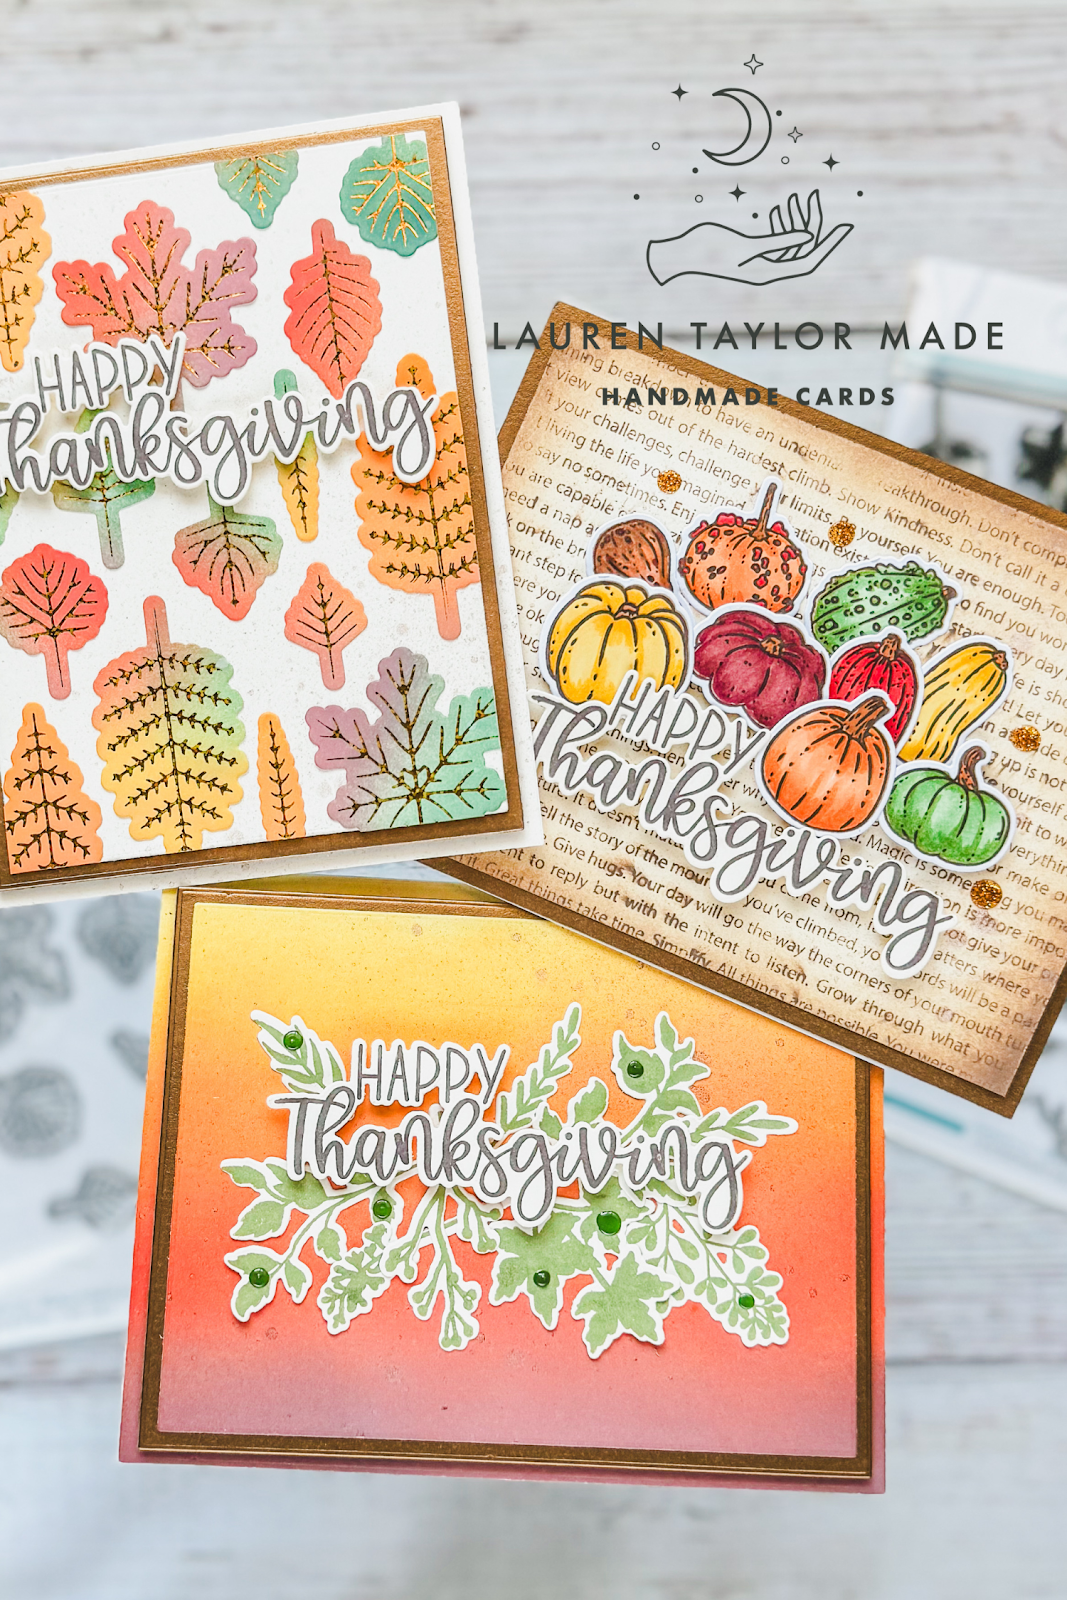
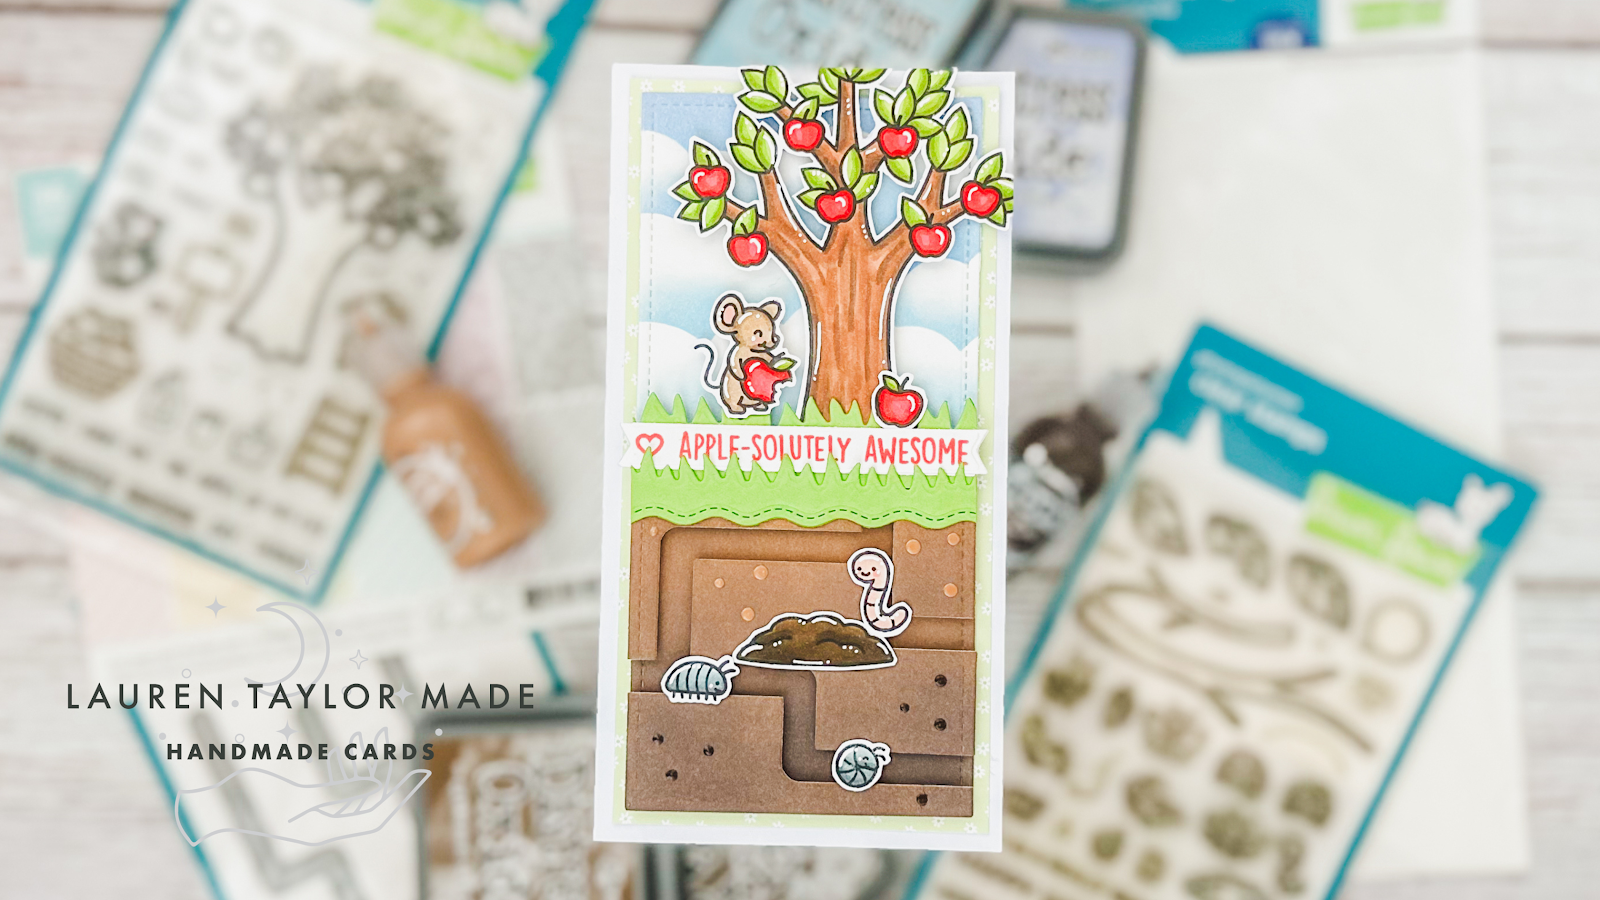
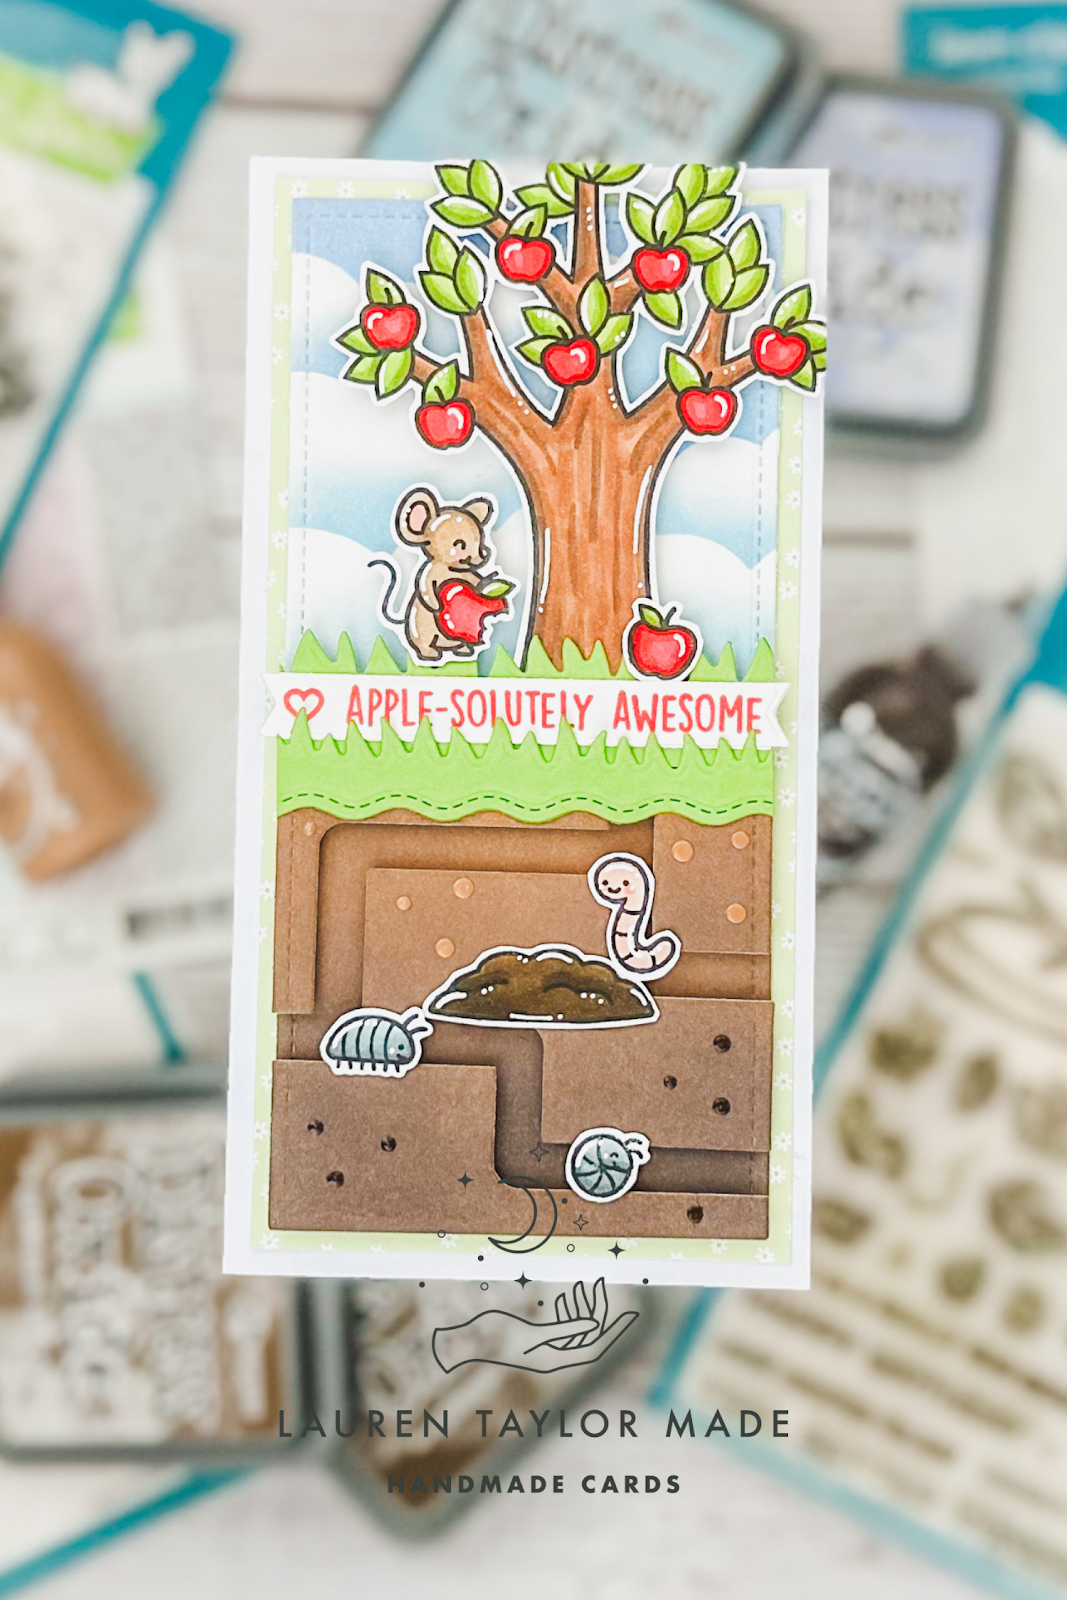
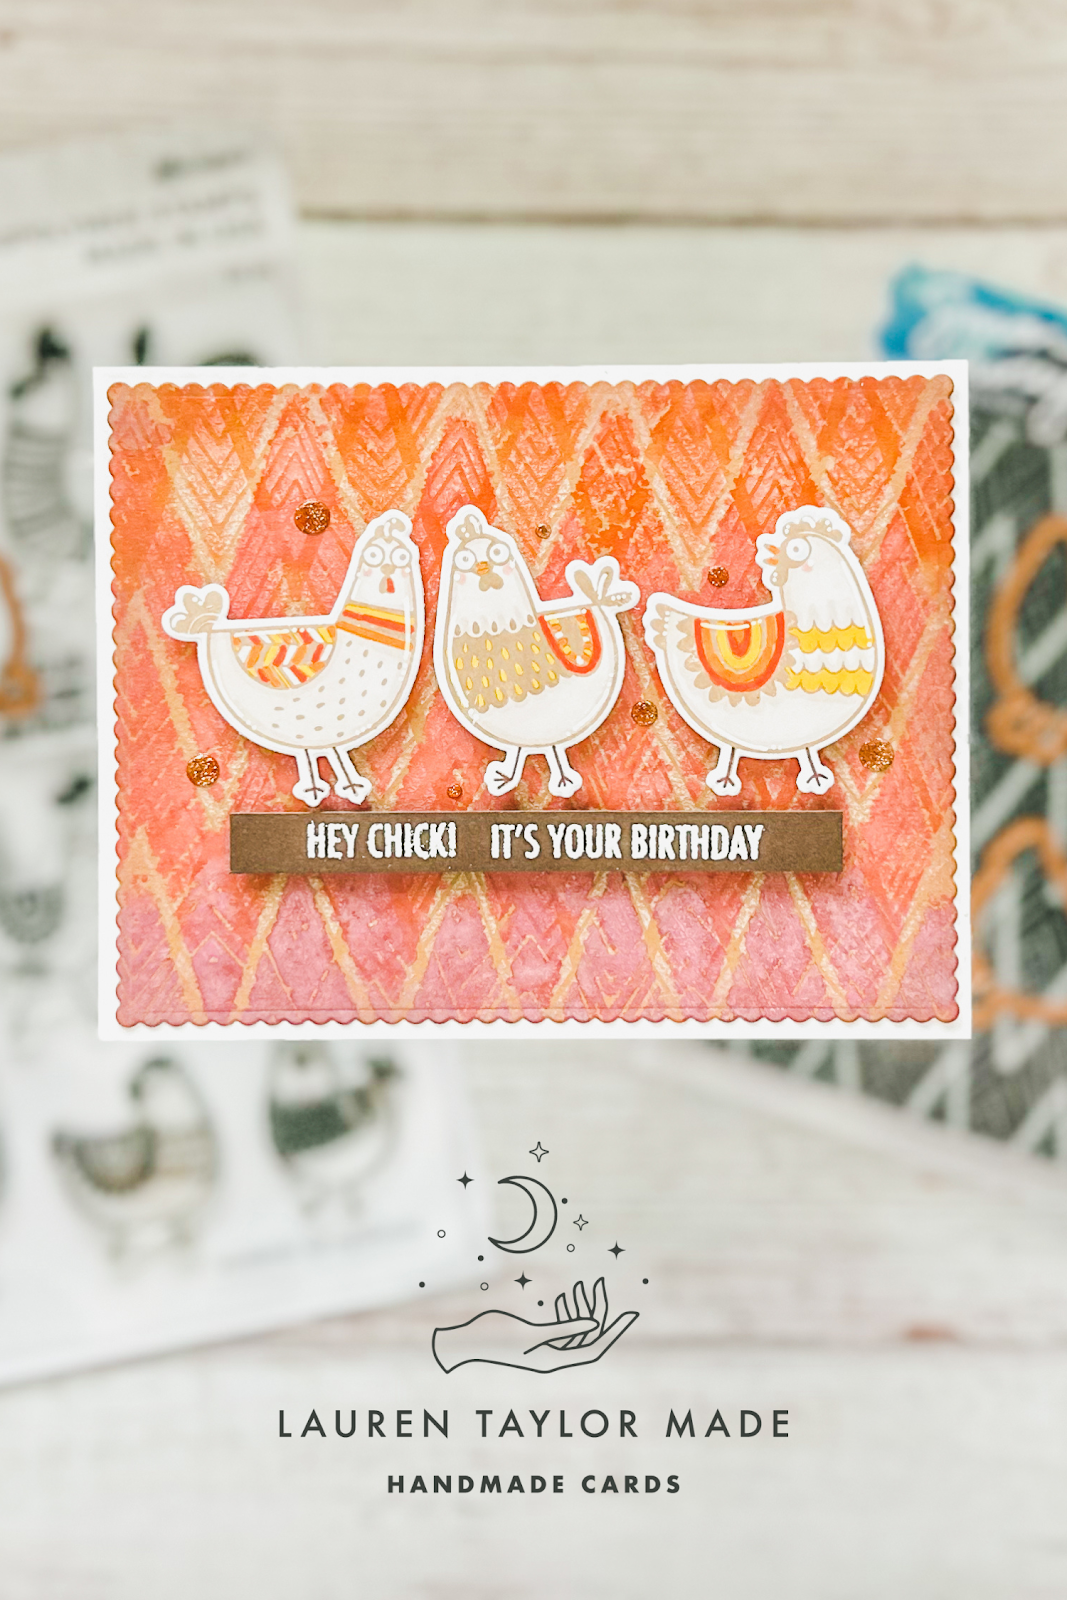
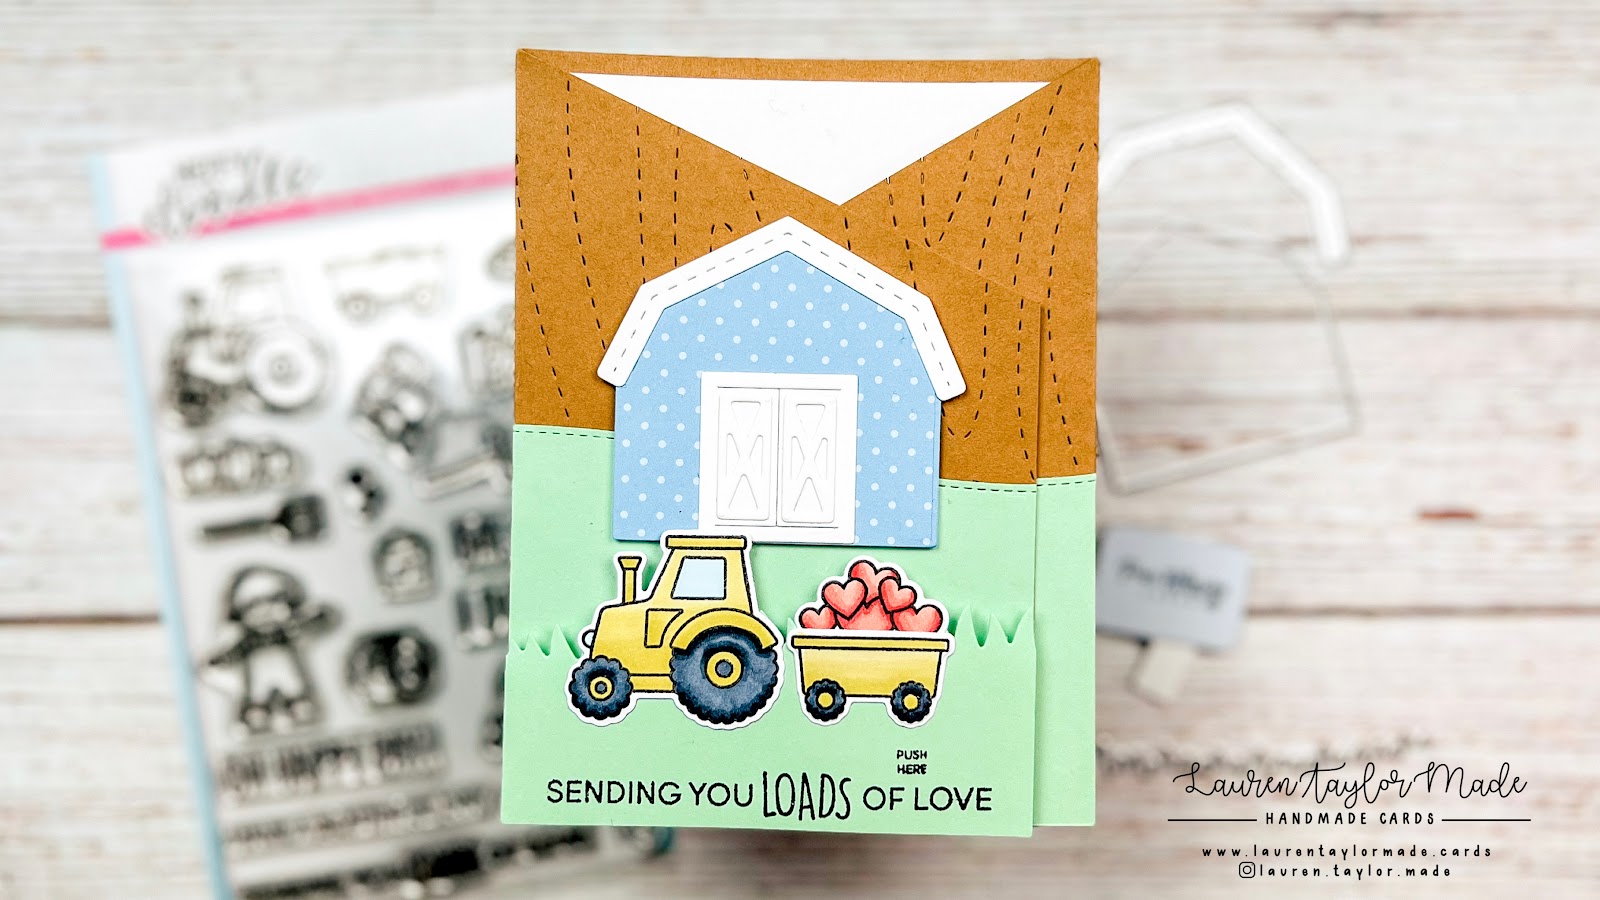
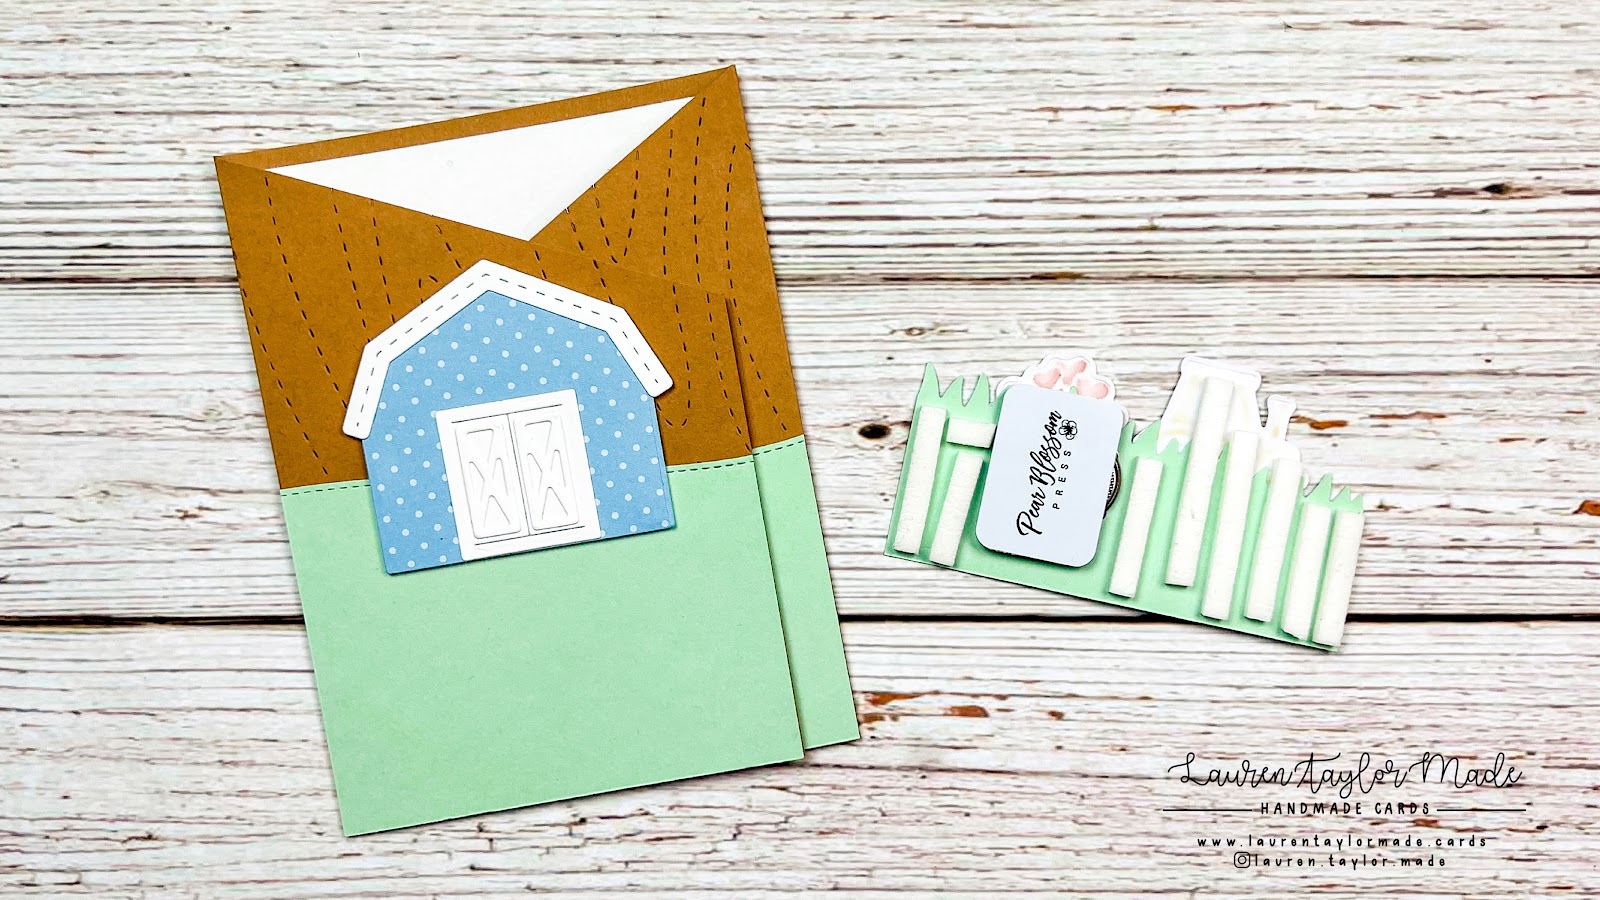
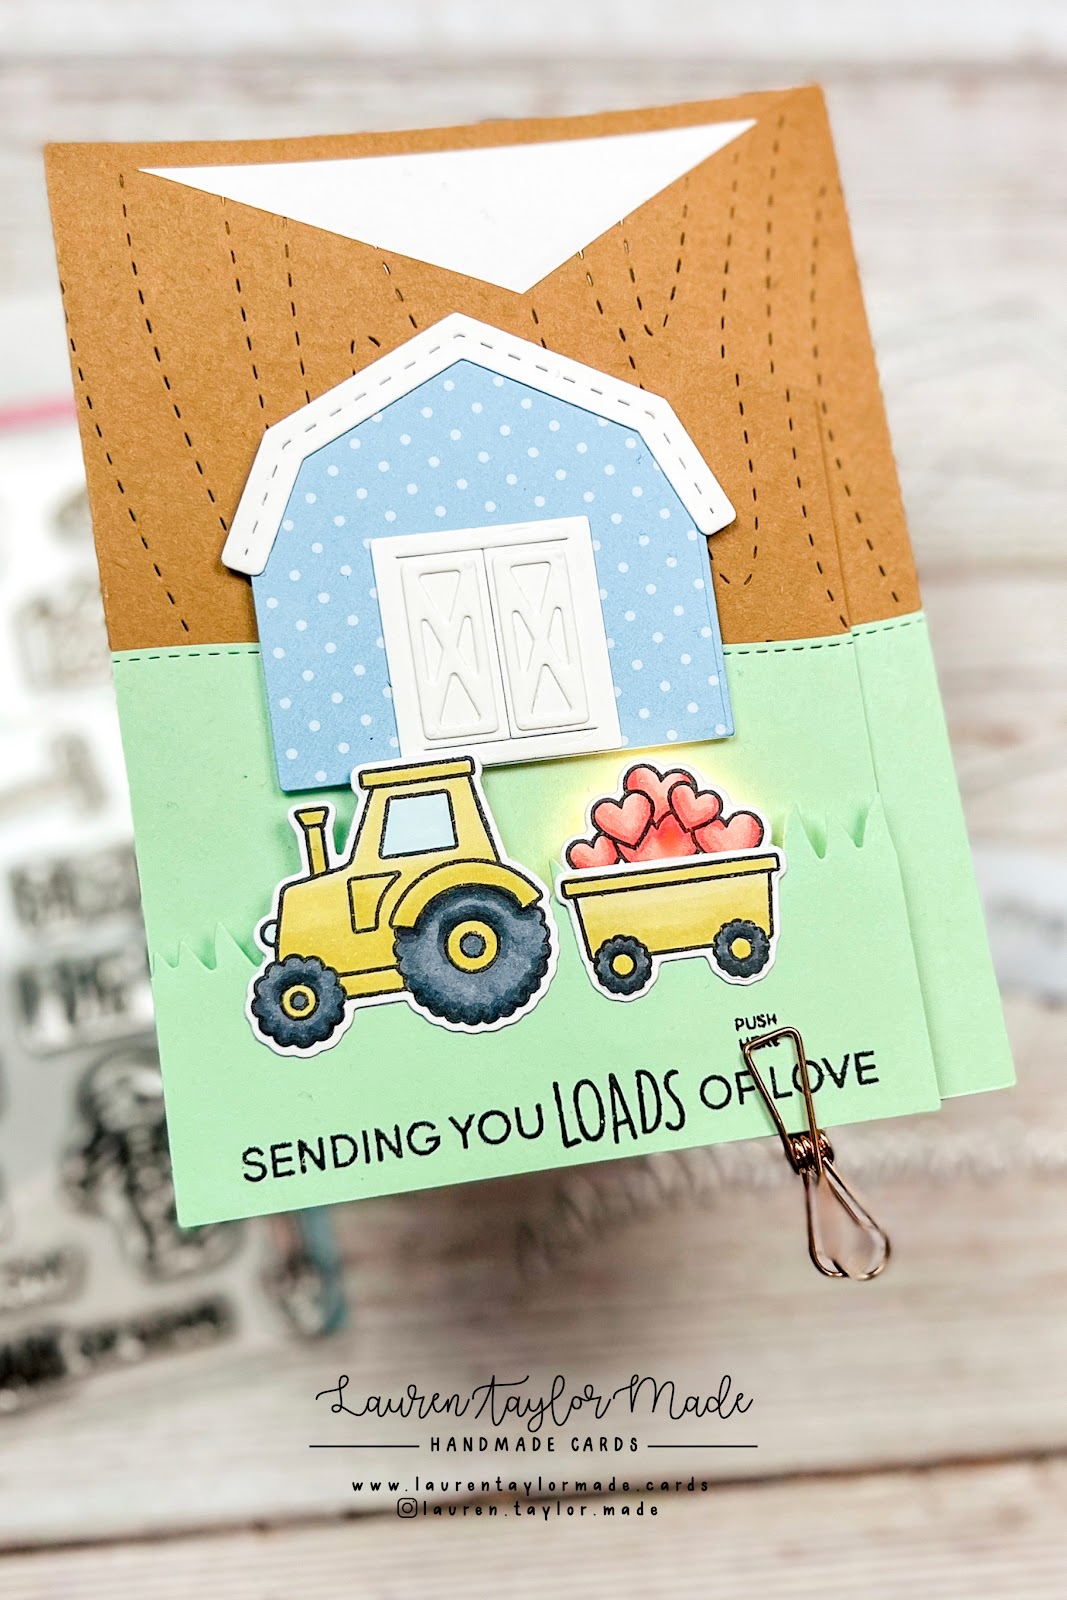
This collection brings adorable farm scenes to life, and I had the pleasure of using the Farm Sweet Farm BetterPress set to create a charming letterpress card. With the help of a registration template, I carefully arranged my plates, selected a beautiful palette of BetterPress ink colors, and built a layered farm scene featuring a vibrant sky, a classic red barn, and lush green fields. The detailed images and coordinating sentiments made the process so much fun, and I love how the finished piece came together!

If you’re inspired by this collection, I invite you to hop along with us over on YouTube! Each creator in our collective has put their unique spin on these delightful farm-themed designs, and there’s so much inspiration to discover. Plus, there’s a giveaway—Justine is offering a $25 Spellbinders store credit to one lucky winner! To enter, simply comment on each of our videos in the hop. Be sure to check out the video description for all the links, and I can't wait to see what you think of my card and what the rest of the collective has created. Happy crafting!

VIDEO TUTORIAL


PIN THIS
SUPPLY LIST

Read More

Enjoy the Journey Square Card with Hello Bluebird

Monday, December 18, 2023

I have been eyeing Hello Bluebird for years, but tried not to buy any products as I just don't need another stamp company to be obsessed with... But there was an amazing sale this year and I finally splurged and bought some sets! I wasn't really sure when I was going to use them, but Craft Roulette helped me make that choice this week. I started with making my square card base (4.25 x 4.25") and added a square piece of Blue Jay cardstock.

Next I cut my kraft cardstock layer to 4x4" and stamped the Farmland Background in brown ink. I picked this for the background as I thought the fence looked like a ladder and I have climbed these fences in my life! I then stamped and colored my images in browns and blue as I found an image of a nest online and used the colors for inspiration. I used the coordinating dies to cut out my girl riding her bike and her cat, layered them with two layers of kraft cardstock and adhered it to the card.

For final touches, I stamped my sentiment in blue ink and added some Pops of Color in a deep blue to match the colors of my girl's outfit. It's a simple card, but I think so cute and I like the monotone background with the color on my image on the card. Have you used Hello Bluebird before? What is your favorite set from them?

PIN THIS
SUPPLY LIST

Read More

Three Thanksgiving Cards, 1 Color Scheme with Trinity Stamps

Monday, November 13, 2023

Can you believe we're in November already?! This year is just flying by and before we know it, Thanksgiving will be here in the US. I have three cards today to share with you using Trinity Stamps products. They're all the same theme, but they also all have the same color palette! In my video today I'm going to walk you through my ink blending, hot foiling, coloring of the gourds and card assembly.

I did use the same sentiment for all three cards as I love the mix of fonts and am excited to send these cards out for the holiday (if I remember and get them out in time). What's great about these products is that you can get completely different kinds of looks and cards so I hope at least of of them is inspirational to you today!

Maybe you like coloring, or ink blending with hot foil, or a simple stamping of solid stamps... There is something that I hope you will like in today's video. Let me know in the comments which card was your favorite and what you'd like to see from me with Trinity Stamps projects in the future! I'm hoping to continue to bring you inspiration as we start moving in to the winter season and holidays.

VIDEO TUTORIAL


PIN THIS
SUPPLY LIST

Read More

Apple-solutely Awesome Mini Slimline Card with Lawn Fawn

Thursday, August 17, 2023

It's hard to believe that I have been playing along with Craft Roulette for almost 100 weeks! This my 99th card I have made for Craft Roulette and it's all been consecutive - I haven't missed a week once. So fun and unbelievable how many cards I've made - some really weird but all unique. For this card, I took the requirement for the card to be split in the middle as my sentiment splitting the top and bottom of my card creating two different scenes.

When I made this card, I realized I should have filmed it because describing this is going to be interesting. But stay with me and let me know if you have questions in the comments or message me on Instagram. I started with die cutting a panel and a half with the largest Small Mini Slimline dies from Lawn Fawn. For the full panel, I split it half and added brown Distress Oxides on the bottom half and blues with a cloud stencil on the top half. I added the same browns to my half panel and die cut out dirt pathways using the Slide on Over Maze die.

Using green cardstock, I die cut two sections of grass and on one of the sections, I used a wavy die to show where the grass turns into dirt. I also die cut a banner and stamped my sentiment along with a heart - I slid the die over and trimmed down the banner with the same die so it would fit perfectly around the sentiment. I used foam adhesive to add the die cut dirt pieces to the bottom of my inked panel. The grass pieces and sentiment were layered together and popped up so it overlapped just a bit of the dirt.

This panel was adhered to a cut piece of patterned paper (3x6") and this was added to my card base (3-1/4x6-1/4" when scored). I stamped my images and colored them in my Ohuhu Art Markers. Jolly reminds me of Santa, so I went with an apple tree so I can have green and red on my card! I do not have dies for both stamp sets, so I decided to just fussy cut all the images out so they would look consistent. I popped up my apple tree to the top panel and trimmed off anything that went past the card base edges. I also added my mouse, extra apple, dirt mound and little dirt critters with foam adhesive to my card.

For some final touches, I added white gel highlights to my images and Pops of Color in two different brown shades to the dirt to give it a little more texture. I hope you enjoy this card inspiration and I think it qualifies close enough for the Lawn Fawnatics Challenge so I'm going to enter it there, too!

PIN THIS
SUPPLY LIST

Read More

Hey Chick! Birthday Card with Simon Hurley create.

Sunday, March 26, 2023

The eyes on these chickens from Simon Hurley + Ranger Ink's set Spring Chickens are the best! I stamped them in brown ink and colored them in with alcohol markers. I'm so glad this set comes with dies from Spellbinders because those little chicken feet would not be the most fun to fussy cut out. I wanted to keep a warm feel so I colored them in with red, orange and yellow.

Using the new Funky Chevron Rubber Stamps, I used Distress Oxides in Ripe Persimmon, Crackling Campfire and Fired Brick to add color. Before stamping down, I sprayed it with water to create a more watercolor look. I cleaned off the stamp and then used Picket Fence to stamp again, but I adjusted the stamp so the design would not line up perfectly.

Once the background was dry, I die cut it with a scalloped rectangle and adhered it to a white cardstock base. I popped up my cute chickens as well as a sentiment that was embossed with white embossing powder on a dark brown piece of cardstock. To add a bit of sparkle, I added some Pops of Color in Copper Glitter.

I love the warm tones and this card was relatively easy to make. I love how using a background stamp can really elevate a card. During Simon's live showcasing the new products, someone mentioned adding googly eyes to the chickens and I think that would have looked so fun on this card!

PIN THIS
SUPPLY LIST

Read More

Easter Wishes Notes with Pretty Pink Posh + Plantable Seed Paper!

Wednesday, March 22, 2023

How fun is it to have a carrot stencil?! I don't know what it is about these cute carrots from Pretty Pink Posh, but it's making me want to make all the gardening cards! I used the Layered Carrots Stencils to make the backgrounds for the cover and inside of these Sweet Notes. The colors I used were Distress Oxides in Carved Pumpkin, Mowed Lawn and Brushed Corduroy. I was able to get four squares from one 6x6" piece of paper which is great as those are the sizes of the stencils as well! The squares were adhered to the Sweet Notes that I cut out of kraft cardstock with tape runner.

I die cut my large carrots from the Easter Mug Additions Dies and used the same Distress Oxides to give them color. I glued them to the front of the card and also layered on my sentiment. I die cut Easter Wishes three times - twice in kraft and once from the Lime Satin Shine Cardstock from my Your Paper Insider (YPI) Box 2. I glued the three layers together with the green on top so the sentiment was nice and sturdy.

I added a few green clay pieces from the Pastel Swirls Mix to add a little more fun and dimension to the covers of the Sweet Notes. On the inside of the note, I glued down a plant marker that I also die cut from kraft cardstock and used a brown ink pen to write "plant us!" so the note receiver knows that the eggs are plantable! They are die cut from the Blue Confetti Wildflower Paper also from my YPI Box 2 into cute little eggs and I attached them with glue dots so it's easy to peel and plant.

Have you ever used plantable paper before in your crafts? I think these are just so cute and I can't wait to take them to my Easter brunch. This week there is also a sale on Spring Products over at the Pretty Pink Posh Shop - go check it out!

PIN THIS
SUPPLY LIST

Read More

Lawn Fawn Fans Fall Hop - Apple Picking Peekabook Card

Saturday, October 15, 2022

It's that time again... It's the Lawn Fawn Fans Hop and this time we're bringing you some Fall themed inspiration and/or using products from the latest Lawn Fawn Release (Fall/Winter). There are eight us of hopping this season and we hope you'll join us all and meet some maybe new to you crafters!

For my project this hop, I leaned into the Fall theme and created a Peekabook Pop Up card of some cutie mice picking apples from their apple tree. I have some layering on the front of the pop up card and incorporated lots of sets along with the new Apple-solute Awesome set from the late release.

When you pull open the card, the peekabook pop up mechanism pops up a mouse who is hiding in the tree and snacking on an apple! I thought it would be cute to show a little hidden image coming out from within the tree and this interactive die really brought my idea to life.

In the video today, I am only showing how I distressed my background and assembled the mechanism. As it is a hop, I didn't want to keep you too long so I colored and cut my images out before the video and talked through assembling each layer but kept the "watching me glue" to a minimum.

To get all the info about the hop (and our sponsored giveaway), make sure to watch my video over on YouTube so you can get the details and find the next crafter in the hop! 

VIDEO TUTORIAL


PIN THIS
SUPPLY LIST

Read More

Teal Pumpkin Fall Card with Pretty Pink Posh

Thursday, September 8, 2022

Pretty Pink Posh has the cutest corner stamp sets! I love these pumpkins and how you can color them in all kinds of ways... Like a blue-ish teal! This card was inspired from the latest episode of Craft Roulette and it is definitely one of my top favorite cards I've made for the challenge game show.

The parameters this month were to make an A2 card; colors inspired by a sunflower field; an element of something happy; and include an unusual color.

My card is an A2 in size (yay! favorite size!) and the colors I used inspired by a sunflower friend are golden yellow, green, brown and teal-ish blue from the sky or maybe rainfall/water from watering the field. I used the teal-ish blue color as my unusual color for my pumpkins - both in the background stenciling and the adorable pumpkin stamped images. Finally, the "something happy" is my sentiment as it says "Happy Fall"!

How do you think I did with this week's parameters? I think it turned out perfect and I just love it! Did you participate this week? Let me know in the comments!

PIN THIS
SUPPLY LIST

Read More

Color & Chat: How to Color Lawn Fawn's Hive Five & A Hexagon Filled Card

Friday, July 8, 2022

A new month means a a new coloring guide! This month I wanted to do a guide for the Hive Five stamp set from Lawn Fawn - bees, honey, a flower and bee hive. You can see my guides down below to save your desktop or you can find them on Instagram to save as well.

If you'd like to see how I colored the images in my sample card, check out my video down below! Let me know if you like the card in the comments and if you'd like to see a process video of how I made it as well.

VIDEO TUTORIAL


PIN THIS
SUPPLY LIST

Read More

Loads of Love Light Up Card with Heffy Doodle

Sunday, June 5, 2022

I was so excited to see Amanda from Pear Blossom Press on this weekend's Craft Roulette! I absolutely love her EZ Lights and of course she incorporated lights into her card. I knew that I had to figure out a way to add in a light, too!

This week's parameters were a diagonally cut project, colors of a sky view, farm element and a partial image in the project. I tried making a fun fold card, but I kind of wish I went to the complete edge rather than have my off-centered look. I think it's cute, but I wish it wasn't so off-center. 😊 I used pastel colors that I would imagine seeing in a sunrise with Heffy Doodle farm themed products. My partial image are the hearts coming out of the tractor's wagon. I actually don't know if that's called a wagon, but I couldn't think of the name for it!

I used a One Light behind my hearts so when you press on the button, they glow! You can see it lit up below. What do you think? Did I meet the parameters this week? Let me know what you think and if you participated, too!

PIN THIS
SUPPLY LIST

Read More