
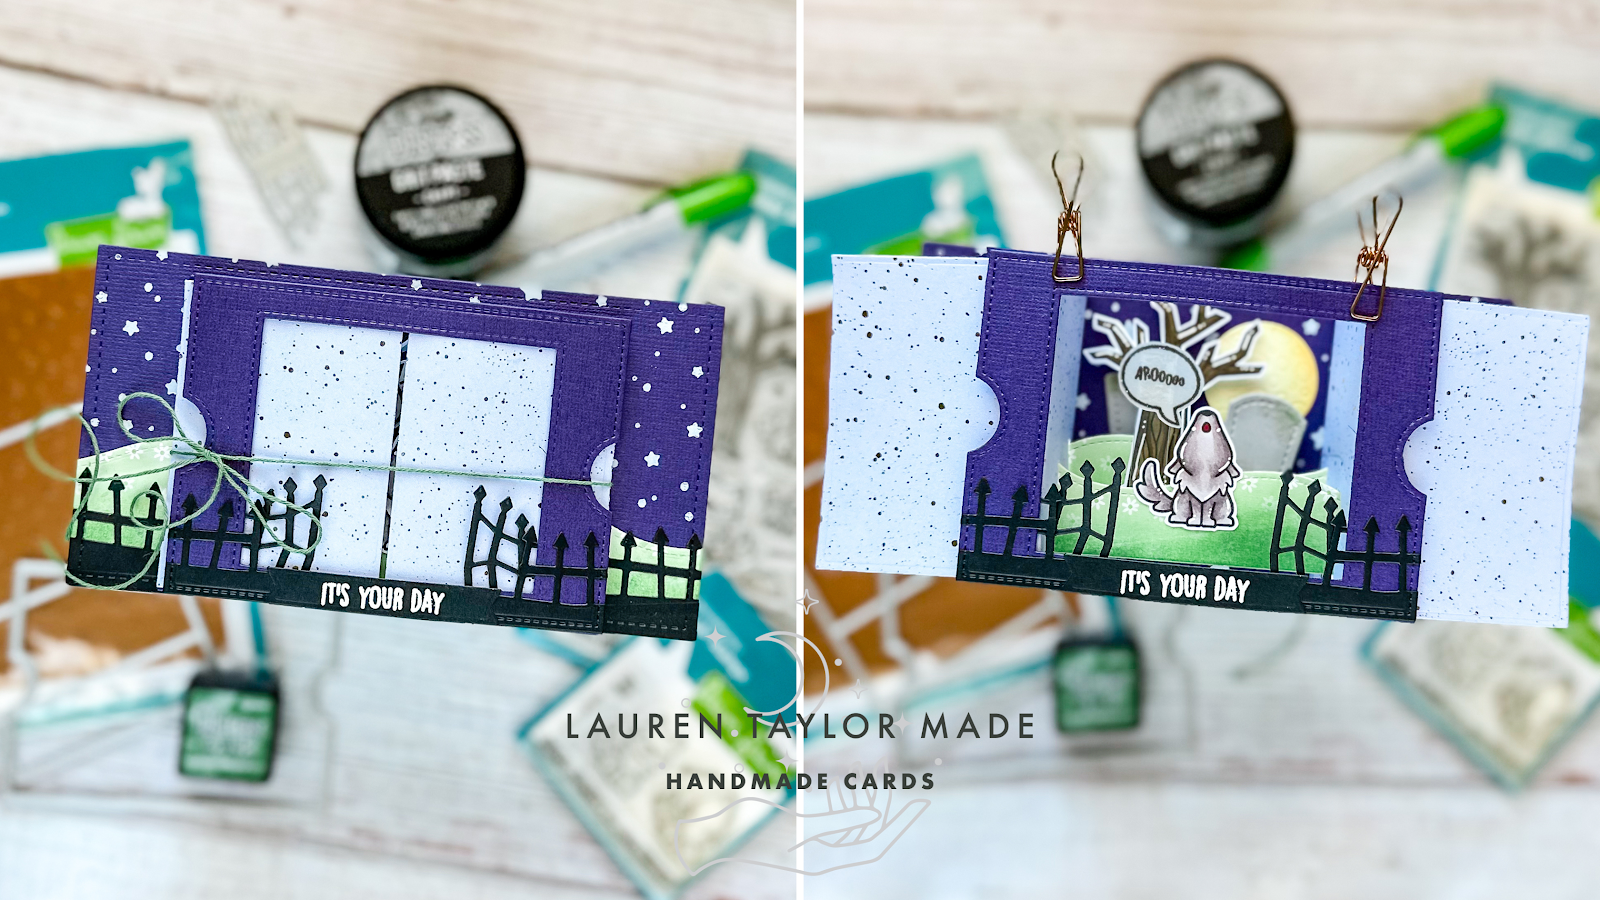
You know I love a good interactive die! Especially when it helps create an adorable scene! I intended to film this idea, but I really wanted to play out how the die goes together before I recorded myself and boy am I glad... I was a hot mess putting this card together. I'll walk you through each layer of my card, but I definitely did not put it together in an effective manner, haha! So we'll just pretend I did things as logically as I explain and not trying to hot foil stars after gluing my hill and fence down...
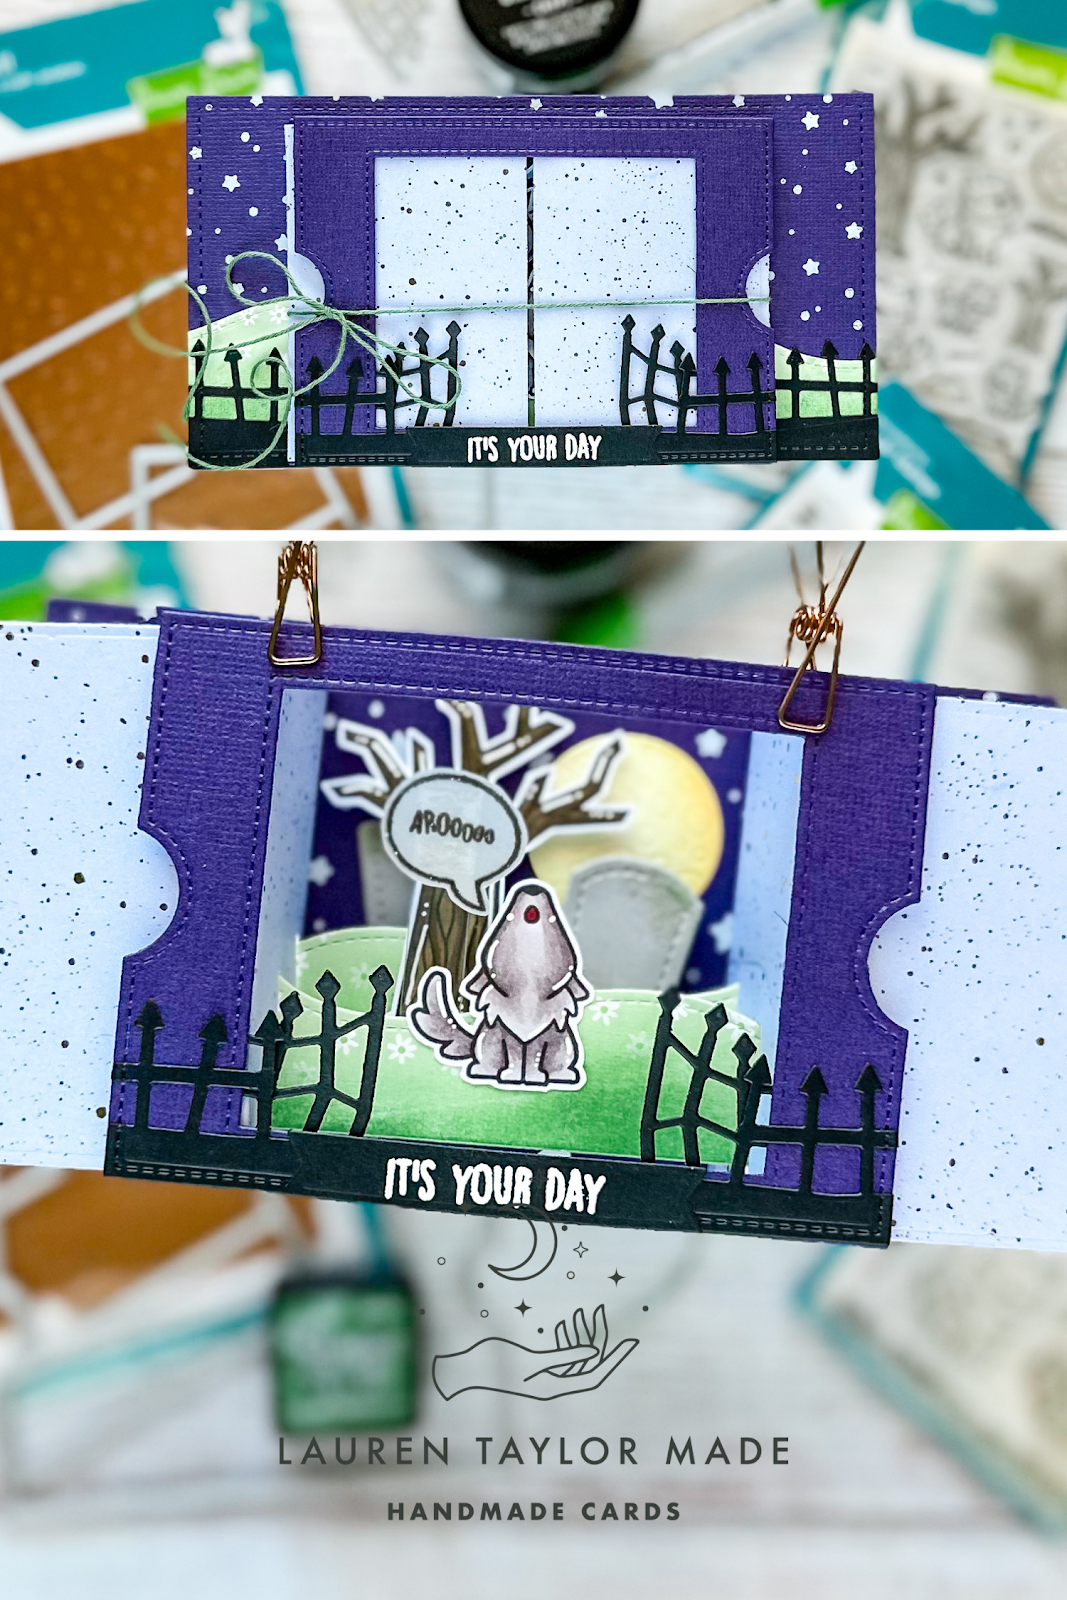
The mini slimline base is using textured, purple cardstock and cut with the largest (6.5 x 3.5") die from PopsicleSticks and while it looks great, I wish I would have gone with the second largest (6.25 x 3.25") as it would have been the perfect size to fit evenly with the Ta-Da! Diorama. Next, you should hot foil on the starry sky background (I used opaque white) and then add your hills and spooky fence. The hills are all cut out of a flower patterned paper (freebie in my order) and the spooky fence is in black cardstock. I added a little Distress Ink to give my hills dimension.
 |
 |
Next is the Ta-Da! Diorama and I just followed Lawn Fawn's video to make sure I understood how to assemble the dies. My front and back were cut out of the same purple cardstock and I added stars to my background as well. The side pieces are from the new Spiffier Petite Paper Pack with the gold (so shiny!) and my hills are cut and colored the same as my side hills on the mini slimline. I also added a gate for my fence to the corners, gluing them to the back side of the open window of the cardstock.
I die cut my moon and tombstones next. I added some Distress Ink to my die cut pieces, but I also added some Grit Paste and a little Distress Crayon to my tombstones to give them an aged look. After stamping, coloring, and cutting out my images, I glued them to my hills. It's important to know that you can only fit a little bit on the front hill. I had one of the tombstones next to my wolf, but the Diorama would not close! So make sure you don't put too much on the front hill that is bigger than the side openings where the inserts slide through.
My moon was glued to the background as well as the tombstone that used to be in the front and I added the second tombstone to the back hill. My sentiment for the front of the card was die cut from one of the banners in the interactive die set and I embossed the stamp in white. The inside is using yellow and purple ink and kind of completes the sentiment on the front to fit the theme. When I glued my Diorama to the min slimline, I added in a piece of green twine to die the interactive part closed so I can put it into an envelope without worrying it will move around or not come out of the envelope cleanly. Not sure if I'll do that again, but it's a tip in case you are worried about that, too.
I hope you like this card and I'll definitely be making a video with this die and stamp soon! Maybe not together, but you'll see them featured on projects.
Post a Comment