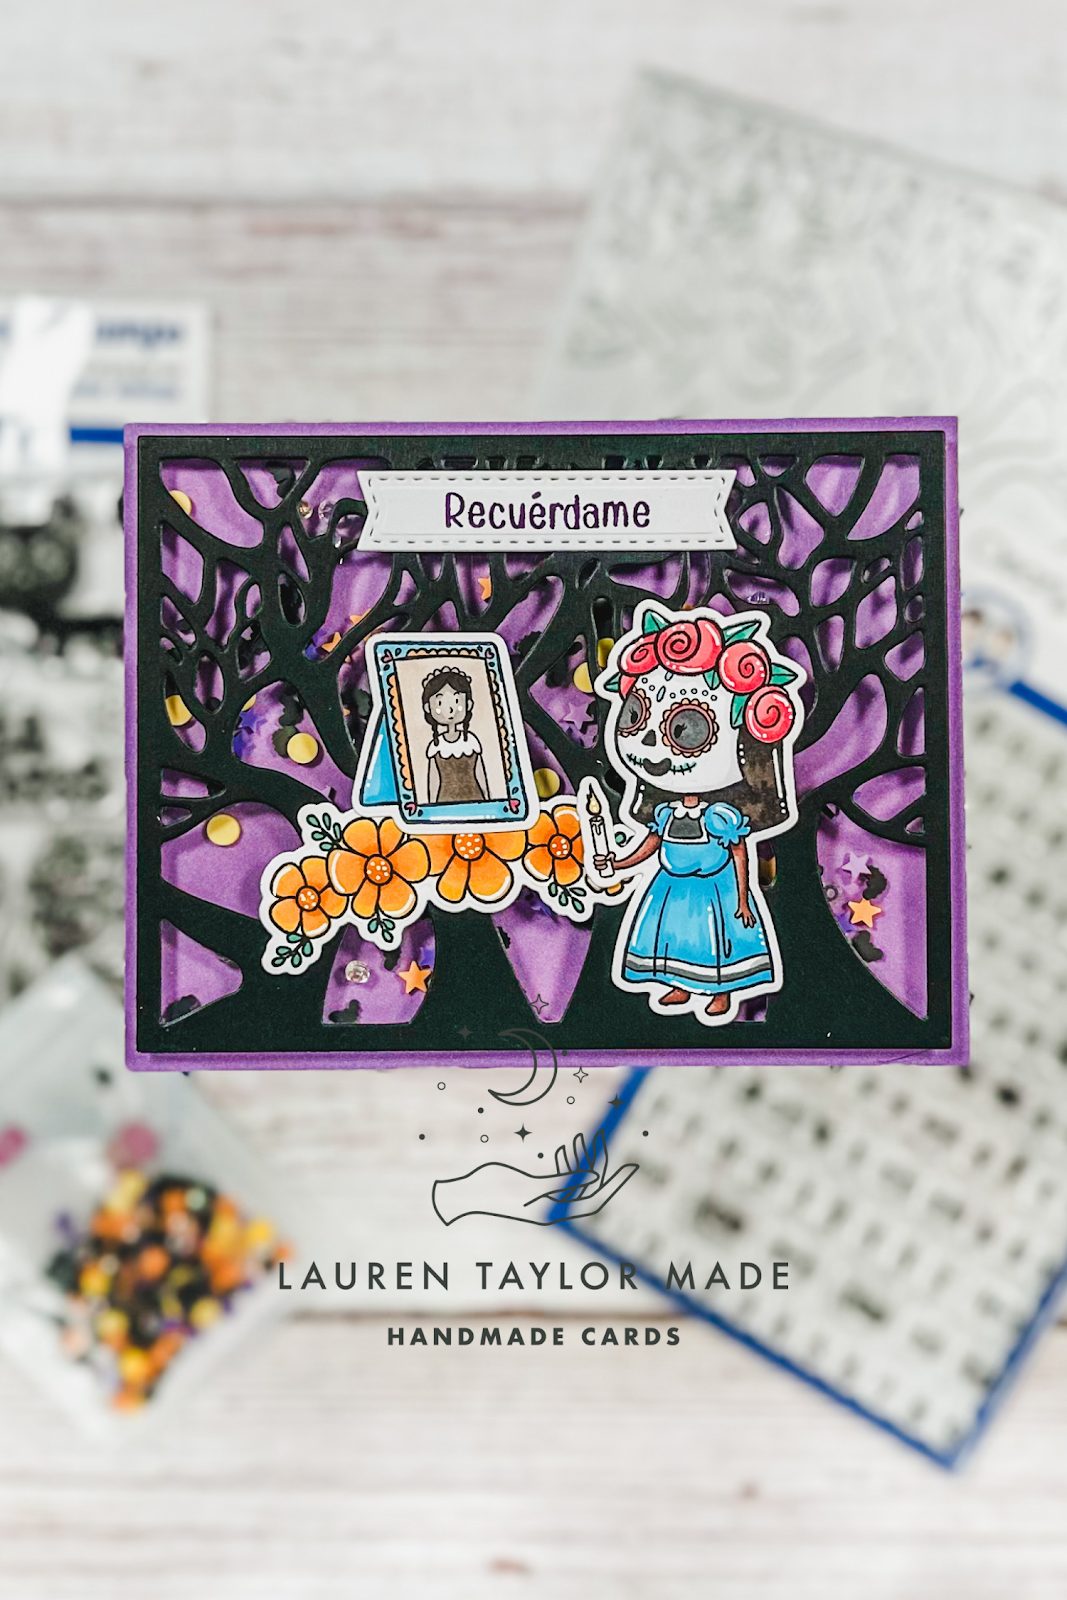
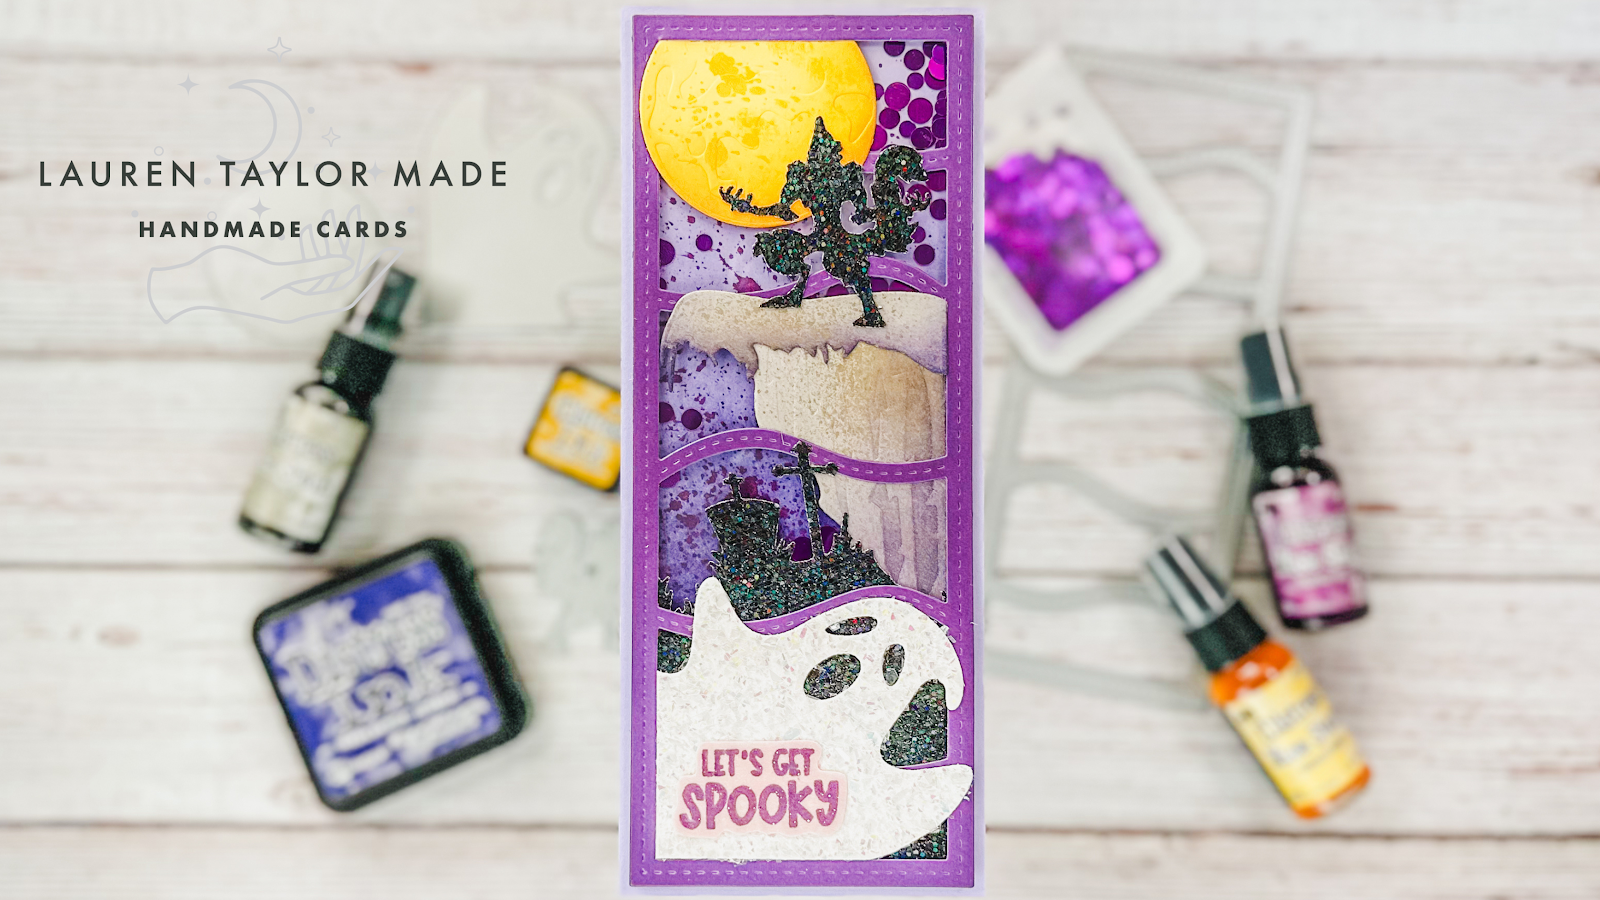
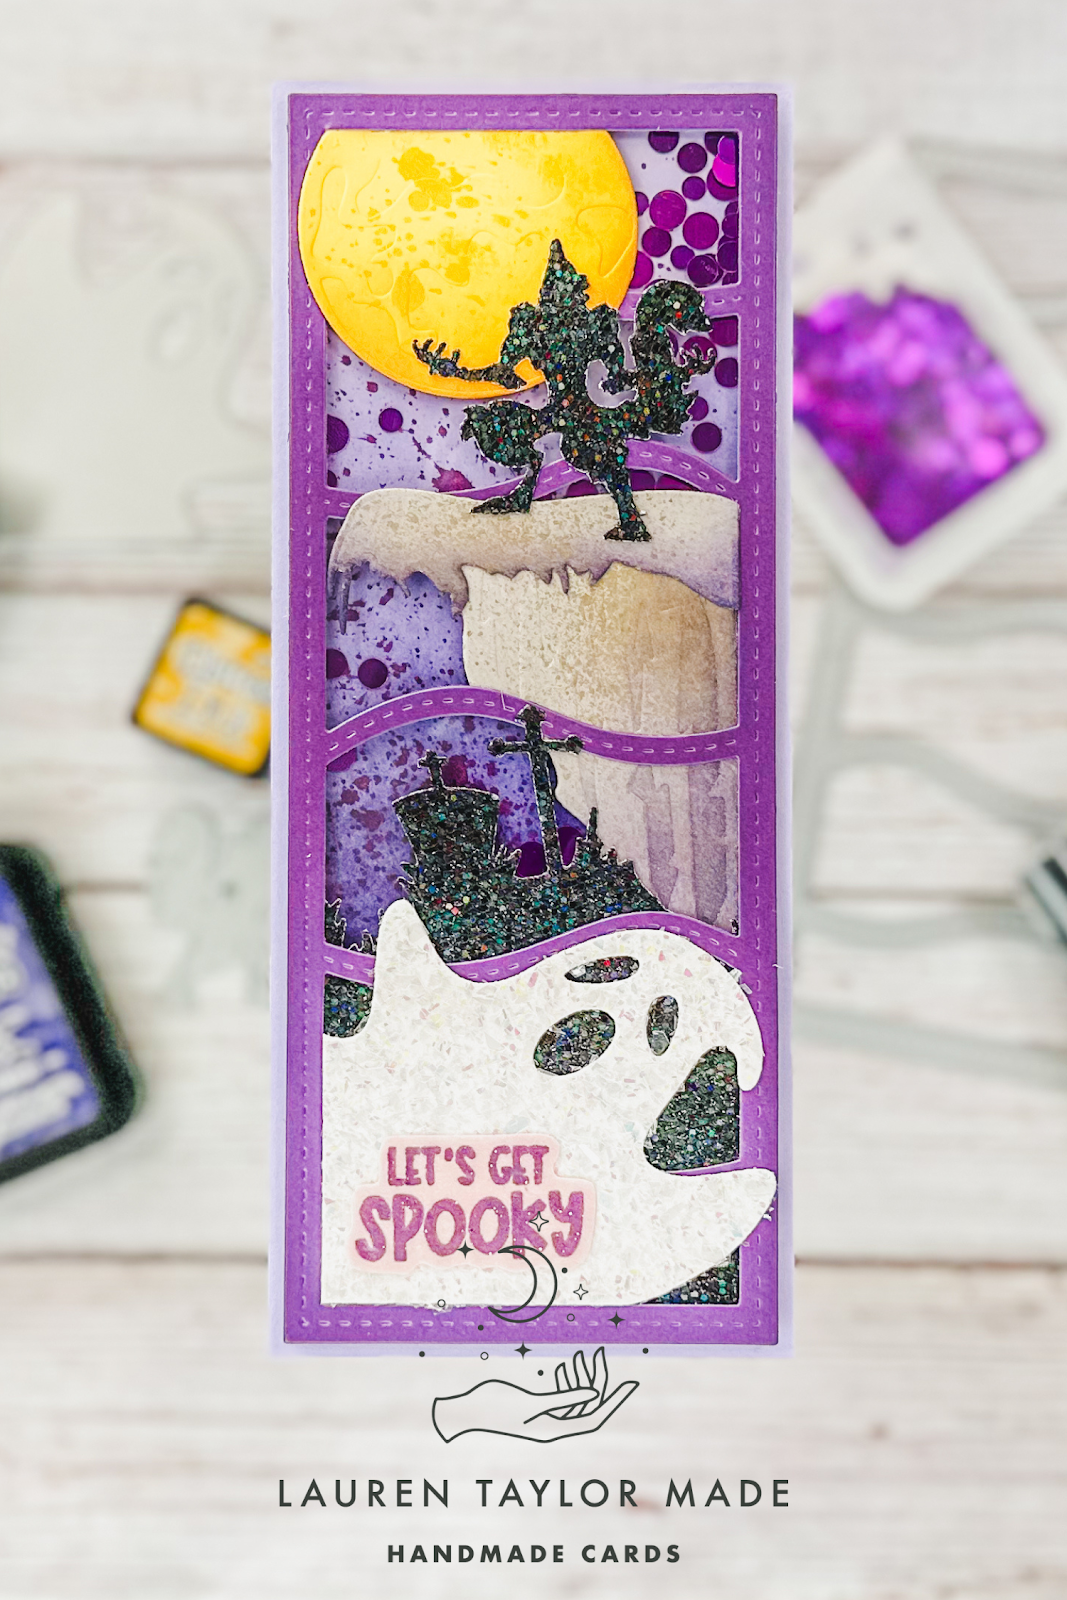
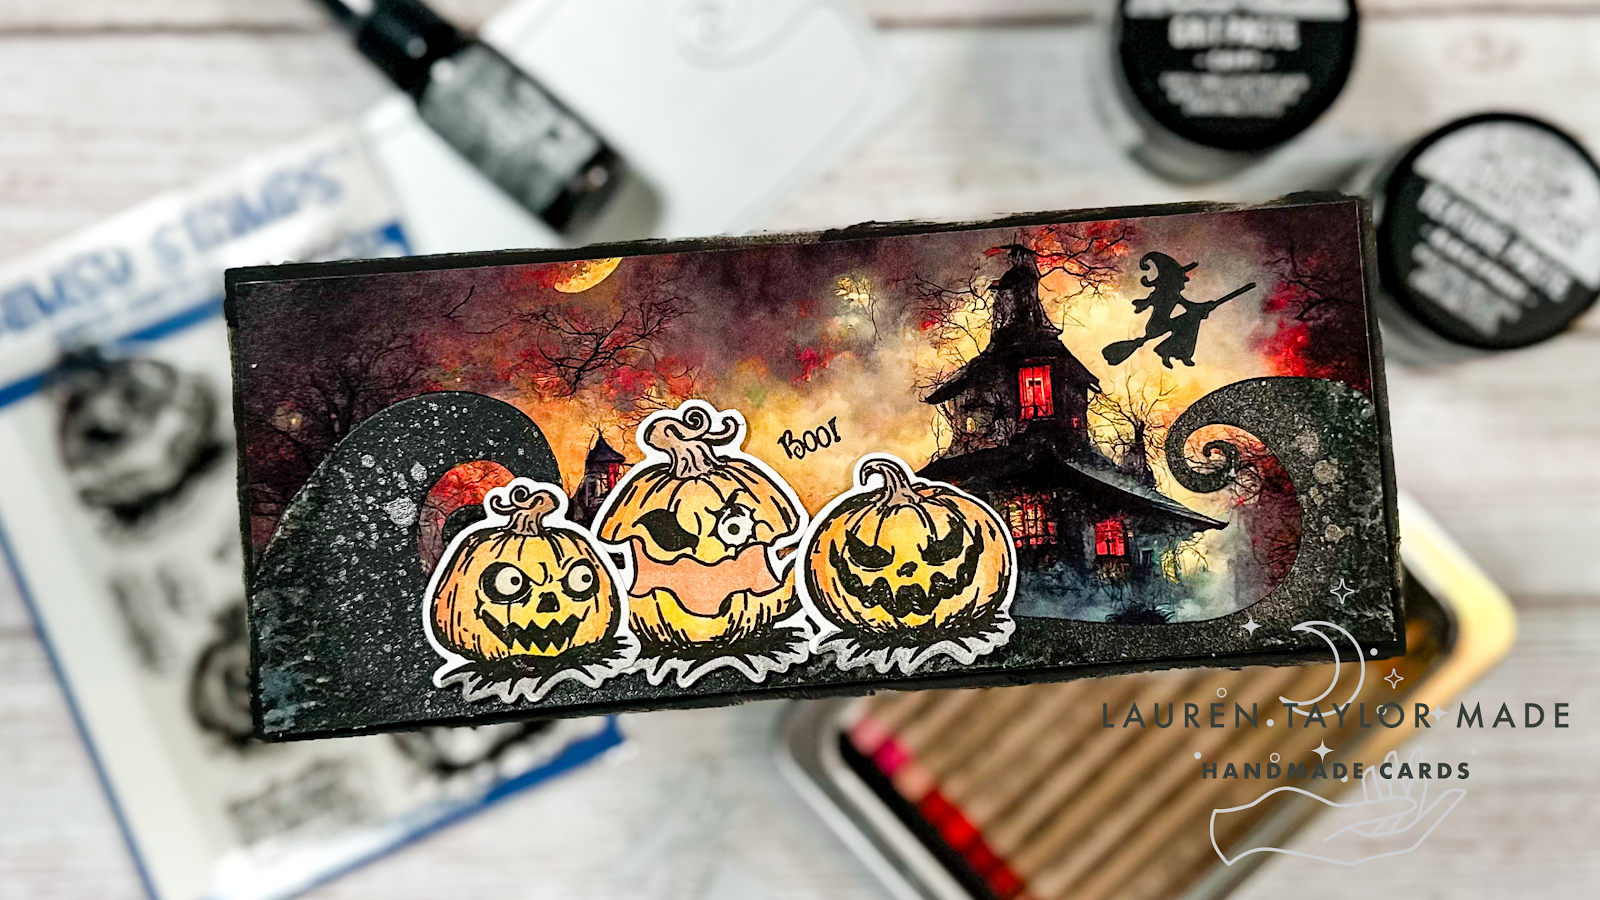
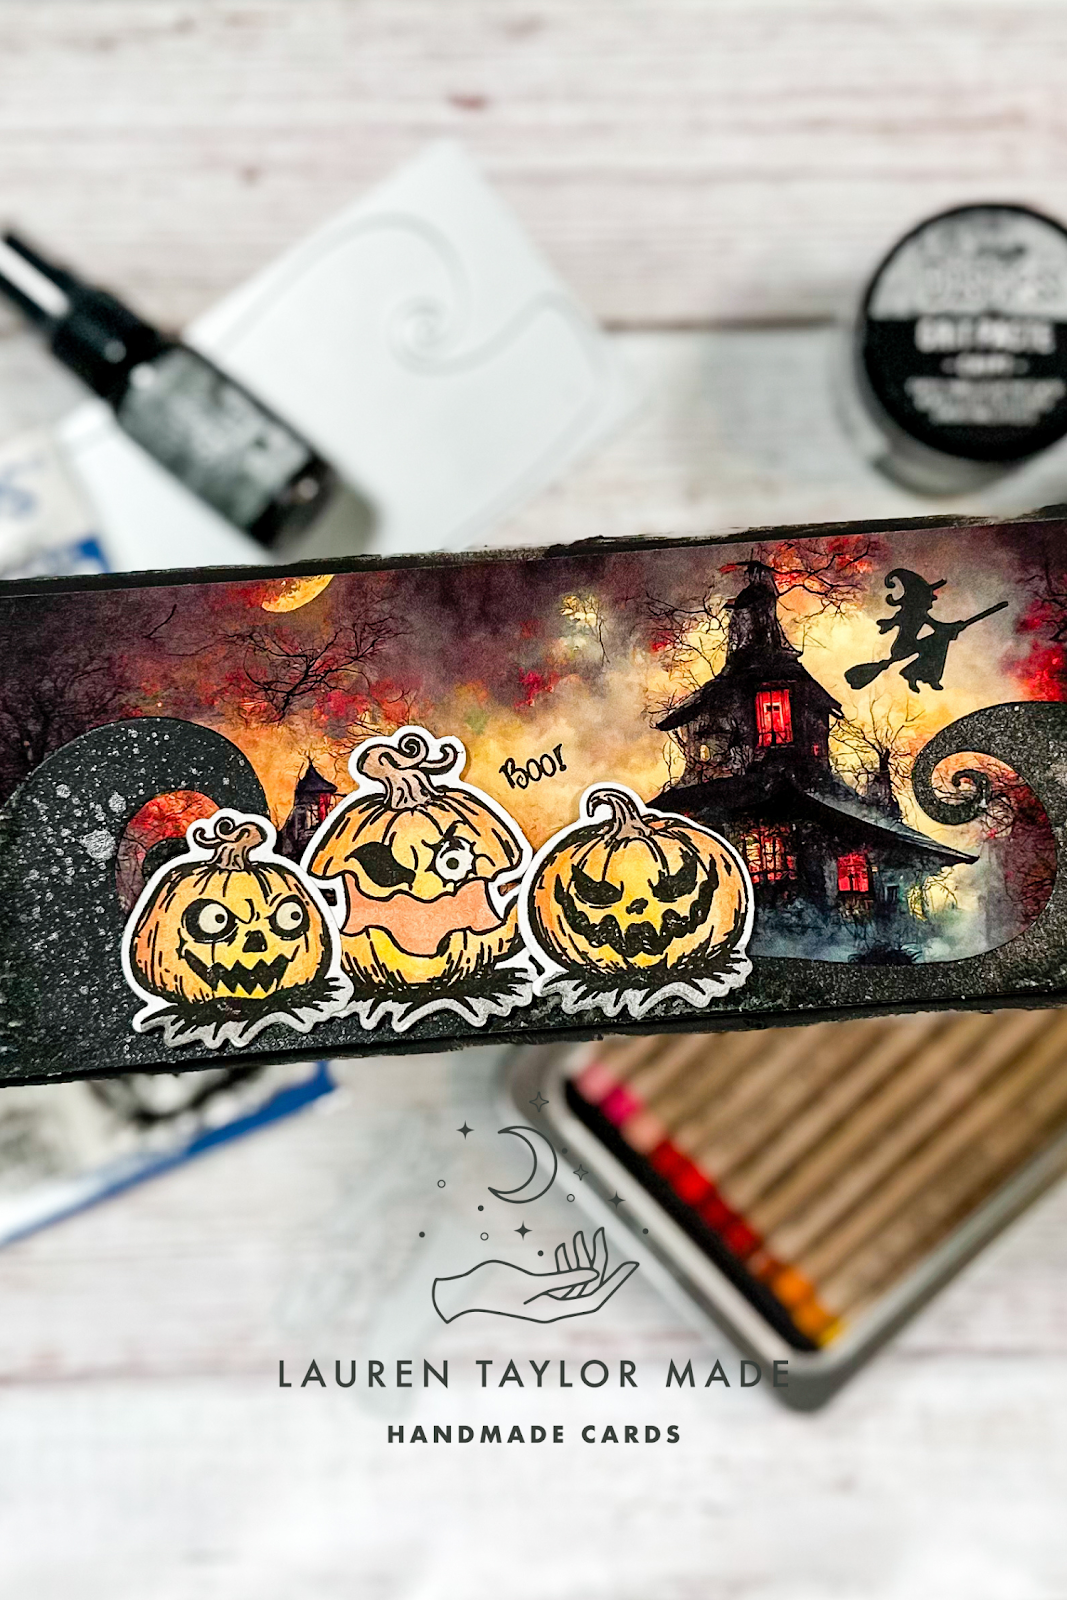
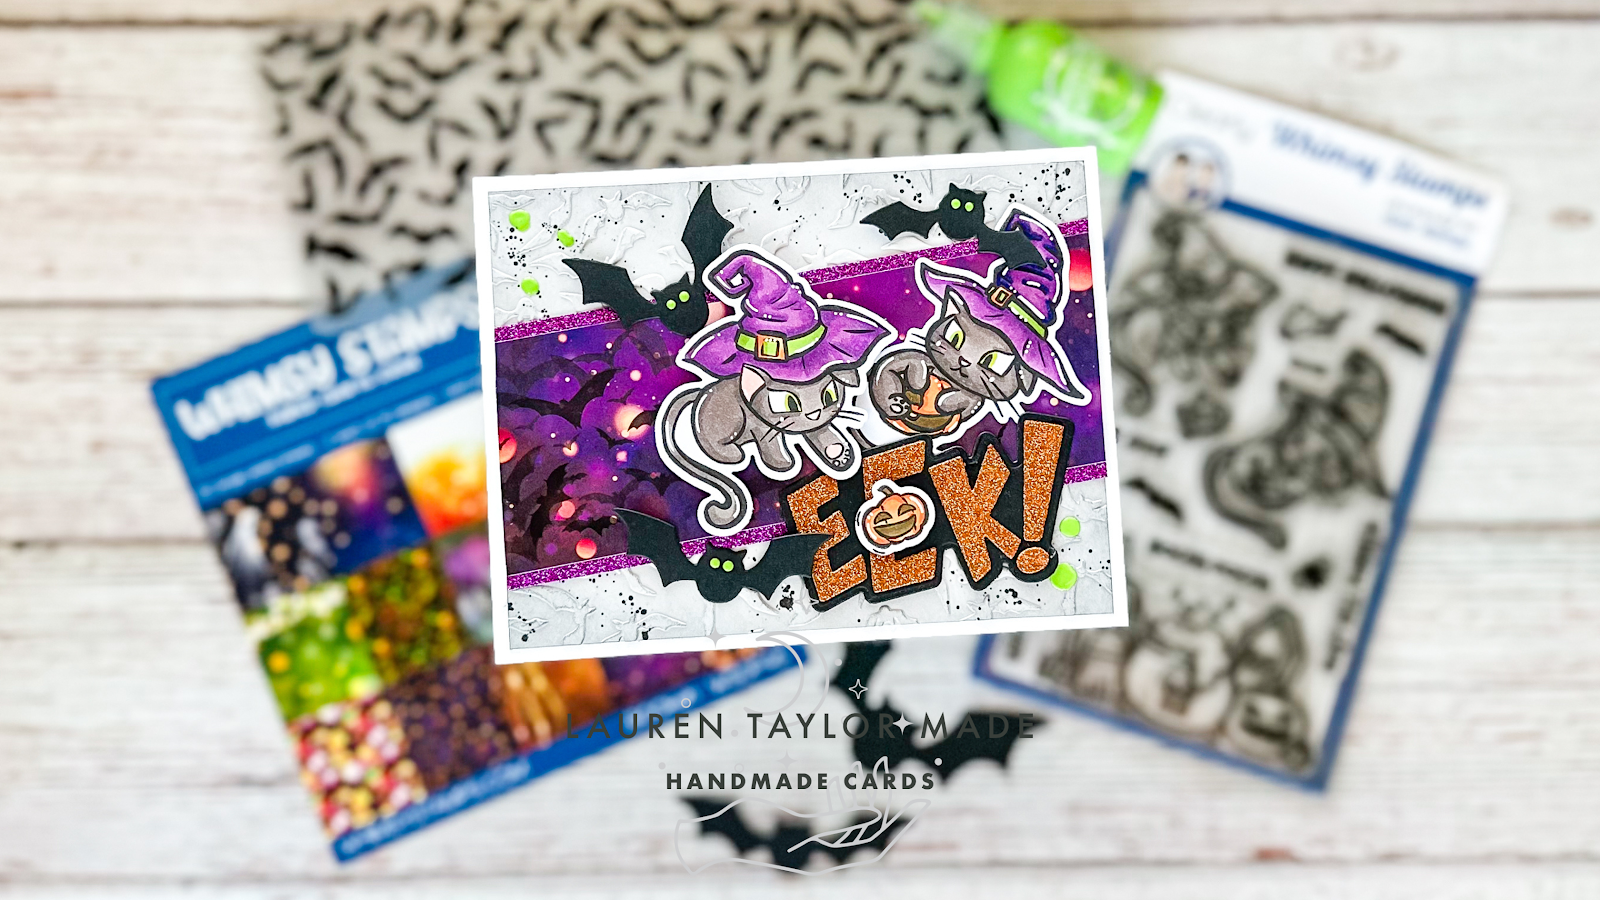
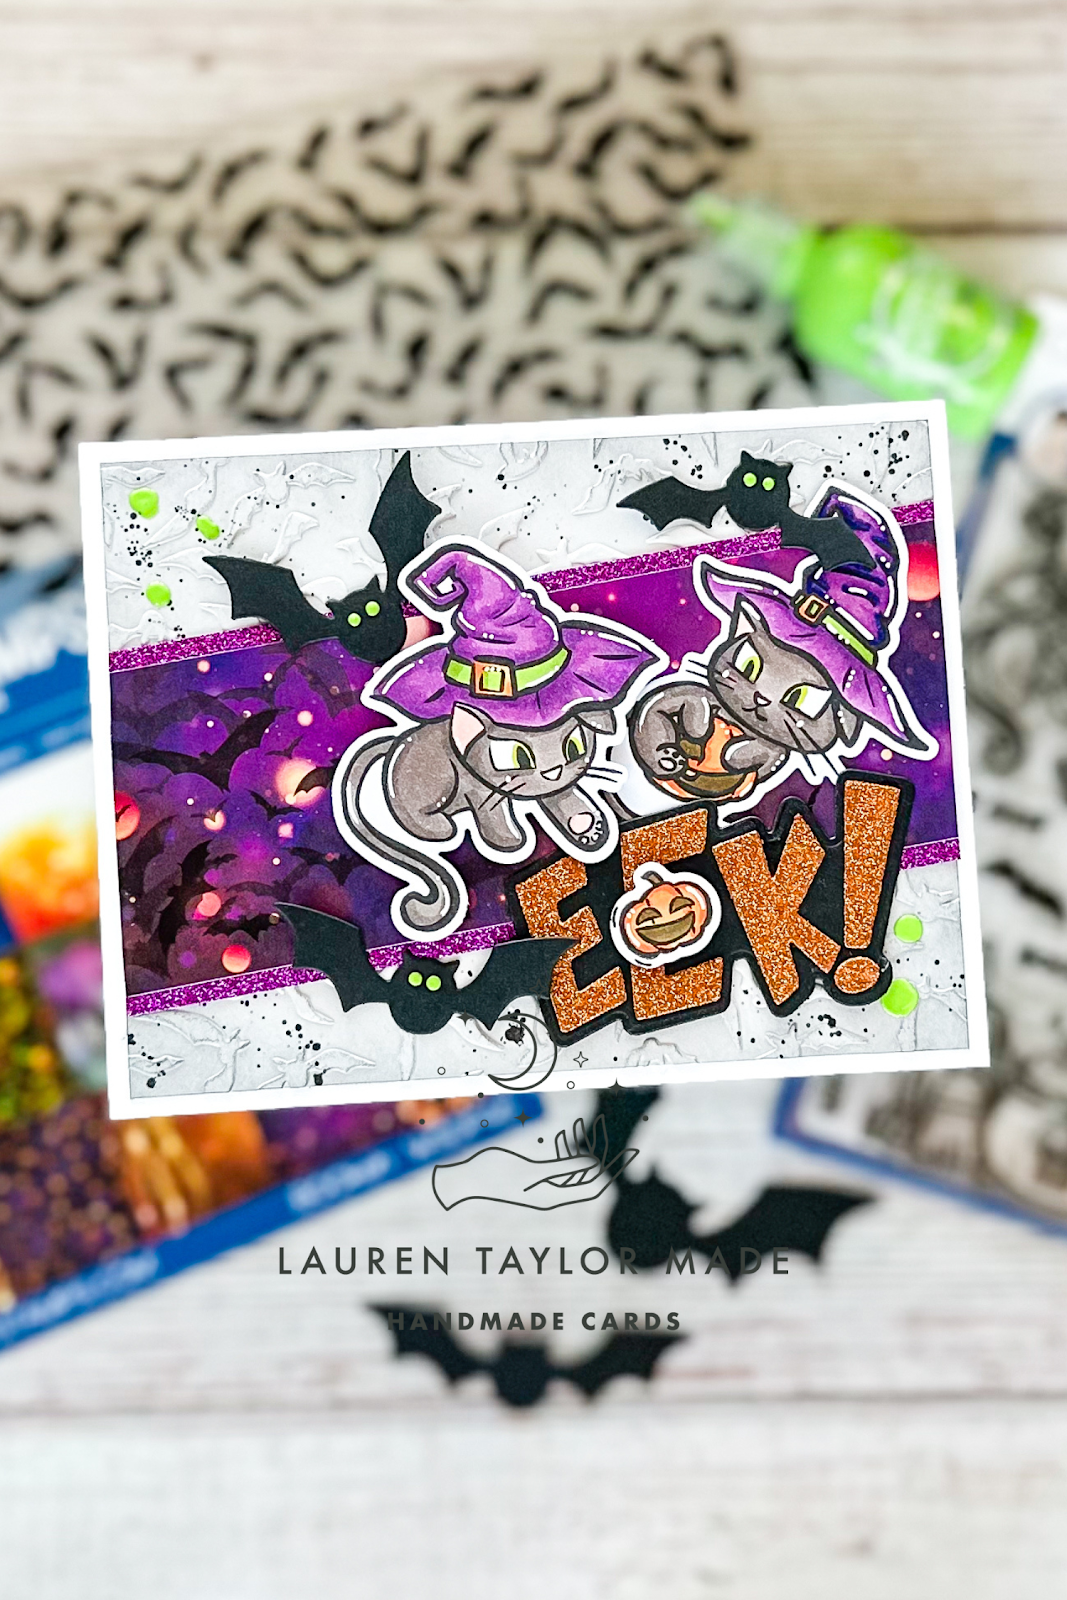
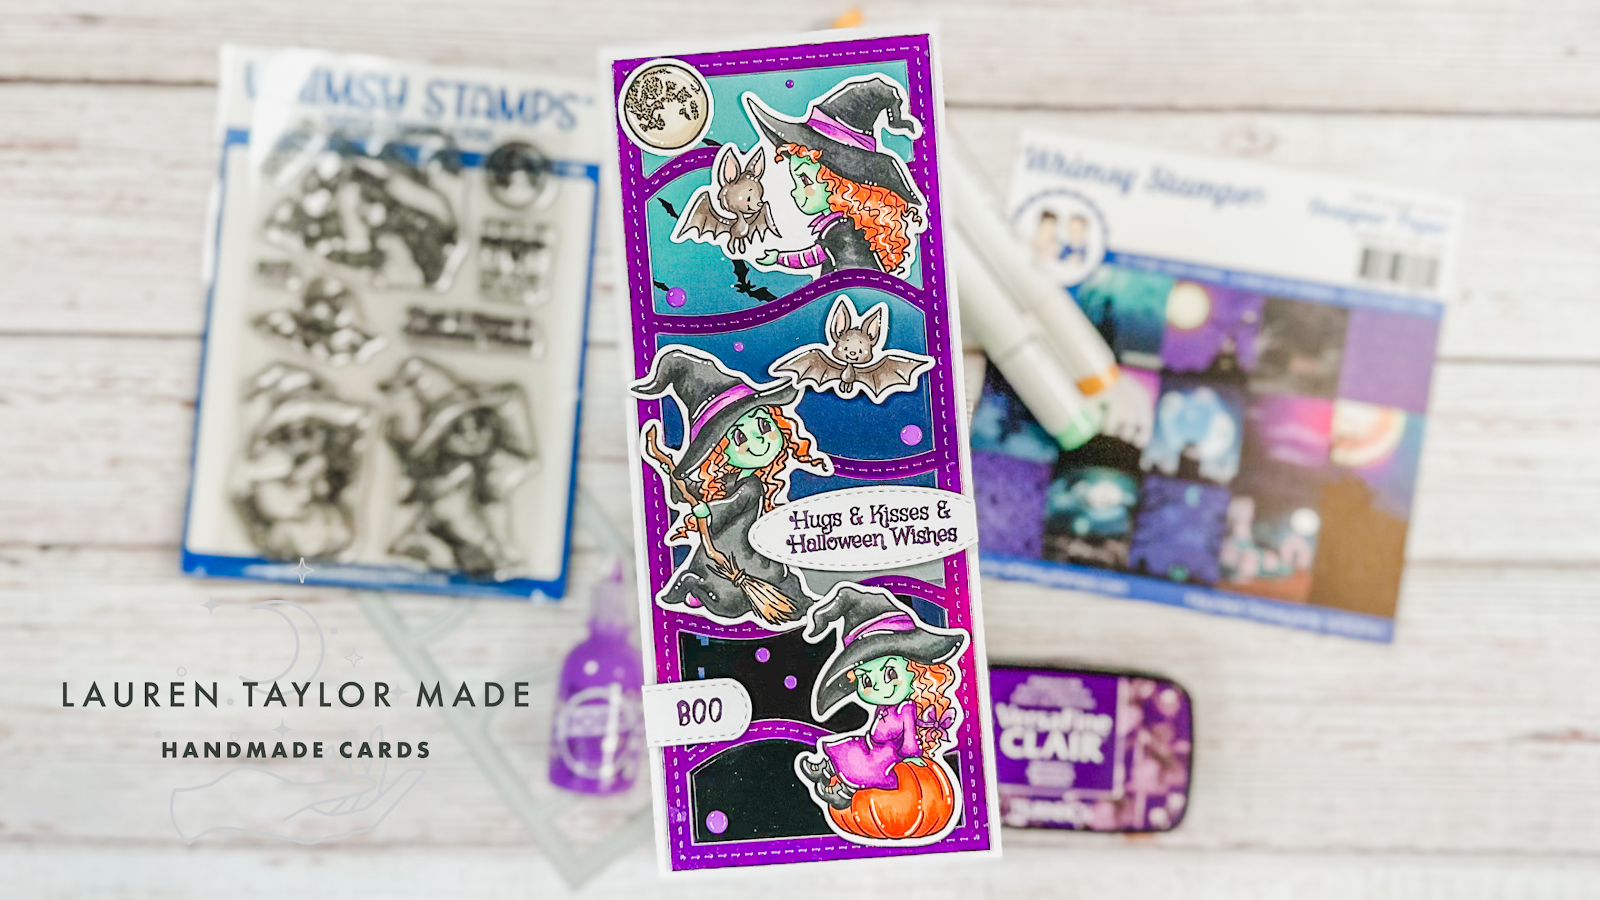
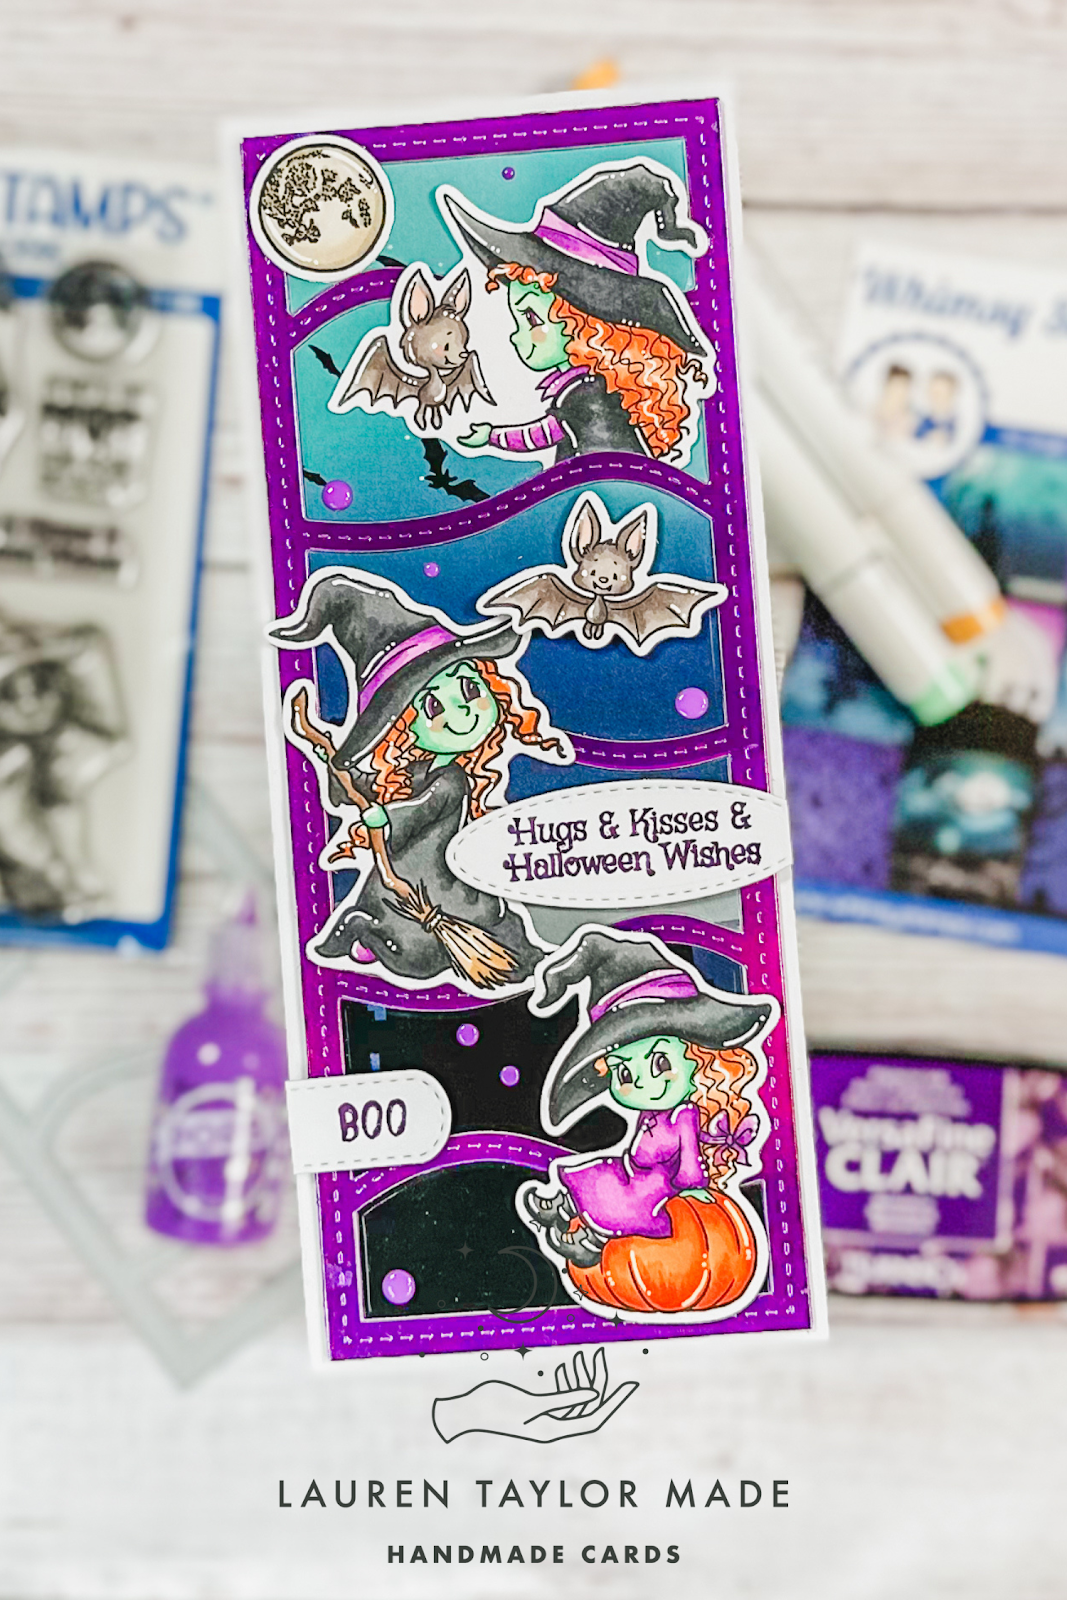
I know I tend to be more of a spooky cute Halloween crafter, but I wanted to share something more on the dark and creepy side today! This project uses some recently released Whimsy Stamps products and a few of my favorite Ranger Ink products for Halloween. I started with trimming my slimline background paper down to 3.25x8.25" as I'll be making a slimline card. I die cut the Nightmare Die out of black cardstock and trimmed it down to 8.25" and making sure you could still see a lot of the background design.
Before gluing it down, I sprayed on some Distress Mica Spray and using my finger, I added Grit Paste around the edges of the Nightmare cut out. While it dried, I also added some Black Texture Paste to the edges of my slimline card base and set that aside to dry, too.
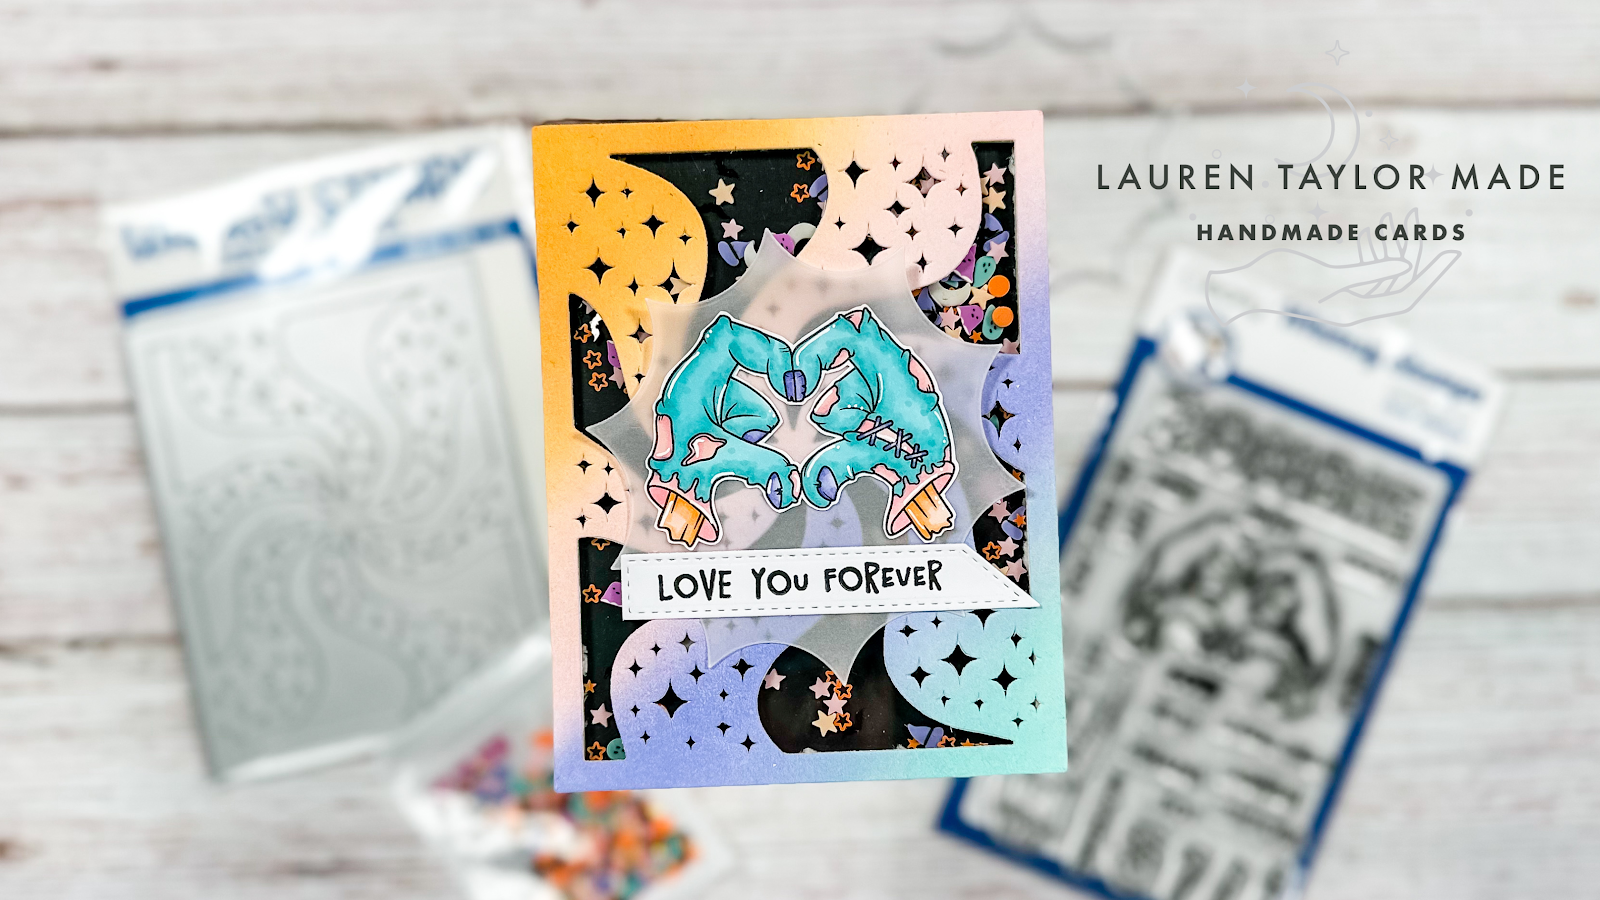
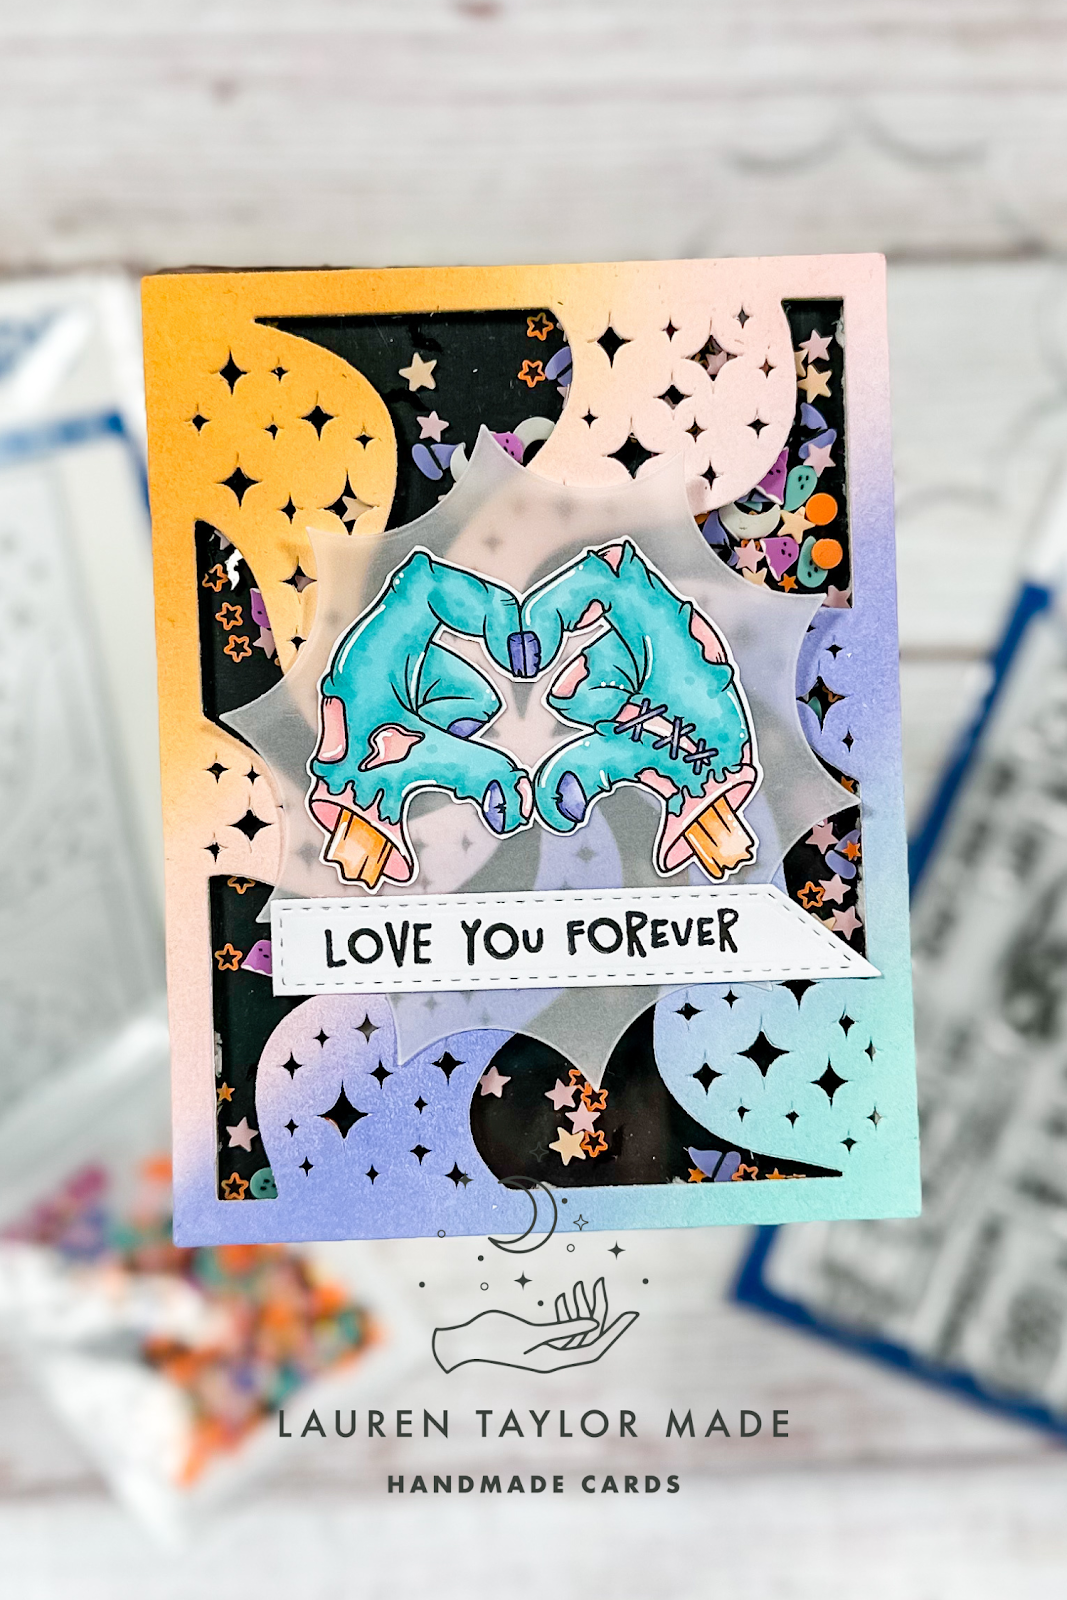
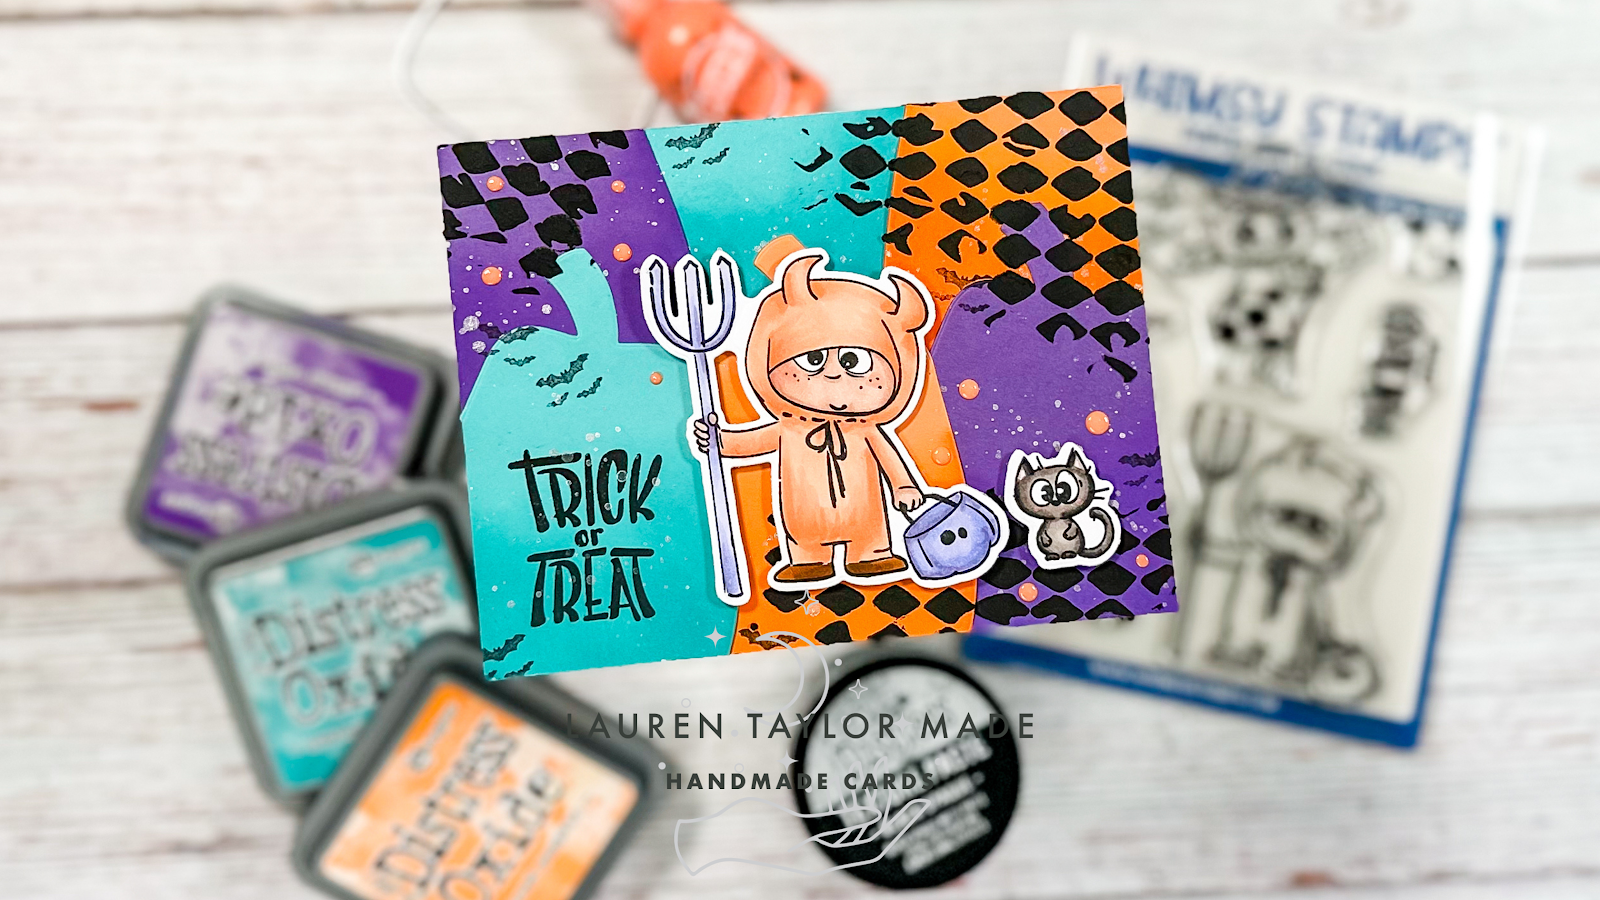
Next I stamped my three pumpkin images from the Grumpin Pumpkin stamp set in black ink and used my Distress Watercolor Pencils to color them in. I used my MISTI to stamp them so I stamped more black ink on top of them when I was done watercoloring to make sure my images had a vibrant outline. I used the coordinating Outline Dies to cut them out as well as my flying witch from Roaming Monsters Die Set out of black cardstock.
Once everything was dry, I layered the background paper to the card base with foam adhesive and glued down the Nightmare cut out with liquid adhesive. I glued my flying with witch with liquid adhesive, too. My pumpkins were adhered with more foam adhesive and then stamped my "Boo!" sentiment with black ink. I loved combining Whimsy with Ranger together for Halloween! They're the perfect duo.
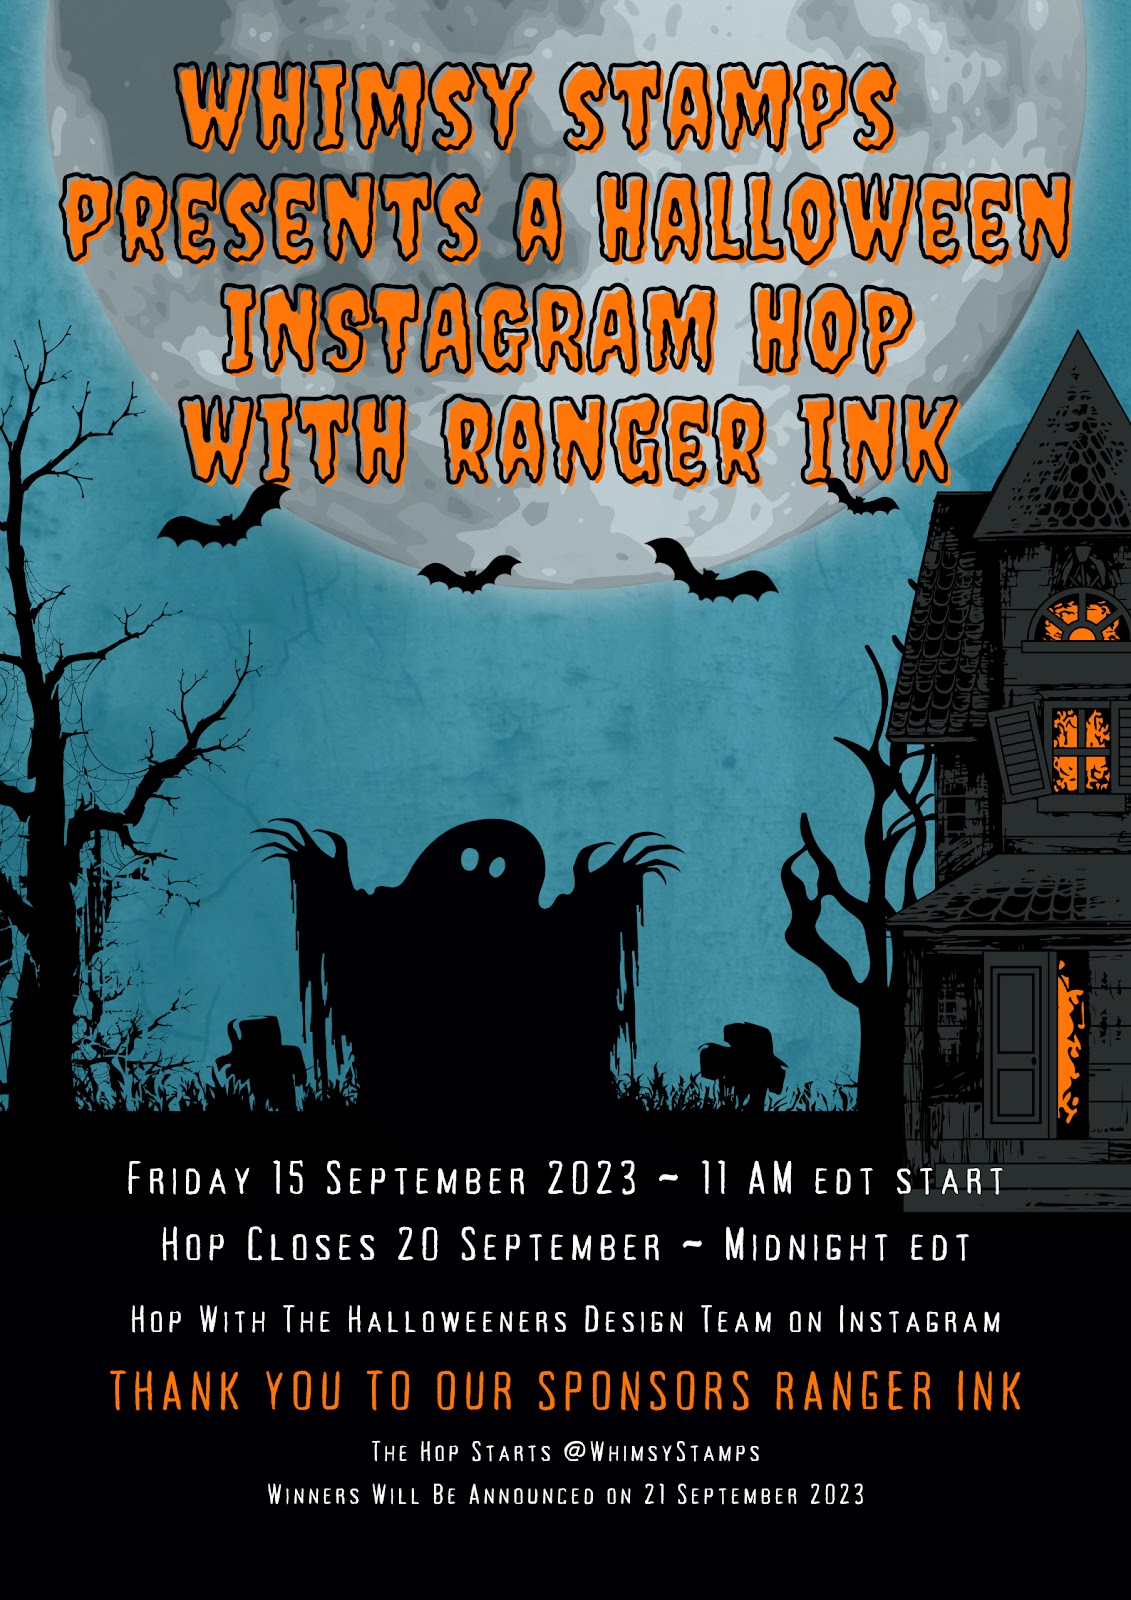
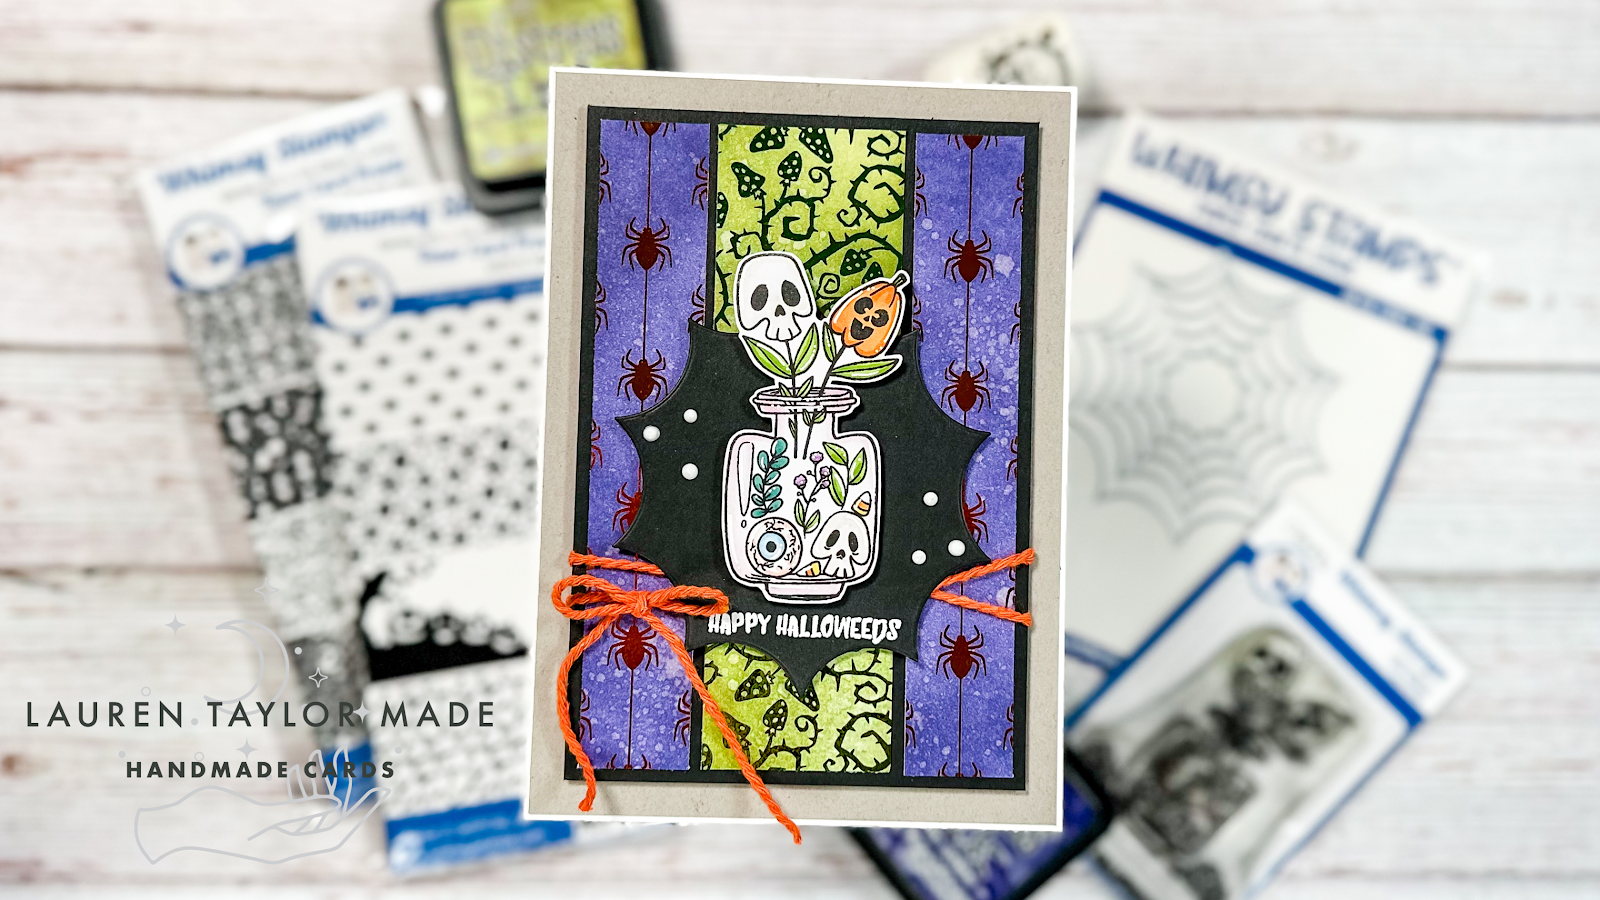
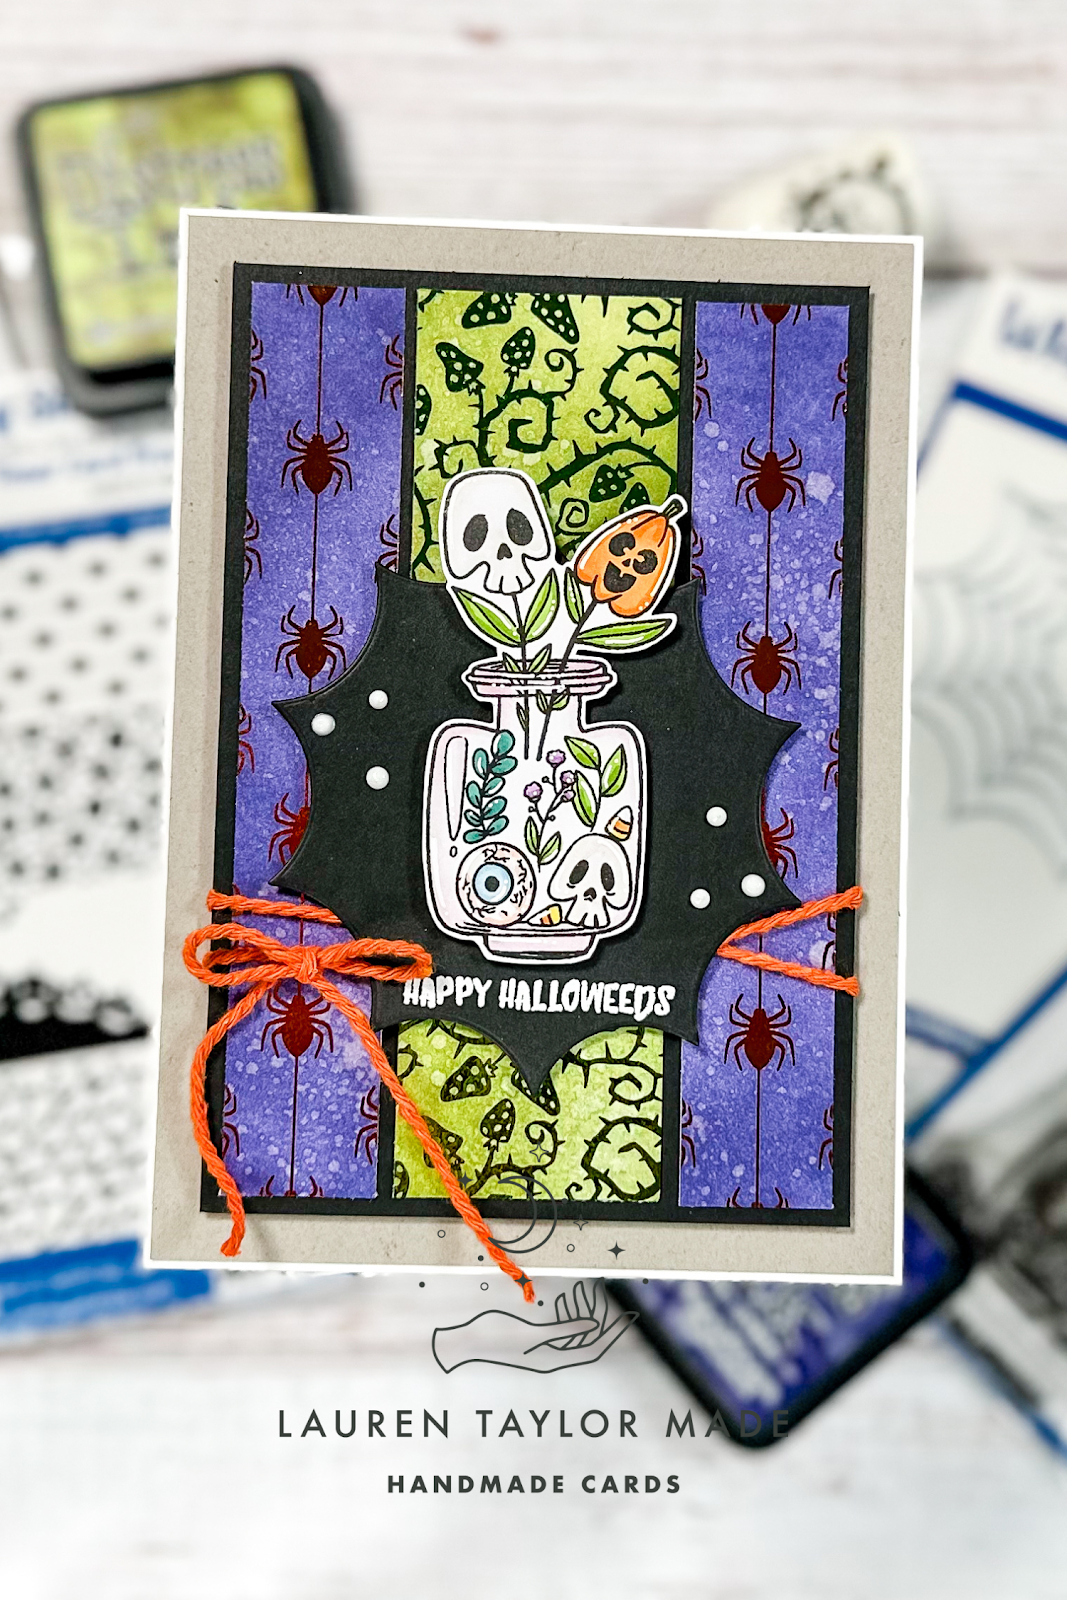
Today is also the Halloweeners Second Instagram Hop! We’re excited to bring the Halloween fun today and equally excited to be sharing the news that the fabulous folks at Ranger Ink are sponsoring this hop! Each designer will be sharing their own special take on Halloween, whether they like the dark and delicious or too cute to spook styles and for this hop we’ll be featuring Ranger Ink products combined with our Whimsy Stamps Range. So prepare for some magic! One randomly chosen commenter will win a $50 Gift Certificate to Ranger Ink and a $50 Gift Certificate to Whimsy Stamps! That’s $100 in prizes for our first lucky winner.
A second randomly chosen commenter will win a $50 Gift Certificate to Whimsy Stamps. Good luck everyone and Happy Halloween Hopping!
PIN THIS
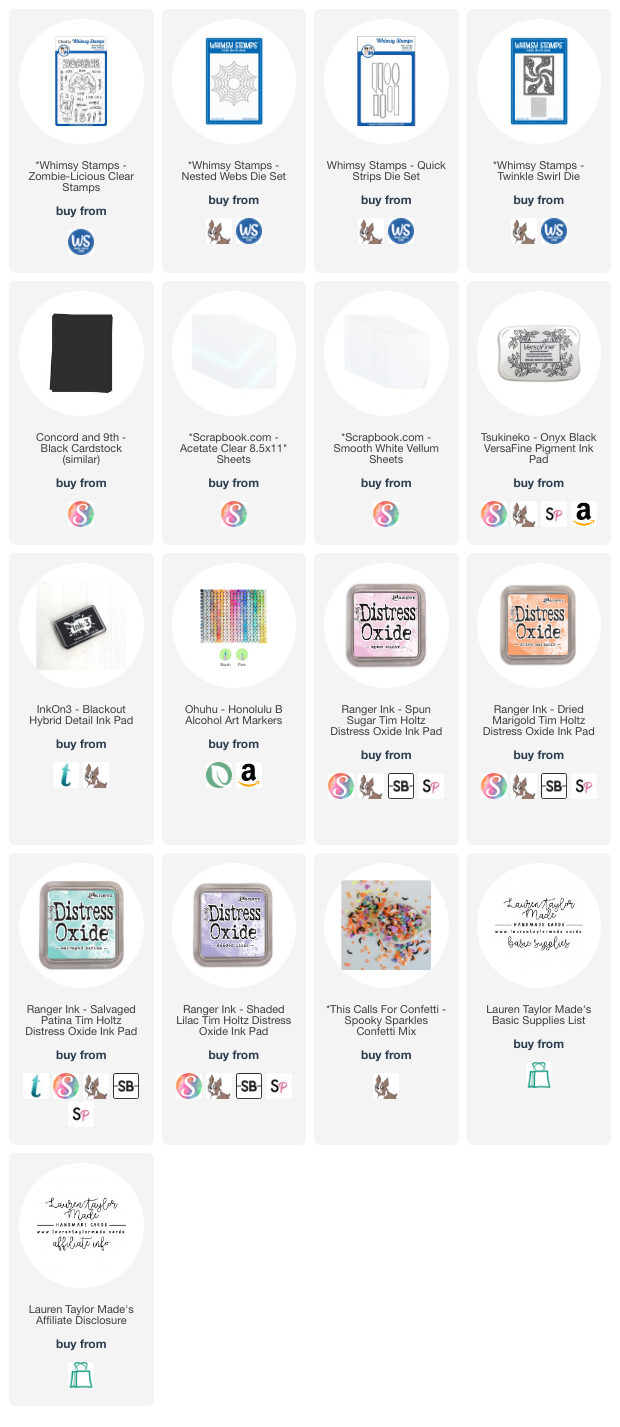
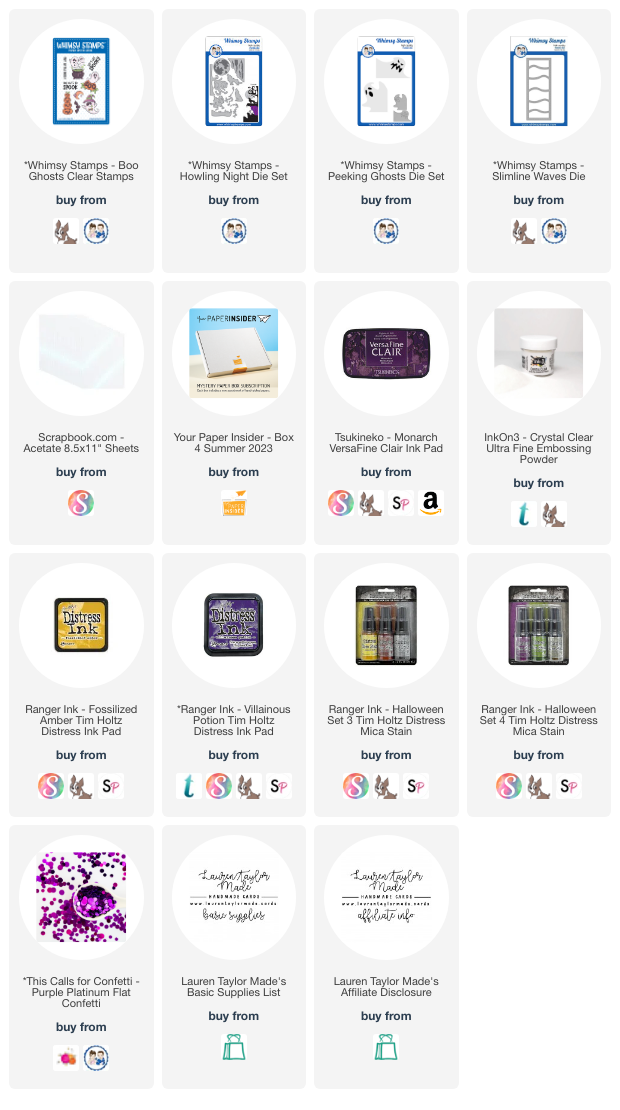
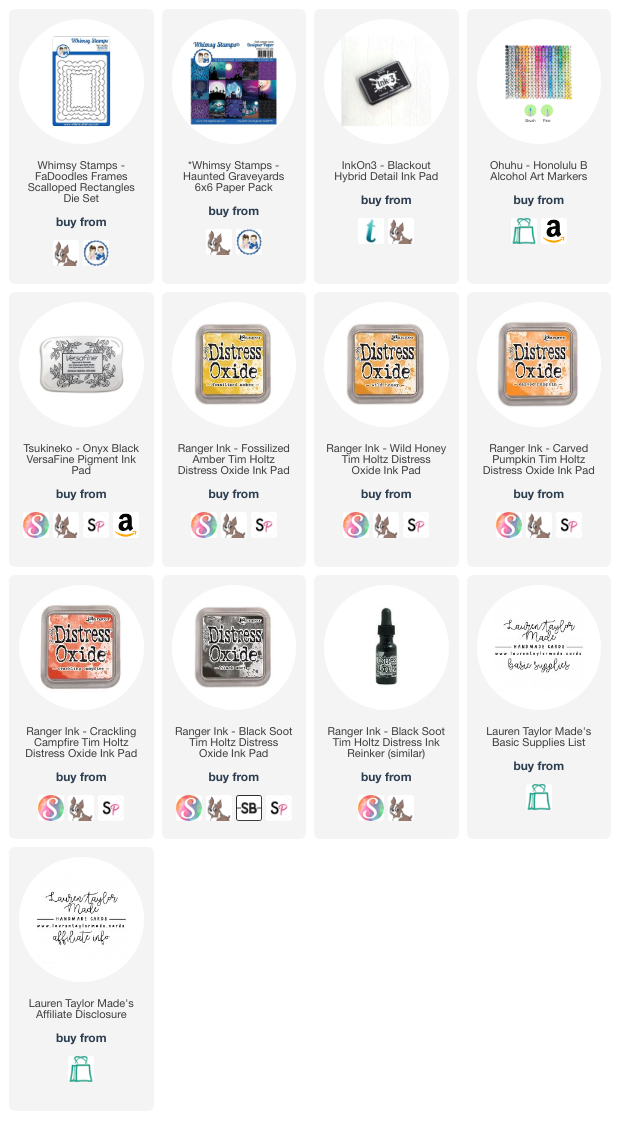
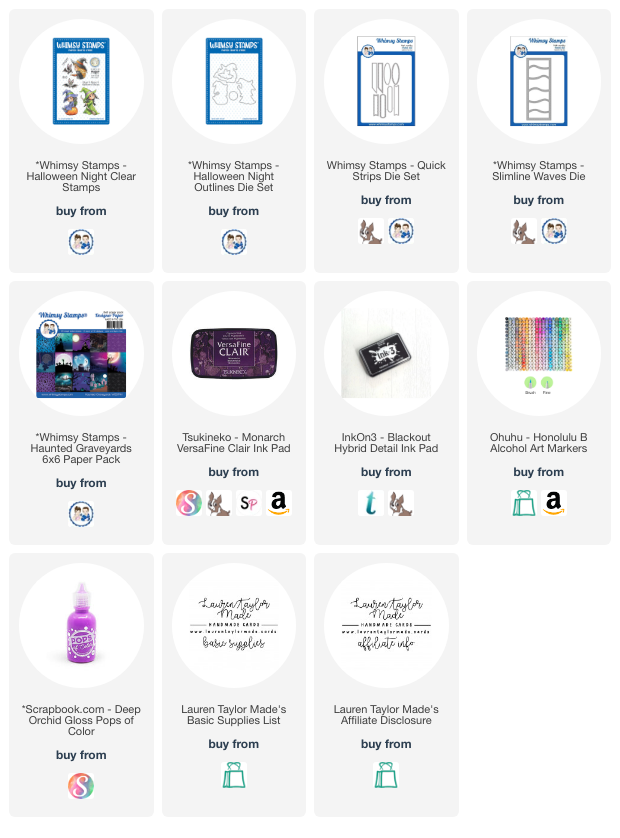
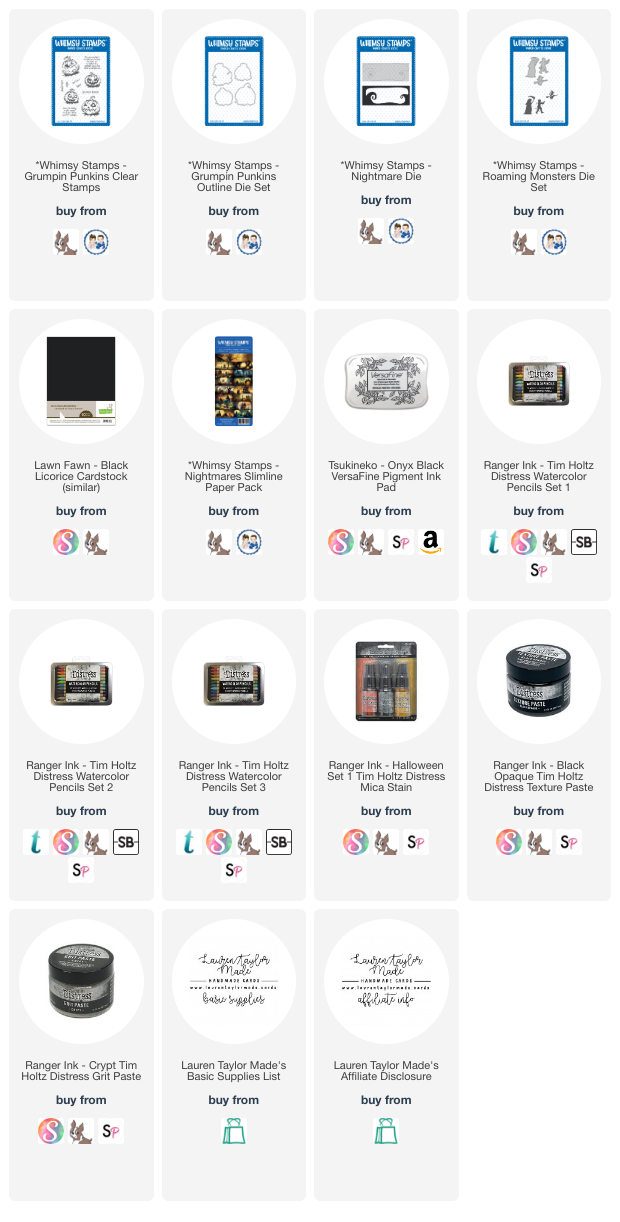
SUPPLY LIST
Read More