In Your Future Light Up Birthday Card with Miss Ink Stamps

Friday, August 15, 2025

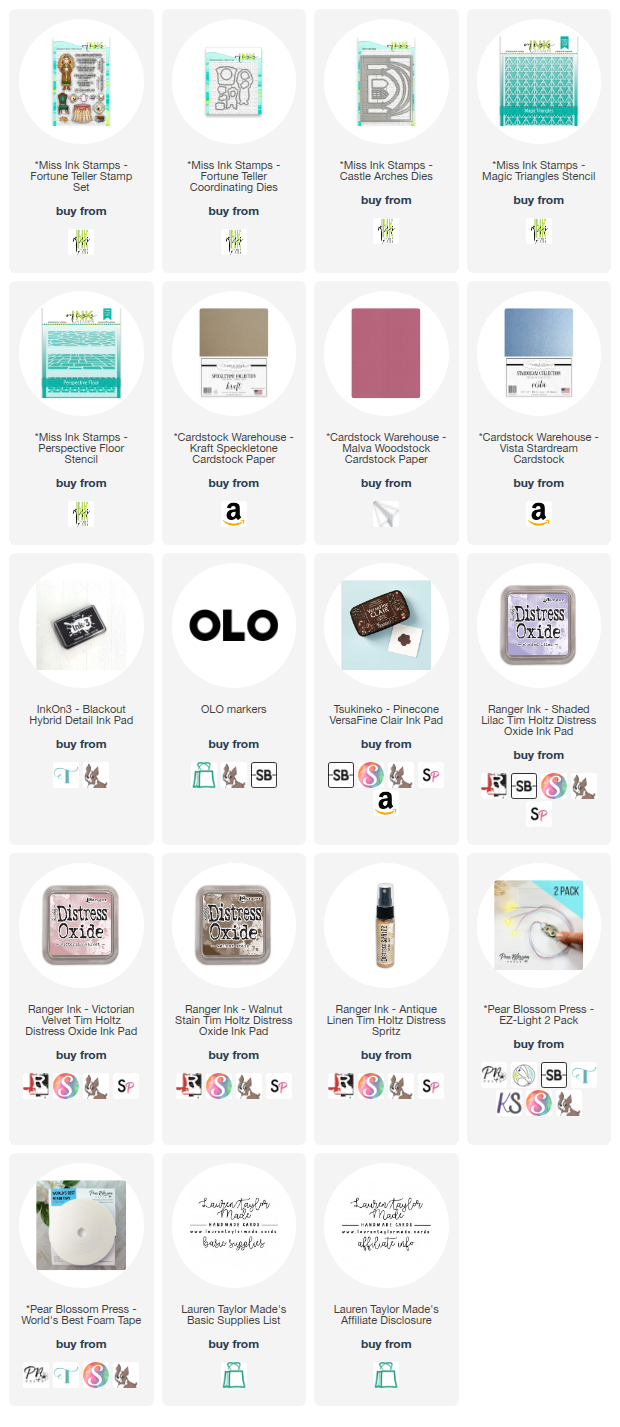
Today’s card feels like it belongs in the corner of a magical castle—stone arches, glowing orbs, and books stacked high for a day of spell practice. I used products from the Miss Ink Stamps Magic Collection (Castle Arches Dies, Magic Triangles and Perspective Floor Stencils, and the Fortune Teller Stamps and Dies) along with an EZ Light from Pear Blossom Press to make the crystal ball and prophecy shine.

I layered ink-blended stenciling, puzzle-pieced arches, and interactive lighting to create a fortune teller’s classroom that’s full of charm (literally). Press the “Push” button, and the crystal ball and prophecy glows like it’s revealing your future—spoiler: it’s full of cake! Watch my video below to see how I brought this magical scene to life.

VIDEO TUTORIAL


PIN THIS
SUPPLY LIST

Read More

Halloween Bucket Shaker Card with Pretty Pink Posh

Monday, August 11, 2025

I'm kicking off Halloween cardmaking season with some seriously spooky fun using Pretty Pink Posh products! I just couldn’t resist the adorable Layered Halloween Wreath Stencils — the little ghosts, pumpkins, and candy are too cute to spook! I started with stencil A, blending purple, green, and yellow inks for a fun, festive base. Then I used stencil B with orange and yellow, and stencil C with orange, black, and green to build up all the adorable Halloween icons. For a little extra magic, I went back to stencil A to add Frostbite Astro Paste on the candy corn and ghost highlights for a shimmery, textured finish. Once everything dried, I trimmed the panel to 4 x 5.25” to create my background.

While that dried, I stamped and heat embossed a “Happy Halloween” sentiment from the Halloween Corners Stamp Set in white and die cut it with the coordinating die. Next, I created a classic jack-o-lantern treat bucket using the Candy Bucket Dies, layering orange and black cardstock. I turned it into a fun shaker using acetate and filled it with Classic Halloween Shaker Beads. I adhered the finished stenciled panel to black A2 cardstock, then to a card base. The shaker bucket went in the center, and I popped the sentiment just above with foam adhesive. I love how this card has a classic Halloween look — with just the right amount of sparkle and fun!

PIN THIS
SUPPLY LIST

Read More

Autumn Stems Hugs Card with Cardstock Warehouse

Friday, August 8, 2025

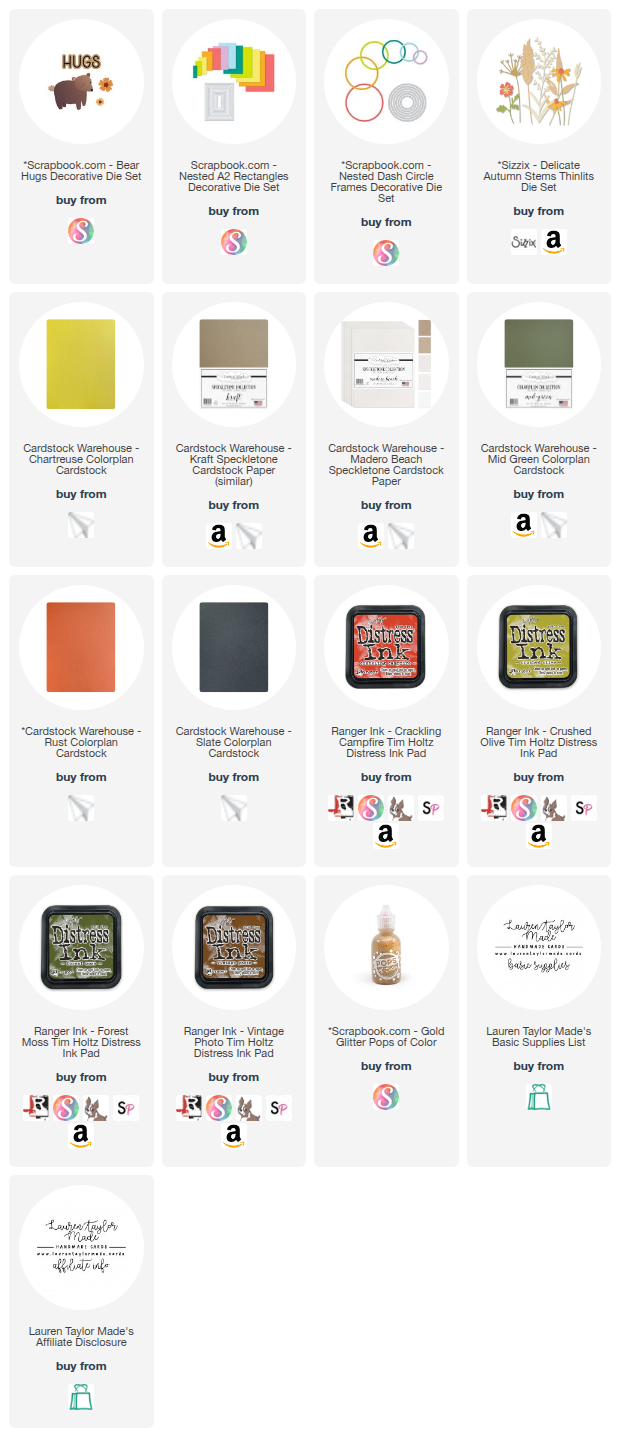
For today’s card, I was inspired by warm, earthy autumn tones and pulled together a mix of Cardstock Warehouse papers to create a layered botanical card. I used Madero Beach Speckletone, Kraft Speckletone, Mid Green Colorplan, Chartreuse Colorplan, Rust Colorplan, and Slate Colorplan cardstock to die cut floral and foliage pieces using the Sizzix Delicate Autumn Stems die set. To add extra detail and shading, I ink-blended Distress Inks onto the die cuts—pairing colors like Crackling Campfire with Rust and Forest Moss with Mid Green.

Once everything was inked and assembled, I moved on to building the base. I trimmed Slate Colorplan to A2 size and glued it onto a card base, then added a Madero Beach panel cut with a rectangle die. A circle frame die cut from Kraft Speckletone gave me an offset anchor to arrange my florals. I finished the card with a layered “hugs” sentiment cut from Slate and Kraft cardstock using the Bear Hugs die set. A few gold glitter Pops of Color were the final touch for a bit of shimmer!

PIN THIS
SUPPLY LIST

Read More

Special Delivery Cards with Scrapbook.com

Thursday, August 7, 2025

Today I’m sharing two handmade baby cards using adorable products from Scrapbook.com, including patterned papers, sentiment stamps, and layered die sets. I created both cards using the same pastel color palette and papers to keep them coordinated, but each one features its own special scene—one with a classic stork and the other with a cheerful hot air balloon. Let’s walk through how I made each card from start to finish.

For the first card, I started with the Darling 6x8 patterned paper in a soft blue and die cut it with the largest Nested A2 Rectangle die, then adhered it to an A2 card base. I layered a plaid gingham paper cut with the largest Nested Stitched Label die. I used the Stork Builder die set and cut all the pieces from white cardstock, then ink-blended them with Simon Hurley inks: Guppy for the beak and legs, Piggyback for the cheek, Shooting Star for the baby bundle, and Minty Fresh for subtle shading. I assembled the stork and added it to the label with foam adhesive. I stamped “Special Delivery” and three hearts from the coordinating stamp set and used the matching dies to cut them out. After popping up the sentiment and stork, I attached the label to the card with foam adhesive and finished with Frozen Flurry glitter embellishments for sparkle.

For the second card, I used the same blue patterned paper, this time die-cut with the second-largest Nested A2 Rectangle to leave a white border. I built the hot air balloon using the gingham pattern for the balloon base, yellow for the middle section, blue for the banner, and light brown for the basket. I also die-cut two small clouds and a seated bear from the Little Lovies die set, using dark and light brown cardstock and patterned paper for the bow. I added eyes to the bear with a black pen and glued it in the balloon’s center. I die cut the “Oh Baby” sentiment using white and yellow cardstock and stamped “Let the Adventure Begin!” from the Special Delivery stamp set in Minty Fresh ink. After gluing down the clouds, I popped up the balloon, bear, and both sentiments with foam adhesive, and finished again with a few Frozen Flurry glitter accents. These cards would make a sweet gift for any baby shower or new parent!

PIN THIS
SUPPLY LIST

Read More

Trio of Hugs Cards with Waffle Flower Crafts

Tuesday, August 5, 2025

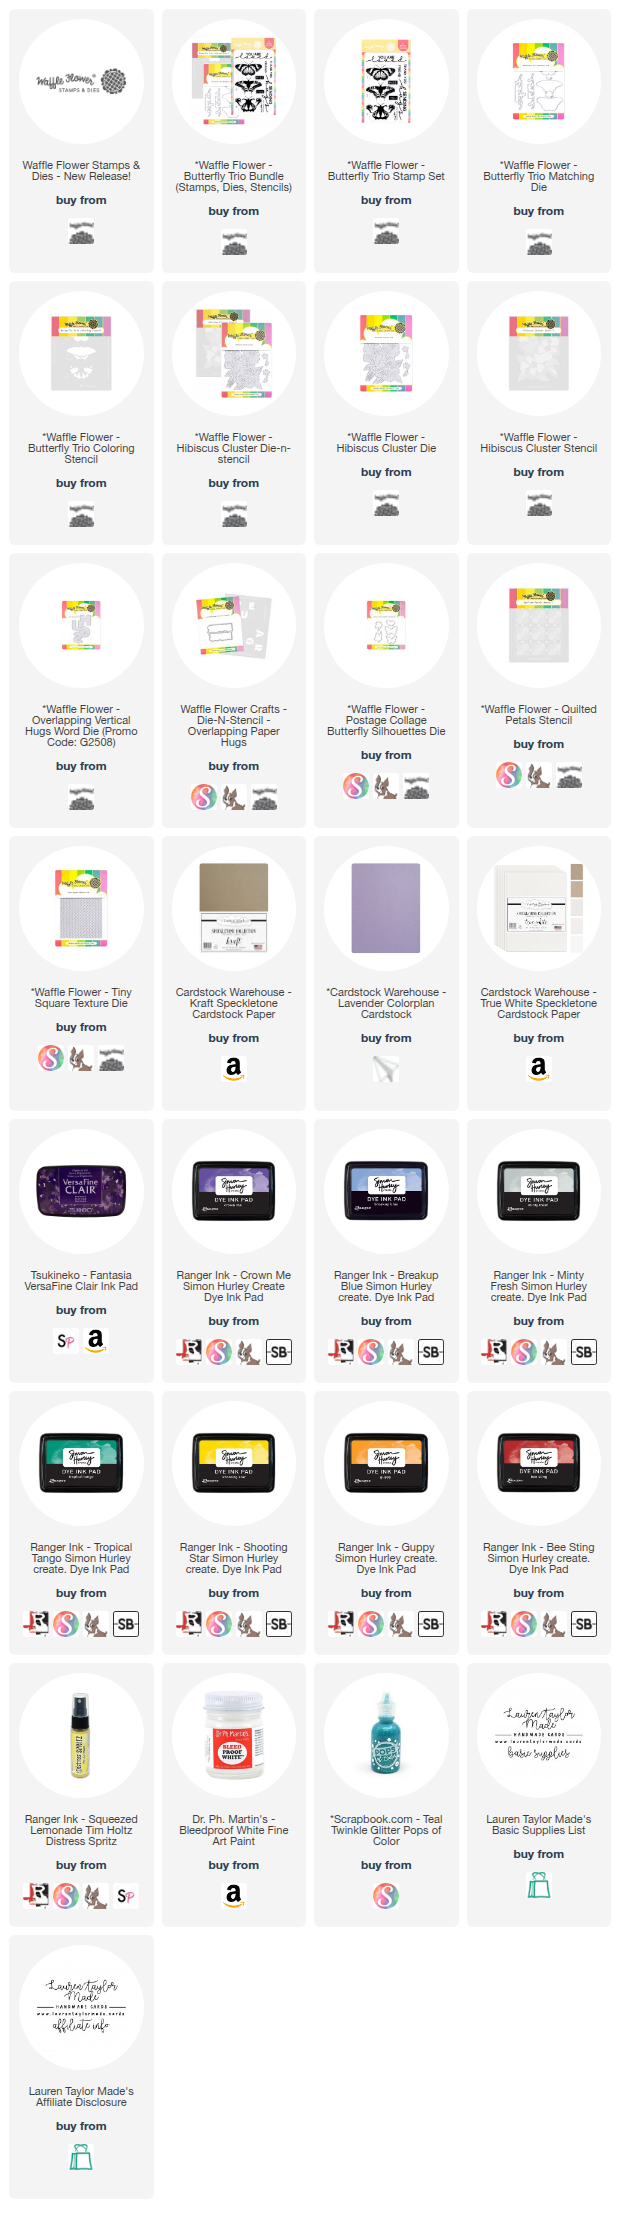
Today I’m sharing three “Hugs” cards using the brand-new Summer Afternoon Release from Waffle Flower Crafts! This collection is packed with beautiful layering stencils, detailed dies, and versatile sentiments perfect for mixing and matching. I focused on creating a cohesive set of cards with the same color palette—purples, teals, and a touch of sunny yellow—while highlighting different techniques on each design.

For my first card, I used the Butterfly Trio bundle to stamp, stencil, and die cut three colorful butterflies, pairing them with the “Sending Hugs” sentiment over a textured, splattered background. My second (and favorite!) card features the Hibiscus Cluster die and stencil, layered in the same dreamy hues and finished with a dimensional “Hugs” sentiment. And for my third card, I reached for some previously released favorites—the Quilted Petals Stencil and Overlapping Paper Hugs bundle—to create a colorful stenciled background with die-cut butterflies fluttering across the panel.

Each card has its own personality, but together they make such a fun trio of designs. Want to see exactly how they came together? Watch the process video below, where I share step-by-step details, tips for layering stencils, and how I add finishing touches like splatter, shadowing, and dimension. Don’t forget to check the description box for a special promotion on the new Overlapping Vertical Hugs die and to enter my Waffle Flower gift card giveaway on Instagram!

VIDEO TUTORIAL


PIN THIS
SUPPLY LIST

Read More

Little Library Bookworm Card with Cardstock Warehouse

Monday, August 4, 2025

For today’s project, I created a whimsical woodland scene card using beautiful Cardstock Warehouse papers and lots of Lawn Fawn supplies. I started by die cutting the largest rectangle from the Lawn Fawn Large Stitched Rectangle Stackables out of Aquamarine Stardream and Mid Green Colorplan cardstock. I used a grass border die (by Popsiclesticks) on the green panel and layered it over the bottom of the Aquamarine panel for a sky-and-grass background. Then I built the Lawn Fawn Tree House from Kraft Speckletone, Mid Green Colorplan, and Slate Colorplan cardstock, adding window backing for an interior. I also die cut a tiny birdhouse and mushrooms using Kraft Speckletone, Hot Pink Colorplan, and Madero Beach Speckletone papers and tucked them into the tree and grass for extra charm.

Next, I stamped images from the Lawn Fawn Little Woodland Library set with Pinecone VersaFine Clair ink onto Madero Beach Speckletone cardstock. I used the coordinating coloring stencils and Lawn Fawn inks to bring the images to life, then cut them with the matching dies and arranged them around the treehouse—featuring adorable critters like a skunk, fox, and bookworm! I added blush details and noses with pink Ohuhu markers and stamped matching sentiments including “Fairy Tales,” “Hello Bookworm,” and “I hope your day is literally the best” to tie it all together. A few stamped grass tufts helped ground the characters, and I added some extra die cuts inside for a finished look. This card is full of dimension, storybook sweetness, and playful personality!

Lawn Fawn Ink Pad Colors: Artichoke, Ballet Slippers, Cilantro, Cranberry, Doe, Fake Tan, Fresh Lavender, Grape Jelly, Guava, Mermaid, Moonstone, No. 2 Pencil, Peachy Keen, Soot, Sugar Cookie, Walnut

PIN THIS
SUPPLY LIST

Read More

You're Reel-ly Cool Under the Sea Card with Simon Hurley create.

Today’s card is bursting with underwater charm, thanks to the playful designs from Simon Hurley create. and Ranger Ink! I used the Saltwater peel-apart background stamp with Clear Skies Starch Ink on glossy aqua cardstock to set the scene. Then, I layered on a bubbly background using the Bubbly stencil with High Tide and Clear Skies Stellar Inks on stark white cardstock for a fun, splashy texture. This layered combo adds depth and whimsy, perfect for a sea-themed card.

I stamped three adorable fish from the Under the Sea stamp set using vibrant dye and Stellar Inks—100% Juice, Later Gator, and Remember Me—and die-cut them to pop up on the card. The sentiment, “You’re reel-ly cool,” is stamped in Crown Me ink and angled for a playful look. A few sparkly turquoise glitter pops were the final touch. Make sure to scroll down and check out the embedded Reels to watch this underwater cutie come together in just a few steps!

VIDEO TUTORIAL


PIN THIS
SUPPLY LIST

Read More